Help Topics
- EaseSuite
- Frequently Asked Questions / Troubleshooting
- General Application Features
- Stock Control and Replenishment
- Accounts Package Integration
- Quick Start Guides
- Mobile Guides
- Word Templates & Print Outs
- Concepts
- Hardware
- Workflow Case Studies
- Terminology
- Submitting Help Requests
- Feature Requests
- Web Shop Preparation Guide
Forms For Mobile
EaseSuite includes a flexible built in form builder for creating forms that can be completed by staff using the Timesheet Mobile App, with completed form submissions going against jobs.
We also allow PDF form files to be completed on the mobile app, but these tend to be a single file per job and follow the files flow (attach in admin first), whereas the form builder forms can be initiated from the app individually by users (forthcoming) or created by asset service schedules.
We derive forms from a template created in Microsoft Word that contains placeholders indicating where data should go. We call out these placeholders in the application to define more characteristics around them.
A simple form template might look like the following:
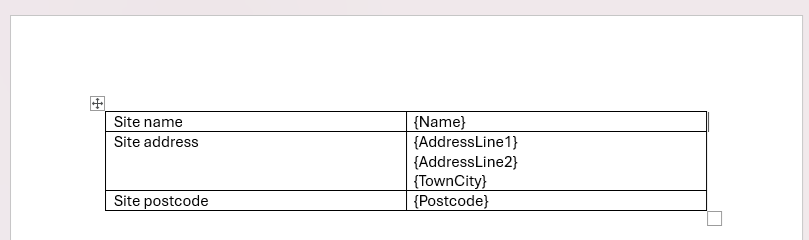
This is a simple table with captions on the left and placeholders on the right that have square curly brackets where the eventual data entered will go, but the layout is flexible with or without tables. This template can be designed and headed up to make it a more formal document for the end result.
The placeholder names can be labelled anything you want (no spaces though). Once you have finished designing your document with placeholders, it is time to add it into the system.
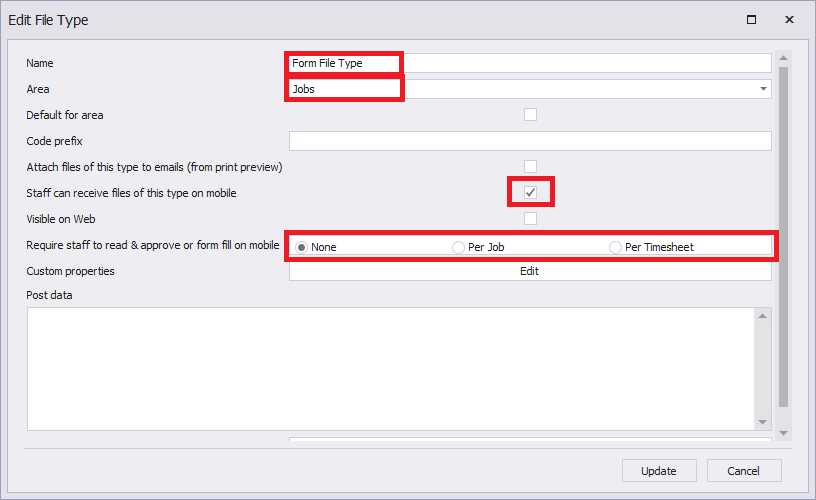
First we need a suitable File Type (Settings > General > File Types). Click the small add button at the bottom of the list then click the new record row. Per highlighted below, give it a name, area (Jobs), receive on mobile, and note the option to require staff to read & approve.
Once complete, Save.
Now go to Settings > Templates. As well as contain print templates, this is where we define forms and add more attributes onto the fields.
Click the add button (+) next to "Record 1 of X".
In properties enter the following, choose the document you created, Save (top left), then tick Form (mobile app entry) and Edit next to Form.
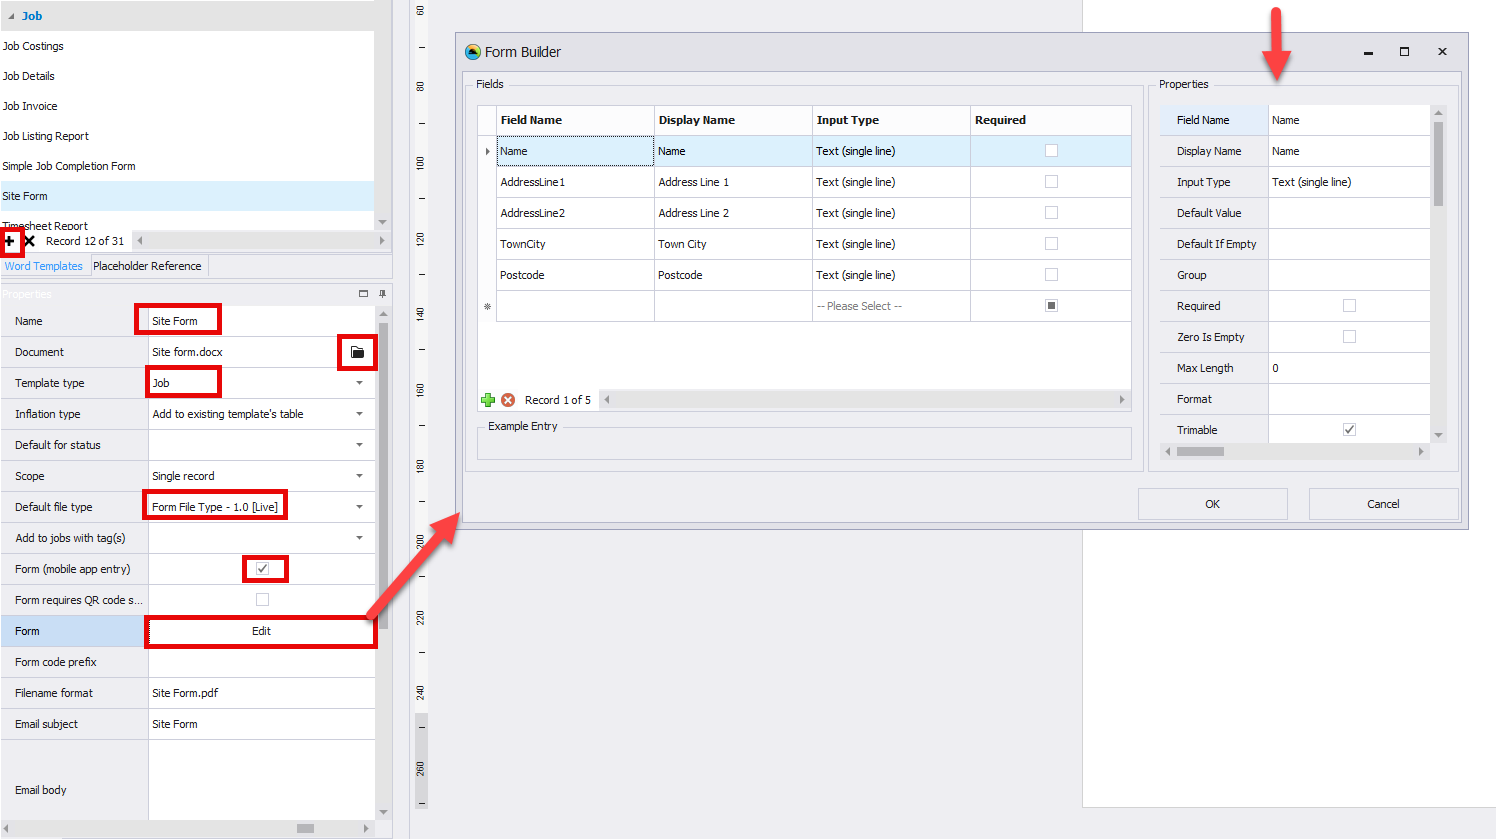
Note properties on the left for each field allows to define what it is (Input Type), if mandatory (Required), along with some other settings.
Once complete OK and save.