Help Topics
- EaseSuite
- Frequently Asked Questions / Troubleshooting
- General Application Features
- Stock Control and Replenishment
- Accounts Package Integration
- Quick Start Guides
- Mobile Guides
- Word Templates & Print Outs
- Concepts
- Hardware
- Workflow Case Studies
- Terminology
- Submitting Help Requests
- Feature Requests
- Web Shop Preparation Guide
General Application Features & Concepts
1. Main menu

- Tiles - Each area of the application has its own colour as indicated in the screenshot (1). These colours are used throughout the application. Clicking one of these tiles will open an Area.
- Tiles can be positioned horizontally along the top or vertically down the side. Drag the Areas heading just above dashboard to reposition.
- Tiles can have sub menus indicated by a down arrow (e.g. Stock) on the right and these usually contain other Area related to the area such as Customer under Sales and Suppliers under Purchasing.
- Area Tabs - Select a Tile to open an Area Tab (2). You can open up more than one instance of an Area if Settings > General > My Settings > Allow multiple area tabs to open is ticked. You can have several Areas open at once, much like a web browser.
- Area Tabs can be clicked and dragged to reposition them or move them outside of the main window. This away you can use multiple monitors and have a tab on another screen. This is useful for comparing two lists for example.
- Top Menu - The top menu (3) allows you to access other areas and functions.
- User "Admin - Main Store (switch)" - Shows your username and the current building you are logged into. Select this to switch to another user or building.
- Recent Activity - Opens the recent activity (or history) area, showing all recent updates and by user.
- Files - An area to add files and scans and associate them with one or more area items.
- Hide Sensitive - Allows you to quickly hide sensitive information such as cost if someone is looking over your screen. Select F10 to do the same. This is a toggle button and pressing again will switch back to showing sensitive.
- Settings - Opens the Settings menu for various settings of the application.
- Help - Opens this help.
- Notification (bell icon) - Lists notifications. Shows a number next to it if notifications are present.
- Chat - Opens the chat window.
- Cloud Synchronise - Forces the application to synchronise with the mobile app server and download/transmit any new information.
- Close button - Closes the application.
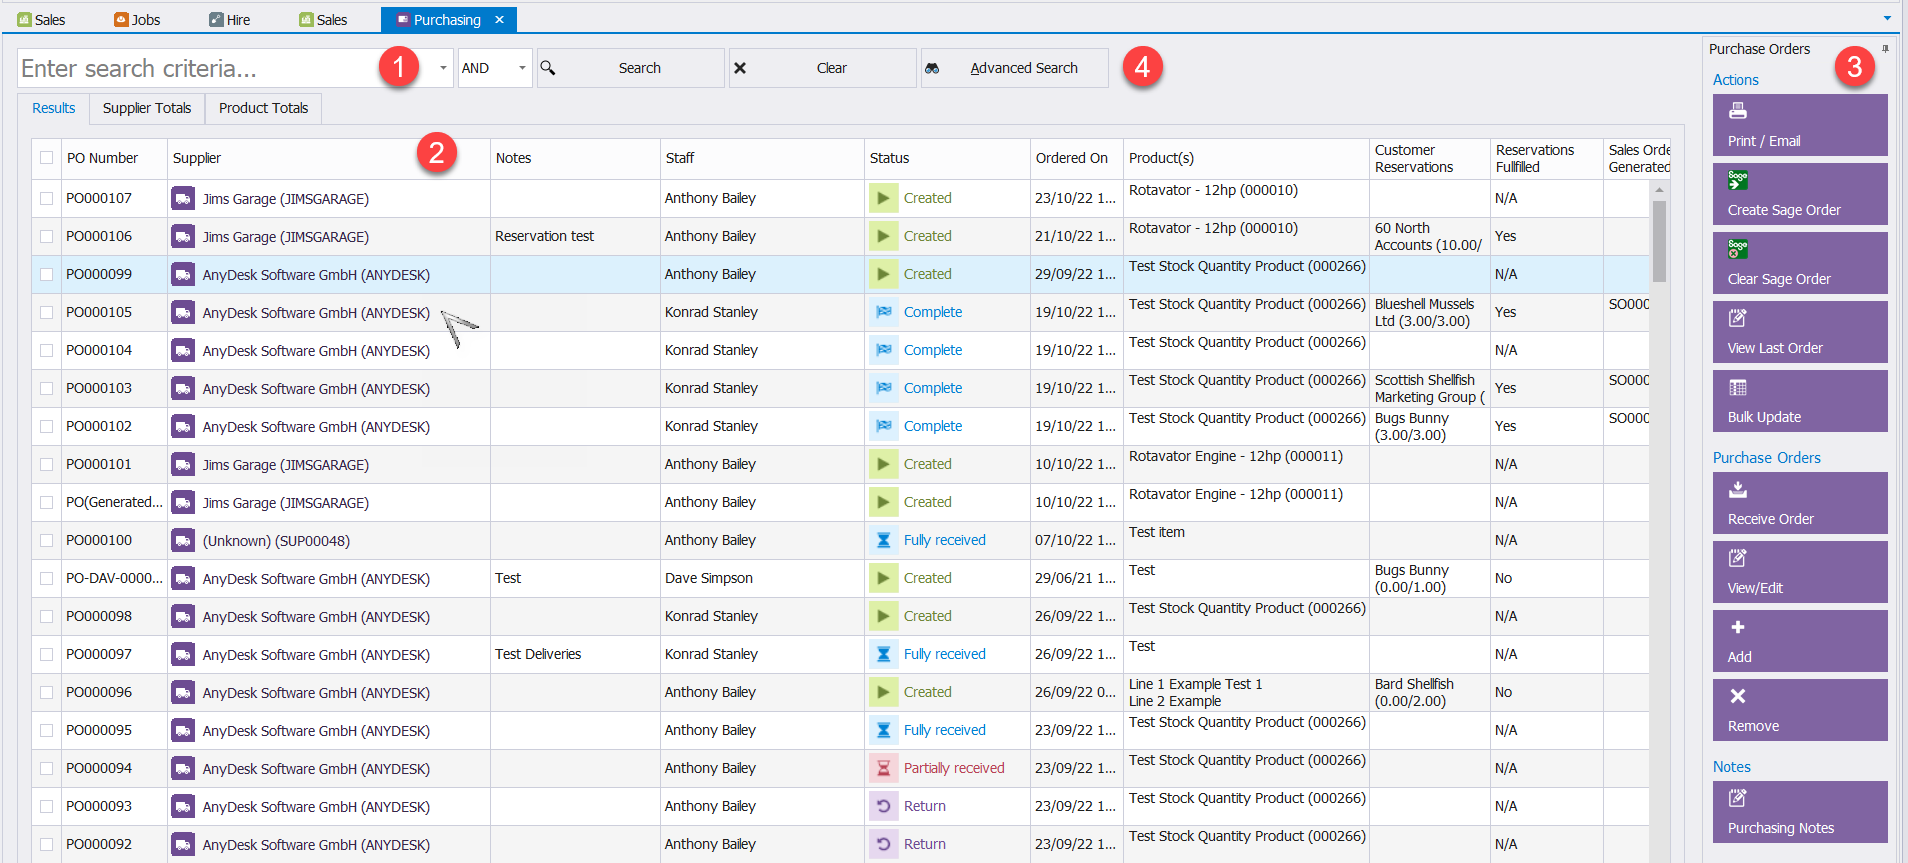
2. Searches
Each Area Tab you open has a simple search bar (1), a listing underneath (2) and usually some buttons that relate to the area on the right (3). Select Advanced Search (4) for a more detailed search.
2.1 Simple Search
Enter search criteria is where you can enter text to search for items. In the above case it is searching in the Purchasing Area.
This Simple Search is present in all areas (other than Timesheets). Simply type the desired search and press enter, which is the same as clicking the adjacent Search button.
This is the simplest way to search and lets you find most things quickly without much involvement. It will search through a variety of fields in the item to try to find a match.
To clear your search, select Clear and full listings will be shown again and the search text emptied.
The AND next to the search box indicates the type of search performed when there are multiple search terms separated with commas. Select it to choose between AND & OR mode.
Eg. if you entered the text: rope,hose in AND mode, it will look for records that contain both these words somewhere in the record. If in OR mode, it will look to match at least one, which will generally return more records as it's a broader search (rope or hose).
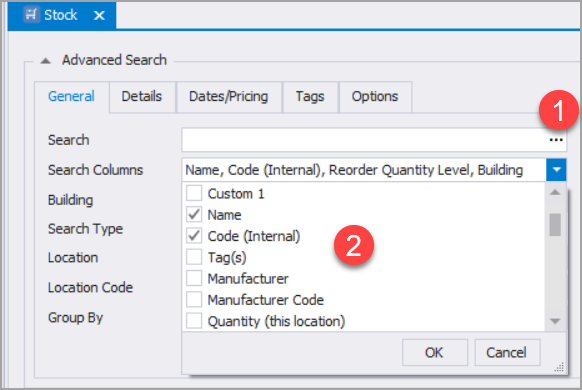
If you feel this simple search is targeting too many fields, then in Advanced Search pressing "..." next to the search box there shows a dropdown below it that lets you pick only the fields you want to search to reduce scope. Once chosen, it will stick and apply to the simple search and this search box after that (stored per user, different users can have different column settings here).
2.2 Advanced Search
When you need to search on exact specifics, and more than one, this lets you do a more detailed search, and is accessed by selecting Advanced Search.

Enter or select search terms and select Search to run the search.
This is known as a combination search.The more information you specify, the more you are narrowing down results. It is effectively an AND search once you select or type information into a box. As with simple search, Clear will clear the search.
By default, when a search box is empty, it displays -- All --, meaning it will match all unless you enter or select a value.
You can go through the tabs selecting as much information as you require.
For dates, there are many different date options selectable and a quick range finder available that appears when you select Ellipse (…)

The two date boxes cover a from and to range (inclusive) and have a time element, which may defaults to midnight. Note these behaviours:
- If both date boxes have dates, it becomes a between search.
- If only the first date box has a date but the second box is empty, it will perform a greater than or equal to date search on this date.
- If the second date box has a date but the first box is empty, it will perform a less than or equal to date search on this date. The Older than/Newer than range selector dates will also give you an example of how this works.
2.3 Saved Searches
In Advanced Search in all Areas you'll notice this box top right in the first tab.

After you've performed a search using the Advanced Search and specified criteria in one or more boxes, you can save it for easy recall as a Saved Search so you don't need to go through adding criteria again. Select + to open the Save Current Search form. Name your search, select other options as required and select OK to save and close. The dropdown button will list all saved searches for recall. The - (minus) button will remove the currently selected saved search. Saved searches can also be managed in Settings > General > Saved Searches.
Saved searches are used for quickly recalling lists and often form part of staff workflows to summon common lists. E.g. List of orders at certain statuses such as overdue, or lists of orders that filter to a specific staff member's workload for progression, i.e. select a list, progress the orders, and when empty another list can be recalled.
It is worth noting that in the date range selector, if you pick a range, this range is stored relatively in the savde search and updated next time you recall the saved search. So if you pick Last week it will pick last week's date based on today, but if you recall the saved search a week later then that date will be updated to be relative to what now is last week based on what now is today. This makes the search dynamic. If you just entered dates or picked dates using the dropdown calendar, they would be stored as static and not change.
At its simplest, you can click +, type a name, then OK to save the saved search. There are however some more features, including the ability to add popup notifications.
2.4 Customising Listings
A Listing can have columns sorted, rearranged, resized and optionally hidden. These customisations are applied per user. Some staff members may only require certain columns, or some columns may be more prominent than others for certain staff, and so this customisation exists to allow such variations.
- To sort a column, select its heading and it will sort. To sort by multiple columns, Shift+Click them, they will then sort by column A, then B, then C etc.
- To rearrange a column, simply click and hold while dragging its heading left or right to move it.
- To resize a column, move your mouse cursor over the line between the column headings and the cursor will change to indicate it can be moved/resized. Click and drag to resize.
At the bottom of each search grid there is some information and a number of buttons:

- Add - Open a new form for adding a new record, e.g. a new Sales Order if in the Sales Area.
- Edit - Open the currently focused record for viewing or amending.
- Delete - Delete the currently focused record, or if multiple records are selected it will delete the selection after confirming.
- Resize columns to best fit - Resizes all the columns based on the data currently showing.
- Show/hide columns - Opens the Show/Hide Columns window. Drag columns into the window to hide them, or drag them out and back onto the column area to reshow them. In the above example, Payment Status is a hidden column available to place back into the columns area.
- Group by a column - Lists the table's columns and allows you group by a column. When columns have the same data, you can choose to group them and it will amalgamate records underneath (the column becomes a group heading).
- Reset columns to default - Reverts any column customisations you've made and resets them back to default.
- Print - Prinst the currently shown result list and can choose what columns you wish to print. On the Print Preview you can also export to Excel or PDF, or email the list.
- Import/Export - Export rows to Excel, amended, then re-import.
- Record count - Displays the selected record of the total. As you search, the total number of records will reduce when filtered.
Other features:
- Preview Cell - Right Click a cell and you can choose to make a column the Preview Cell. This is useful for comments or longer descriptions and places the field underneath the row in a bigger area. This lets you scroll the list to read this longer text without having to open record forms.
Note after doing customisation you can apply changes to other user accounts too. Settings > Users then choose the source user in the list then click Copy User Settings. You can then select other users to copy the settings to. Described above are the column settings, but form settings (their size/position/screen) can also be copied too.
2.5 Adding or editing records
There is usually two ways to add or edit a record. In a search tab, at the bottom of the grid is "+" Add button and Edit button (see previous section).
On the right hand menu (3 in the Searches screenshot) there are usually also 3 buttons that do the same:
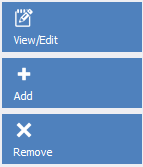
Note you often don't need to Remove records and instead can just deactivate them by clicking an Active tick box whilst editing.
2.6 Bulk Actions
On the right hand menu there is usually a Bulk Actions item, which can apply a variety of updates to any selected records as a quick means of updating them.

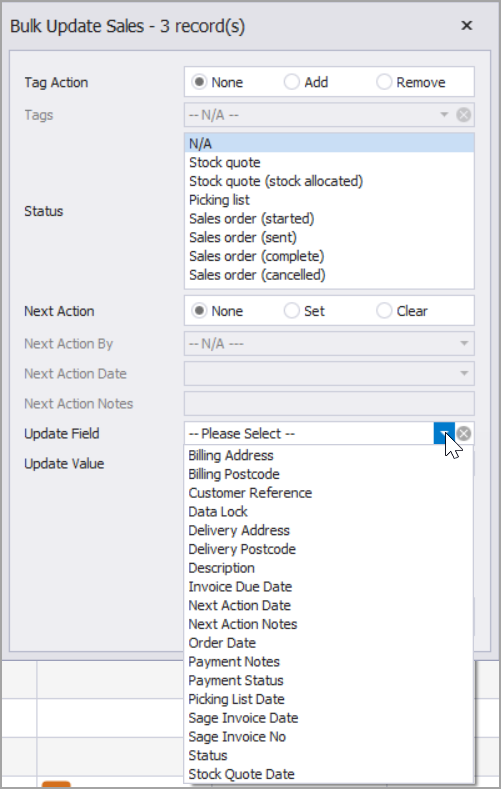
We generally provide a means of adding/removing Tags (categorisation - see tags below), adjusting next action fields, or choosing from a list of fields to update where you can select one, type or select a value, then Apply to apply the changes to the selected records.
2.7 Notes
On the right hand side every area has a notes button.
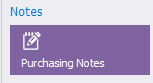
This lets you add some generic notes to the area. You might document TODOs or other general notes here.
2.8 Printing and Emailing
3. Forms
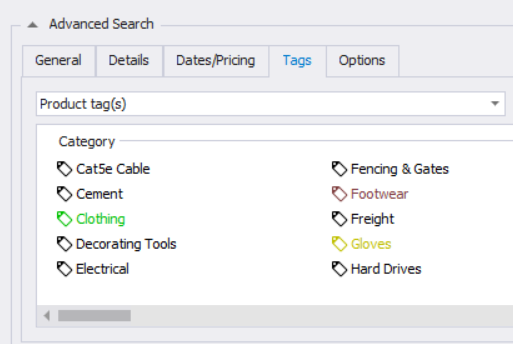
4. Tags
Just about every area's records (purchase, sale, job etc.) can have one or more Tags.
Tags are simply a means of categorising items. You can define as many tags as you need in Settings > Tags.
You can give items a permanent tag or a temporary one to act as a flag. E.g. to pull onto a Saved Search.
Advanced searches have a tab that allows you to quickly filter lists by clicking on a tag. You can CTRL+Click tags to select multiple tags. This will look for items that have both the tags selected (items can have as many tags as you want for multi-level categorisation).
More details on Tags can be found here.