Help Topics
- EaseSuite
- Frequently Asked Questions / Troubleshooting
- General Application Features
- Stock Control and Replenishment
- Accounts Package Integration
- Quick Start Guides
- Mobile Guides
- Word Templates & Print Outs
- Concepts
- Hardware
- Workflow Case Studies
- Terminology
- Submitting Help Requests
- Feature Requests
- Web Shop Preparation Guide
Label Printers QL-700, Setup & Troubleshooting
This guide applies to the QL-700, but apply similar to say QL-570 by Googling drivers.
Setup
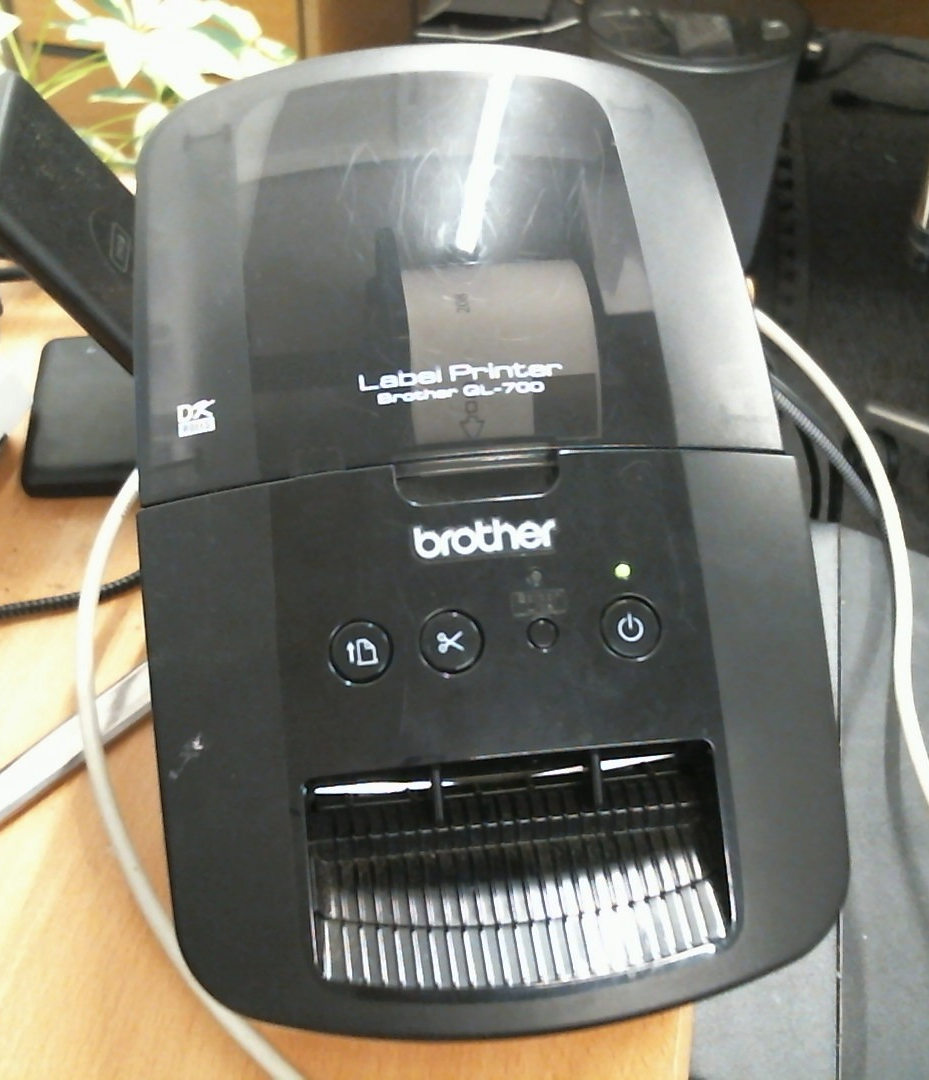
- First ensure the printer is NOT plugged into the computer, doing this too early can affect installation and cause it not to show later.
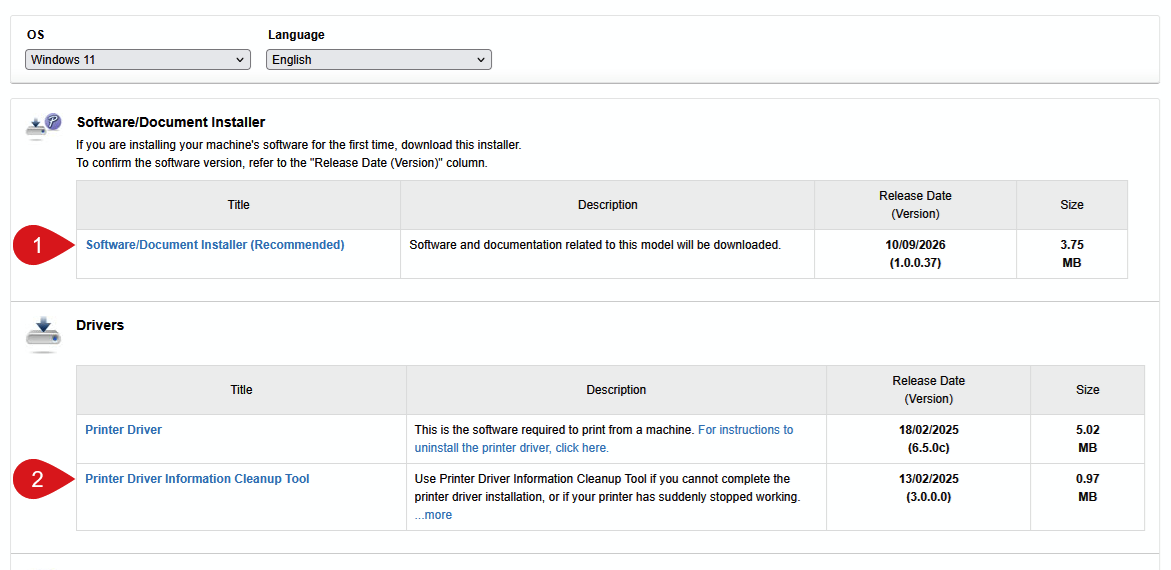
- Cleanup tool - if you have previously had issues and the printer has been installed, it is recommended going to https://www.brother.co.uk/support/ql700/downloads and downloading and running the 2nd download shown below first (Printer Driver Information Cleanup Tool). This will clear out the driver and the computer will reboot. These cleanup tools exist for earlier models too.
- This is slightly awkward to run. After download go to download button top right (Edge) to see Downloads then Open Container Folder next to download as shown.
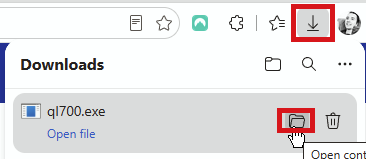
- Next double click ql700.exe and press Unzip, OK, then Close.
- In this same downloads folder, there will now be a ql700 folder (may need to scroll up or down), go into it and double click ptsweep.exe
- Installer - next download and install the first download (shown below) from the same page https://www.brother.co.uk/support/ql700/downloads and run the installer. If the recommended installer is not available, choose Print Driver instead (recommended is best if available because it has a detection routine).
- Now when requested plug in the printer to mains and USB to computer. Brother doesn't recommend going through a USB hub, you may try after setup if you wish at your own risk.
- Ensure it is powered on and only one green LED is lit (far right above power switch). If the one second from the right is showing, press the smaller button under it to take the light off. With this light on, the printer will not be found. See screenshot of printer above.
- Click Auto Select, this should find the printer if the previous steps have been followed.
- There is a list of software, but all that is required to be ticked in the Printer Driver.
- OK your way through the installation. Also note it may launch other installers that aren't immediately obvious but they have an icon on the taskbar to click to continue. If you are seeing the green progress bar run a long time, this is likely the issue.
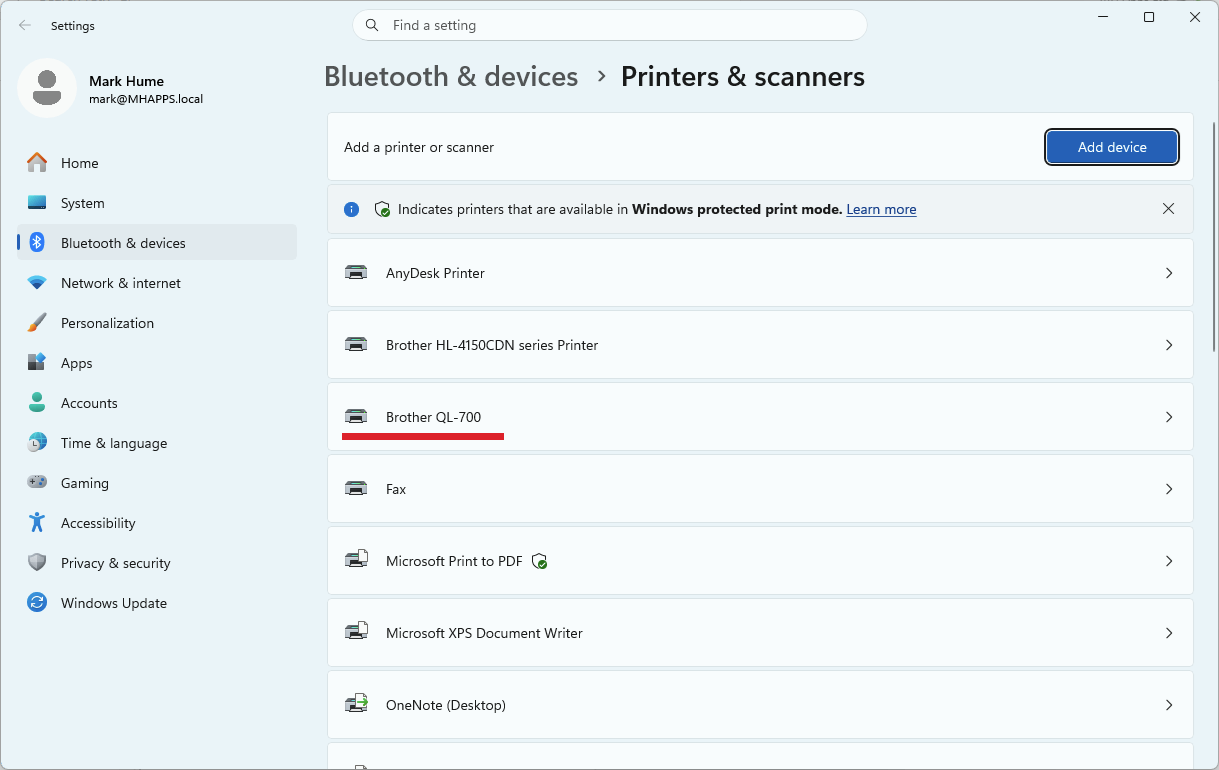
- Once everything is installed, open Start menu and type Printers then choose Printers & scanners (Windows 11). This printer should now list per below.
Configuring for labels
In this example, there are two label widths we want to cater for - 38mm and 62mm (continuous).
Note if labels are die-cut (gaps), they need an exact dimension like 38mm x 90mm or 62mm x 100mm for example. If continuous (and guillotined), they only require the width e.g. 38mm or 62mm.
We want to create two printers in Windows for them that point to the same label printer but with different settings and that are consistently named so all computers can access them on their local label printer (regardless of model variation).
Above in Printers & scanners, click Brother QL-700, then Print Properties.
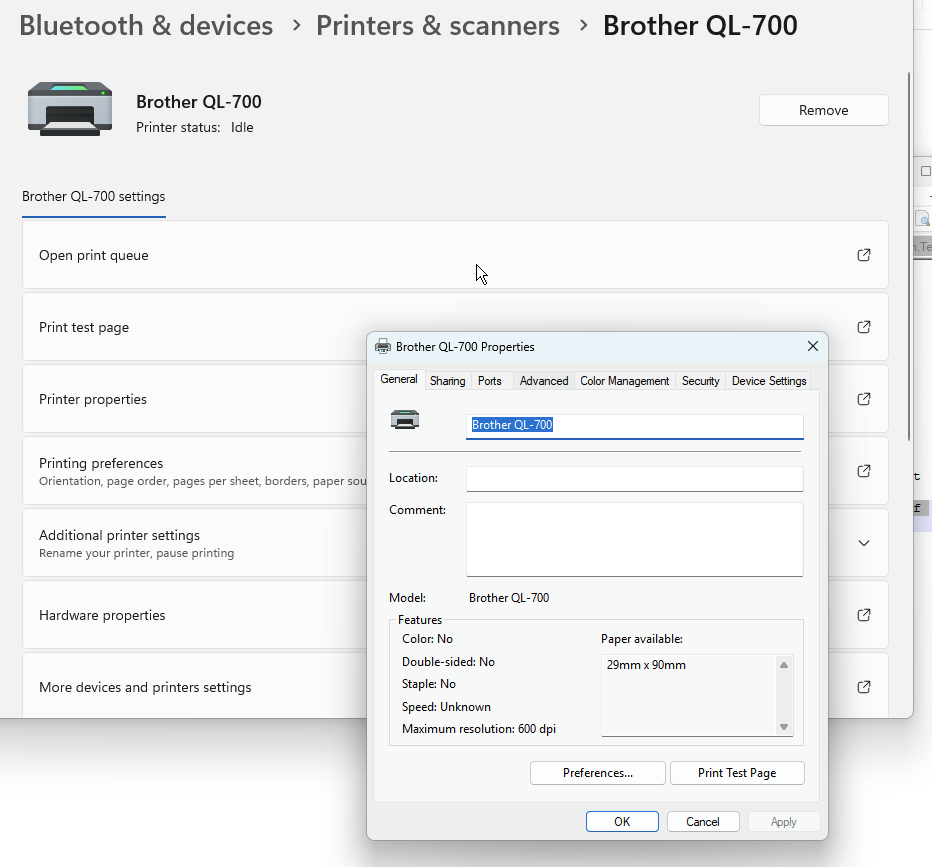
On this top line we want to rename Brother QL-700 to Brother QL 38mm
Next click Preferences and set these settings:
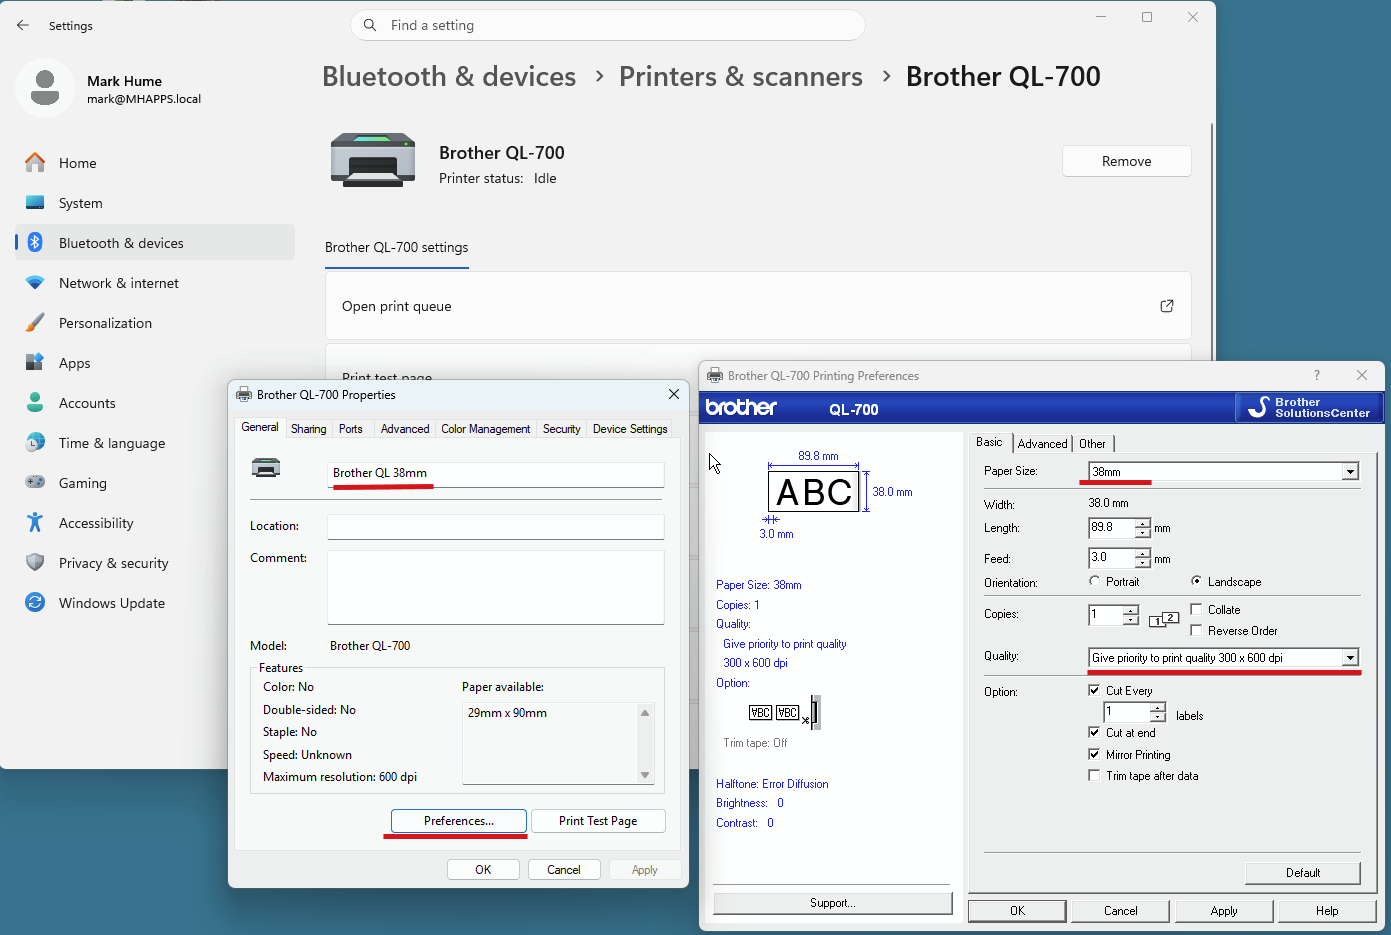
Then Apply and OK.
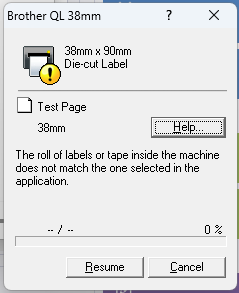
Printing a Test Page can be useful here to test the settings are correct per the label in the printer. If wrong, the newer drivers indicate the discrepancy as shown below when going to print (what is loaded at top and details of page sent).
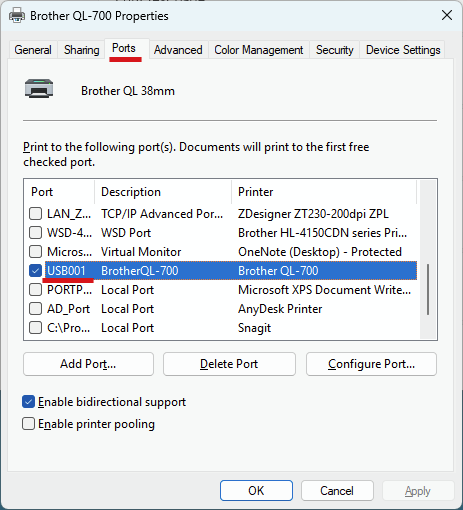
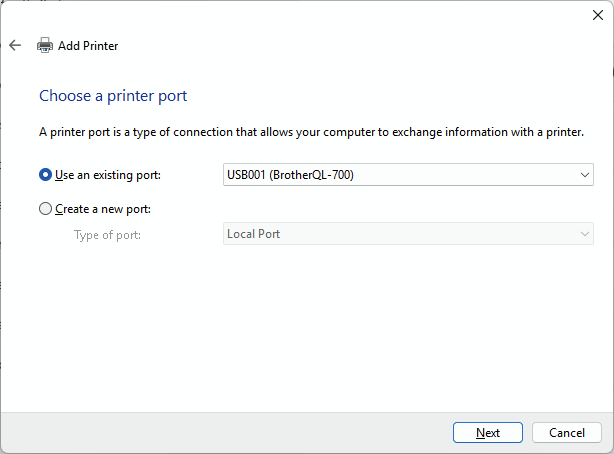
Whilst still on printer properties, click Ports tab and take a note of the Port this printer is on, e.g. USB001, then Advanced and take note of the Driver, e.g. Brother QL-700.
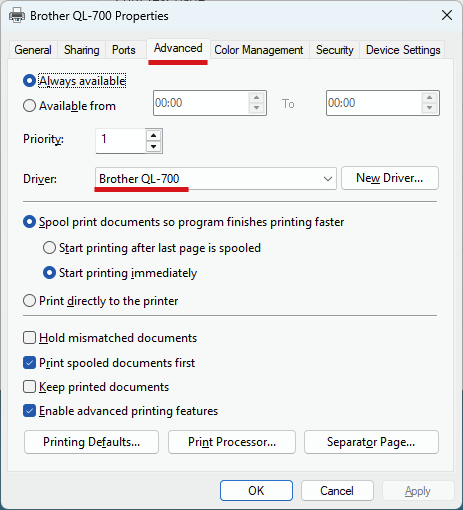
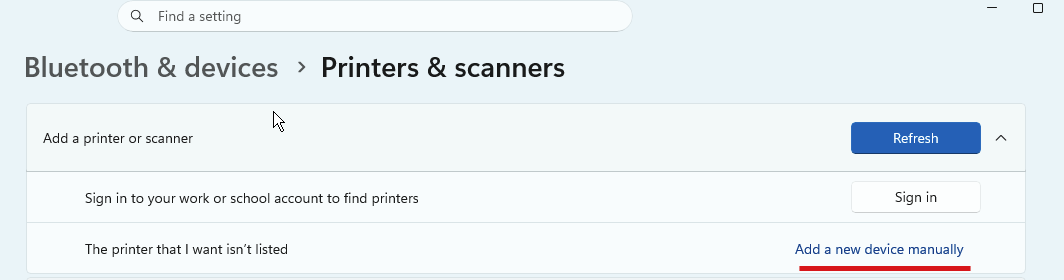
Next go back to Printer & scanners and click Add device top right then Add a new device manually.
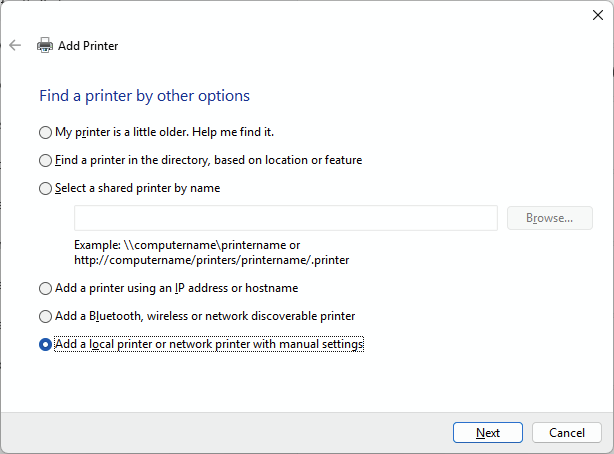
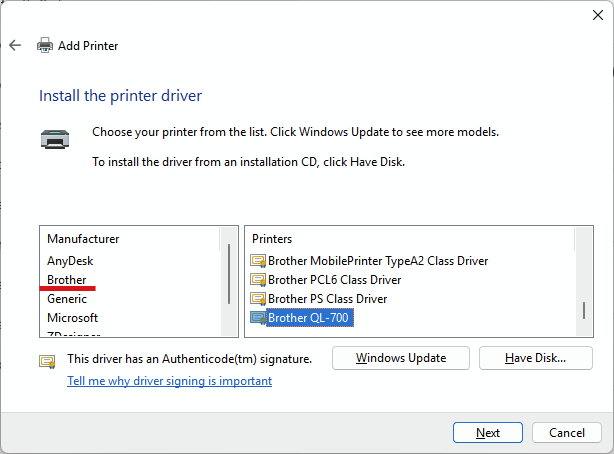
Choose the last option then Next:
Use an existing port, choose the USB port you noted above:
Next choose the Driver you noted above and Next:
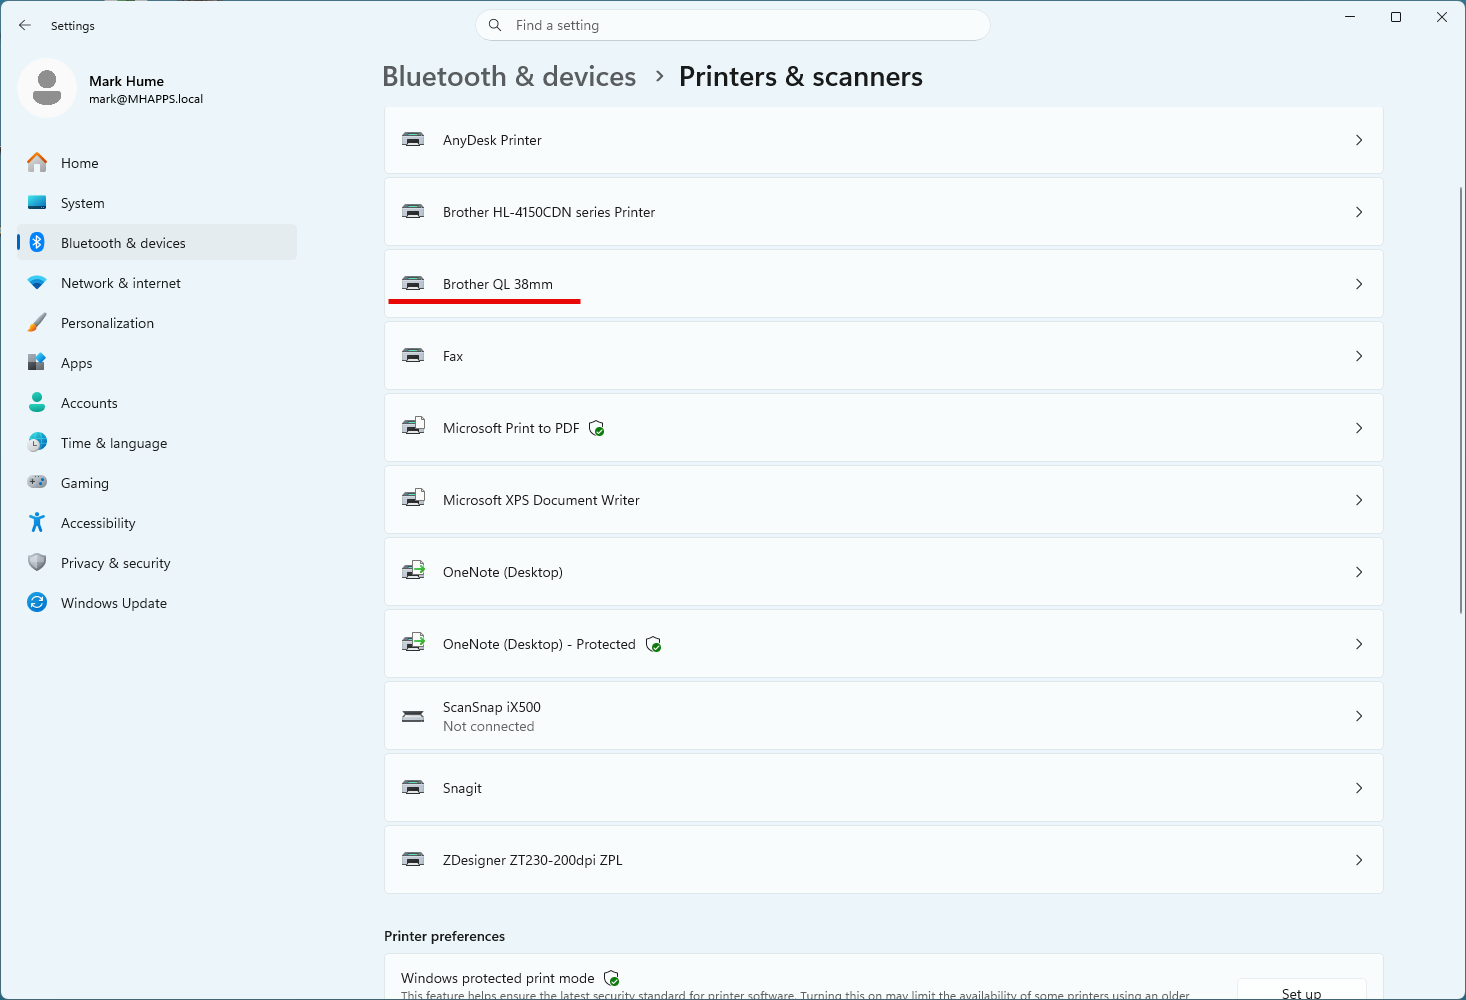
After this go back to Printers & scanners and choose Brother QL 38mm (note in Windows 11 even though two printers, it'll only show the first here, the 2nd is available after clicking it).
You will now see both printers. Choose the 2nd (62mm), Printer preferences and configure for 62mm similarly.
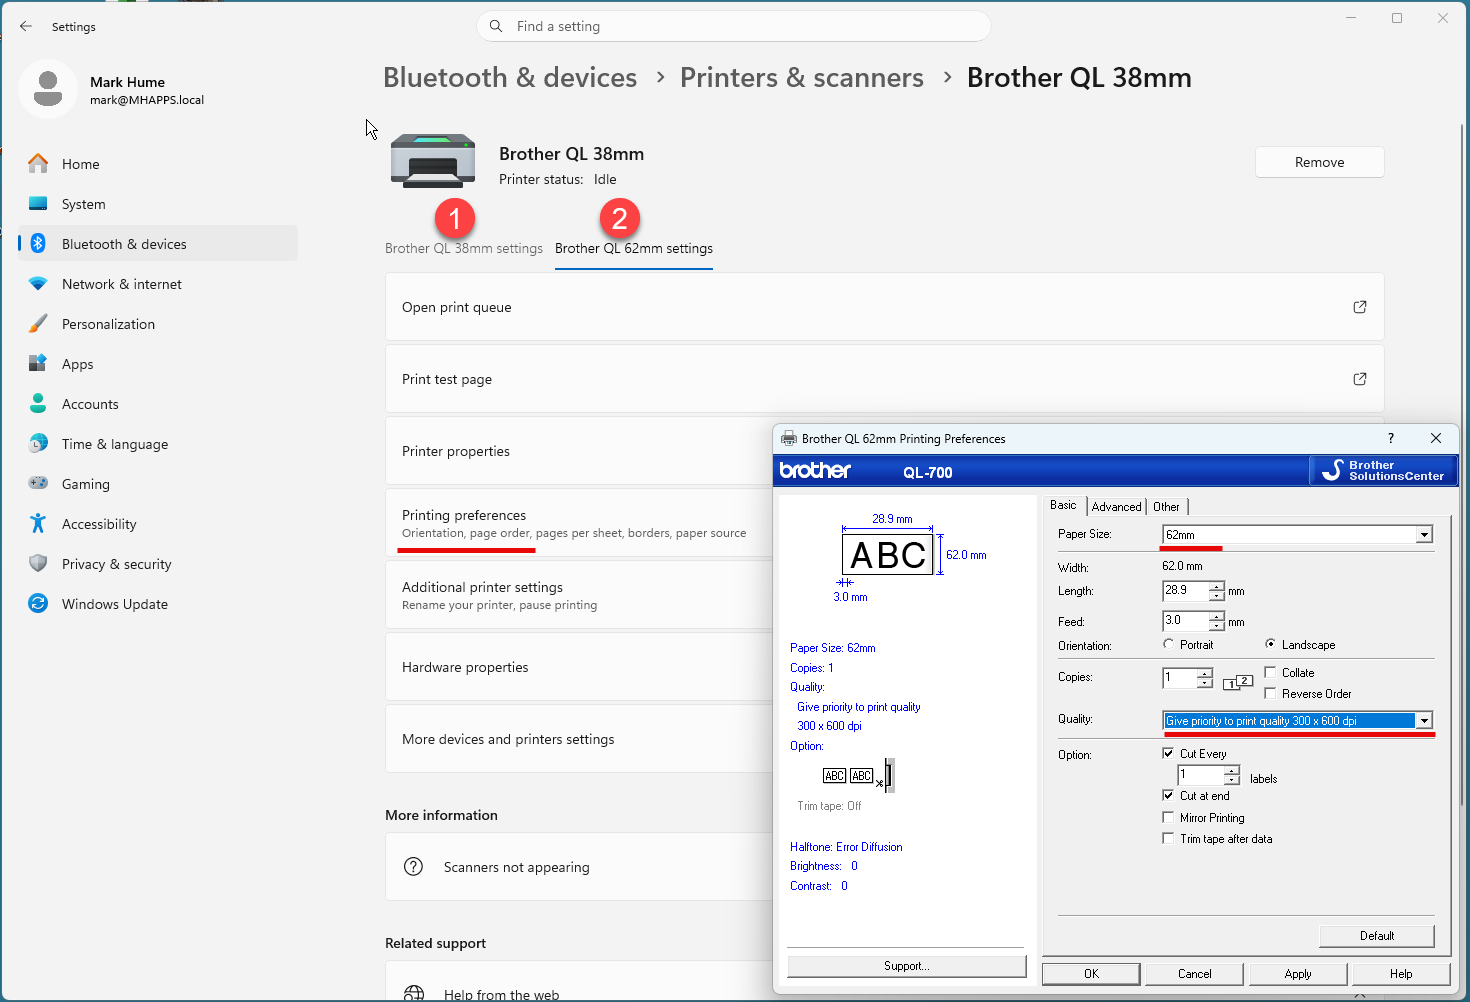
That is the label printer set up for both types of labels, each with their own consistent name (keep these names on every machine installed on so EaseSuite can easily direct).
Notes:
- We rename away from the model because various models are in play, e.g. QL-570, QL-700 etc. By giving them consistent names by sizing, the system can find them on every local PC with a label printer, and it makes them more obvious.
- Keep each label printer to the same PC. If you plug in a different label printer, you'll get another instance of that printer installed and reverting back to QL-700 with a new USB port spanned, which will need separate configuring, which isn't a good idea. If you do this, you are best starting this guide again, doing the clean up first.
- Don't make the label printer the default printer. The main A4 printer should be the default one, whether it is networked or local.
- If changing labels from continuous to die-cut (gaps) for say 38mm or 62mm, Printer Preferences shown above will need adjusting for the specific width before printing will work.
- When previewing labels for these label printers in EaseSuite, the printer should be chosen here and set as default (recommended per building). Because each computer with a label printer uses the same naming , the labels should then work when printed (given they have been configured correctly under each name).
