Help Topics
- EaseSuite
- Frequently Asked Questions / Troubleshooting
- General Application Features
- Stock Control and Replenishment
- Accounts Package Integration
- Quick Start Guides
- Mobile Guides
- Word Templates & Print Outs
- Concepts
- Hardware
- Workflow Case Studies
- Terminology
- Submitting Help Requests
- Feature Requests
- Web Shop Preparation Guide
Stores App Guide
1. Introduction
The EaseSuite Stores App is available on Android mobile devices and allows the user to complete a number of tasks that would normally be done on the PC running EaseSuite. The functions of the app are split into three main areas. Sales, Purchasing and Stock.
The logo in the centre can be replaced with your organisation's logo to personalise and brand your Stores devices.
2. Installing the App
The Stores App will have been installed and configured on your device by MHApps Ltd. staff.
3. Your Device
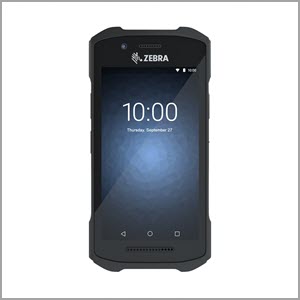
Your Stores App runs on a small handheld touch computer that runs the Android operating system. It has a camera, wireless connectivity and a Barcode scanner.
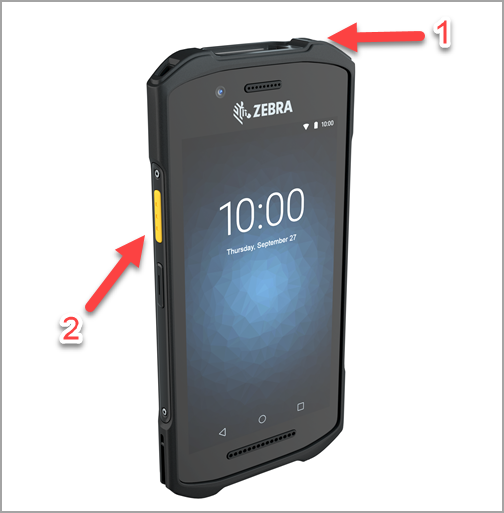
The power button is located on the top (1). The barcode scanner is activated using the yellow buttons found on either side (2)
4. Launching the App
Select EaseSuite to open the Stores App.
.png)
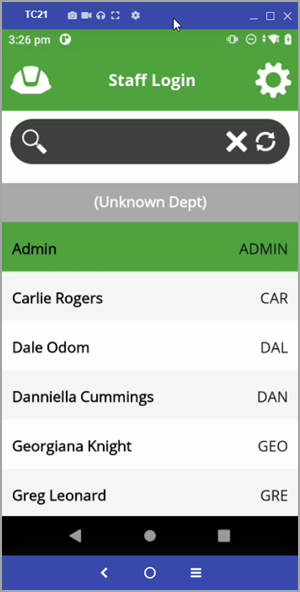
5. Login
The App will launch into the Staff Login screen. Either select your name from the list or search for it in the Search area to login to the app.
6. Layout
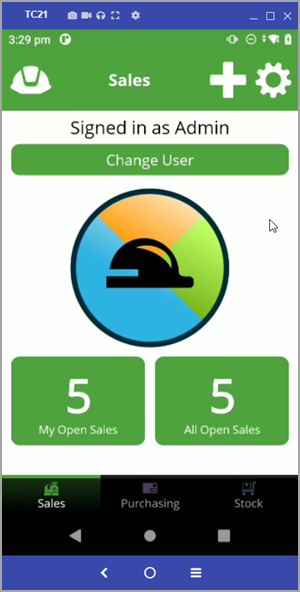
When you have logged in to the app you arrive at the Sales page. The App's functions are arranged in three areas. Sales, Purchasing & Stock. Switch areas by either swiping left or right on the screen or selecting the Sales, Purchasing or Stock buttons at the bottom of the screen.
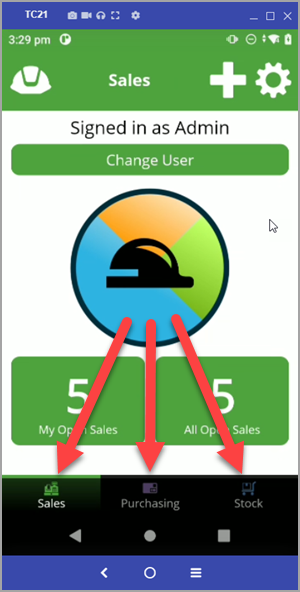
At the top of the three top pages, the Hard Hat icon serves as a Home button and takes you back to the Staff Login page.
The cog icon opens the Settings menu (see below)
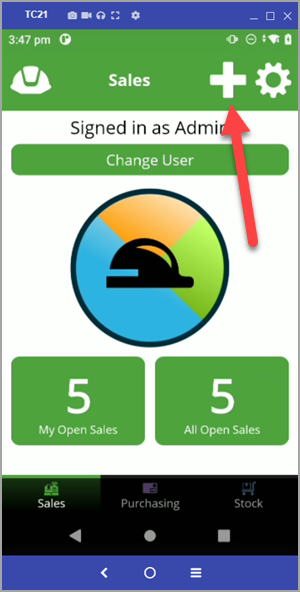
7. Sales
From the Sales page select the Plus (+) icon at the top to create a new Sales Order. (see below image)
The empty Sales Order form that opens is displayed over 2 pages. A Swipe graphic briefly overlays the screen to remind the user that swiping left and right allows access to the additional pages of the form.
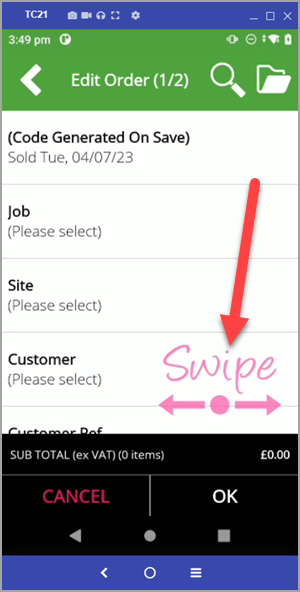
After a few seconds the swipe graphic disappears leaving the Edit Order page to be completed as required.
Fields shown on the first page are as follows:
- Code Generated on Save - This the Sales Order Number.
- Job - Select from the list of Jobs shown. If a Customer has been selected, this list will display only Jobs associated with the selected Customer
- Site -
- Customer - Select from the Customer list including Cash Sales and Card Sales.
- Customer Ref -
- Notes - Enter any additional information here.
- Requested By - The name of the staff member who is logged in is entered here.
- Open on PC When Saved - This option, if selected, will open the Sales Order automatically on the selected PC when the Order is saved on the mobile app.
- PC Selection - If the option above is selected, chose from the list of PCs to select which one you would like the Sales Order to open on.
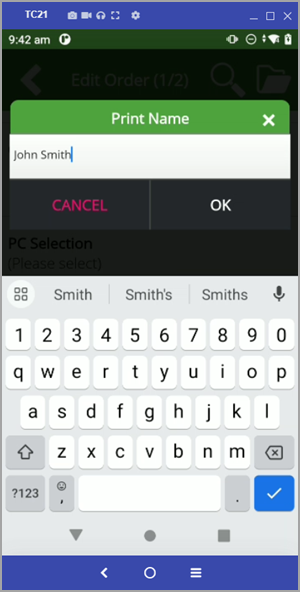
- Signature Required - If selected, the name and signature of the Customer will be requested for the Sale.
Swiping onto the second page shows a list of items added to the Sales Order. If no items have been added yet then the image below will be shown.
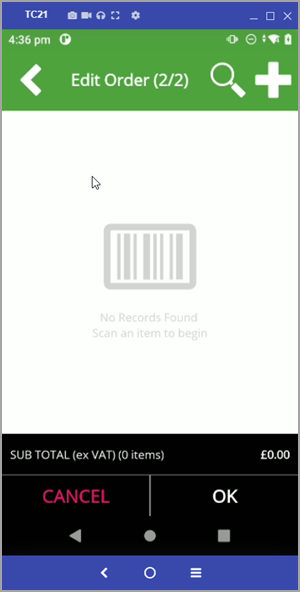
Items can be added three ways
- Scanning the barcode - Press the yellow side button on your device and point the scanner at the barcode.
- Select the Plus (+) icon in the top right to add an Untitled Product
- Select the Search (magnifying glass) icon to open Stock Search where you can find and add a specific product from Stock.
Items selected will then appear as a list.
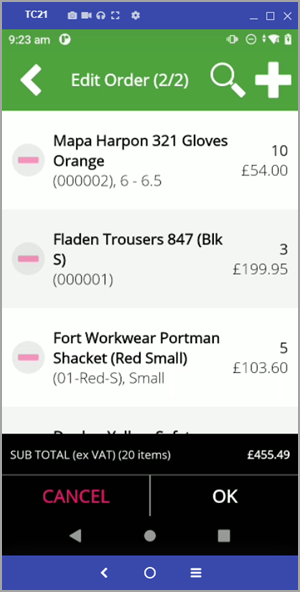
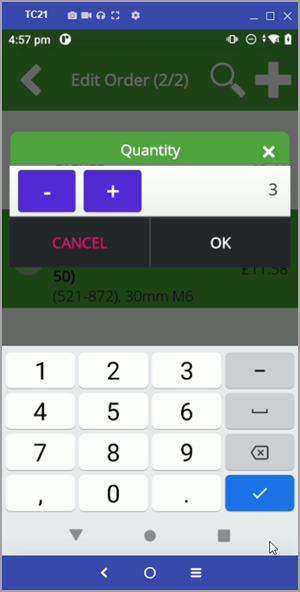
An item added to the Sales Order can be selected to change the quantity ordered. Either via the Plus and Minus buttons or by typing the total quantity.
When you have finished adding items, select OK to save and close the order.
If you selected Signature Required, a screen will open asking for the Customer's name. Type the name then select OK.
The next screen if for the Customer to sign their name. Hand the device to the Customer and explain the signature process to them.
If they are unhappy with their signature attempt then can select Clear to begin again. When they have signed they should select Submit.
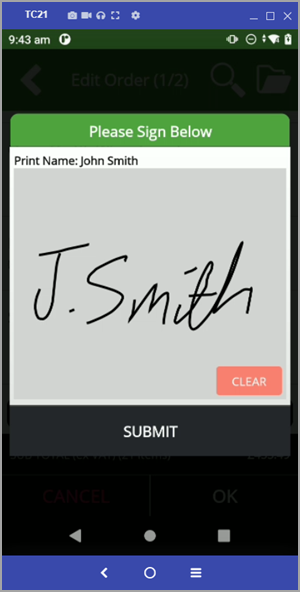
When they have submitted their signature a message will appear asking them to return the device to the staff member.
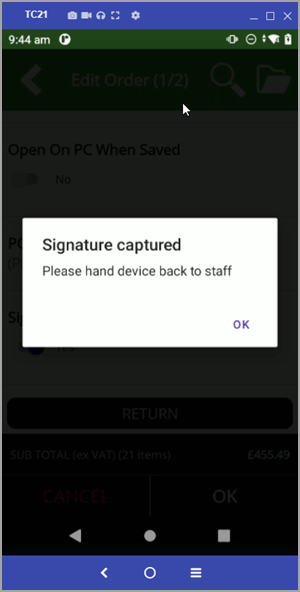
Select OK to close the order.
If you selected Open on PC when Saved, Your Sales Order and its invoice will open on the selected PC. The invoice can be printed and/or payment taken etc. as required.
From the main Sales page, two large buttons provide access to further screens:
- My Open Sales - Shows a total of your open orders and selecting this opens a list of all your open Sales Orders.
- All Open Sales - Shows a total of all open orders and selecting this opens a list of all open Sales Orders.
.png)
From these lists Sales Orders can be opened and edited/updated as required. A new Sales Order can also be started from these pages by selecting the plus (+) button top right.
.png)
8. Purchasing
The Purchasing area functions in the same way as the Sales page. Buttons show numbers of open Purchase Orders and enable access to lists of those orders, and new Purchase Orders can be started from either the Purchasing Page or the Purchase Orders List pages by selecting the large plus (+) icon top right.
The process of adding information, scanning barcodes, searching for stock items etc. is very similar to creating a Sales Order. Please review the detailed Sales Order instructions above is you require a detailed breakdown of the processes involved.
Obviously no signature option is available for Purchasing but you do again have the option, if selected, to automatically open your Purchase Order on a selected PC when saved.
8.1 Receiving Deliveries
- Find the Purchase Order you wish to record deliveries for by searching through either the My Open Orders list or the All Open Orders list. This can be done by scrolling through the list or by using the search box at the top of the list.
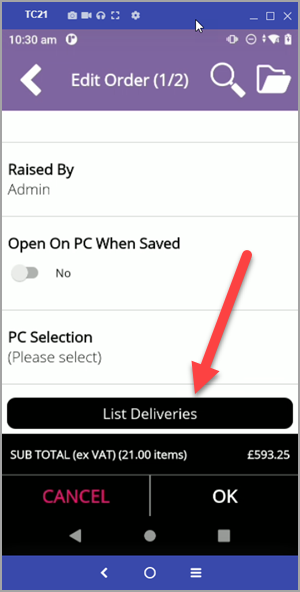
- On the Edit Order page for the selected Purchase Order, scroll to the bottom of the first page of the order.
- Select List Deliveries.
If previous deliveries (whole or partial) have taken place for the Purchase Order they will be listed here.
To receive a new delivery select Plus (+) icon in the top right.
The Receive Delivery form now opens.
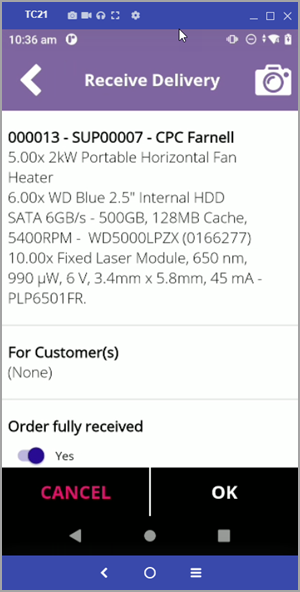
The Receive Delivery form contains the following fields:
- Ordered Items - Lists the items and quantities on the Purchase Order.
- For Customer(s) - If the Purchase Order contains any items for Customers rather than Stock, the information will be shown here.
- Order Fully Received - A selectable field that defaults to Yes. Select No to log receipt details of a partial delivery. If No is selected, when OK is selected the Advanced Edit page will open. See below.
- Item Location - This defaults to Per stock item.
- Per stock item - Meaning the items, once received, are put to their regular location documented in their Stock record.
- Single Location - Items are received to a single location. If this option is selected, an additional field appears below for recording the single location.
- Various - Item locations are various and can be specified in the advance Edit Delivery form that opens.
8.2 Advanced Edit Delivery
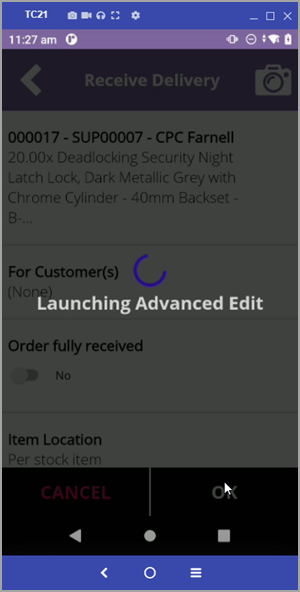
When Order Fully Received is set to No and OK is selected, a message is displayed indicating that the app is Launching Advanced Edit.
Edit Delivery can also be accessed by tapping on an existing entry in the list of deliveries.
A two page Edit Delivery form opens.
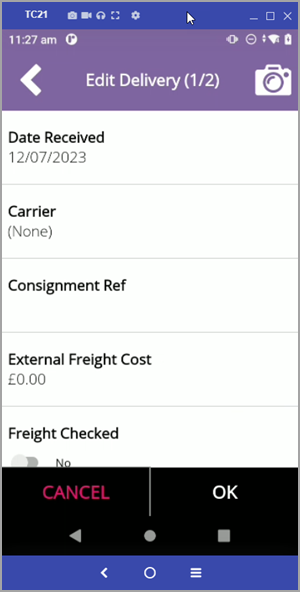
The Edit Delivery form page 1 contains the following fields:
- Date Received - Automatically filled with today's date when you receive an order. Can be edited if required.
- Carrier - A text field where you can document to carrier if required.
- Consignment Ref - Add the relevant info here is needed
- External Freight Cost - If the Freight cost is known at this point it can be documented here.
- Freight Checked - Defaults to No. Switch to Yes to confirm that the freight has been checked
- Comments - Add any further relevant info here.
In addition a camera icon (top right) allows a photo to be taken and uploaded showing the delivery.
Swipe right to reveal page 2 of the Edit Delivery form.
.png)
This page lists all the items on the Purchase Order.
Tap on an item to record delivery information
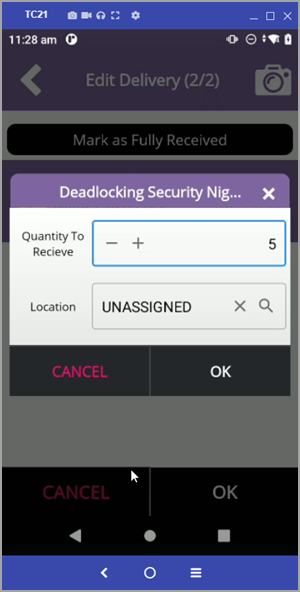
If not all the order is delivered the Quantity to Receive can be edited as needed. Location can also be entered here.
Tap OK to save the details of the delivery.

9. Stock
Select the Stock Area by either swiping left or right from one of the other two area or tap the Stock icon bottom right.

The Stock area enables users to:
- Search and scroll through Stock list.
- View and edit details of individual Stock items
- Edit quantity of Stock
- Add a barcode to an item of Stock - Under Stock Details select Add Barcode and scan or enter the new barcode.
- Perform the following Bulk Actions on you selected list of Stock.
- Move Location - Eg. for moving a number of items to a different shelf/aisle etc when rearranging store displays or warehouse layout.
- Add Tag - Add a Tag to multiple items
- List on PC - Select from the list of PCs to open the Stock item(s) in a list on that PC. EaseSuite must be open on the PC for this to work.
- Remove Tag - Remove a Tag from multiple Stock items at once.
- Select Stock Take Mode and add Stock Take Quantity information. (see below)
9.1 Stock Take Mode
Enter Stock Take Mode by selecting the Stock Take Mode Switch (See below)
.png)
When put into Stock Take Mode, a number of changes occur in the way the app operates.
- When you open Stock Details for a Stock item (either by scanning its barcode or selecting it in the stock list) the Details open at the Quantity (Stock Take) field.
- After entering a numeric value into the Quantity field (see above) the user does not need to close, tick or save the entry. Simply scanning the barcode of the next product will save the entered value and move onto the next scanned product.
- Changes in Quantity recorded as part of a Stock Take will appear in the PC app in the Stock Take History, whereas an individual change to a stock's quantity done in the normal app mode will be logged as a quantity adjustment.
10. Settings
The cog icon in the top right opens the Settings menu with the following options available:
- Version - Displays the software version number
- Web Service URL - Shows URL information. You may be asked for this information if there is a problem.
- Page Timeout (mins) - the period of inactivity a page will be available for editing a before it times out and information not saved is lost. Defaults to 20 mins but can be edited here.
- Close App When Docked - Switch defaults to On. Select Off if required.
- Check For Update - Select this to see if any updates to your software is available
- Network Test - Runs a network diagnostic check and shows the strength of you WiFi signal
- Close Application - May be needed if a problem occurs.