Help Topics
- EaseSuite
- Frequently Asked Questions / Troubleshooting
- General Application Features
- Stock Control and Replenishment
- Accounts Package Integration
- Quick Start Guides
- Mobile Guides
- Word Templates & Print Outs
- Concepts
- Hardware
- Workflow Case Studies
- Terminology
- Submitting Help Requests
- Feature Requests
- Web Shop Preparation Guide
Timesheet App Guide
1. Introduction
The EaseSuite Timesheet app can be installed on your mobile device and allows remote access to the information require to complete Tasks and Jobs. To submit information to your organisation about Timesheets and Purchases made while on Jobs. The app is designed to be simple and intuitive to use and is administered and set up to your organisation's requirements by your app administrator. Your app administrator will assist you in the initial installation and setup of the app on your device and will provide a basic overview of its functions and usage within your organisation. Further detailed information is provided in the document below.
2. Installation
The EaseSuite App is available for both Android and iOS/Apple devices. The installation process differs slightly, so please follow the instructions for your device.
2.1 Android Installation
- On the desktop EaseSuite software select Settings (1) > Pair Mobile App (2).
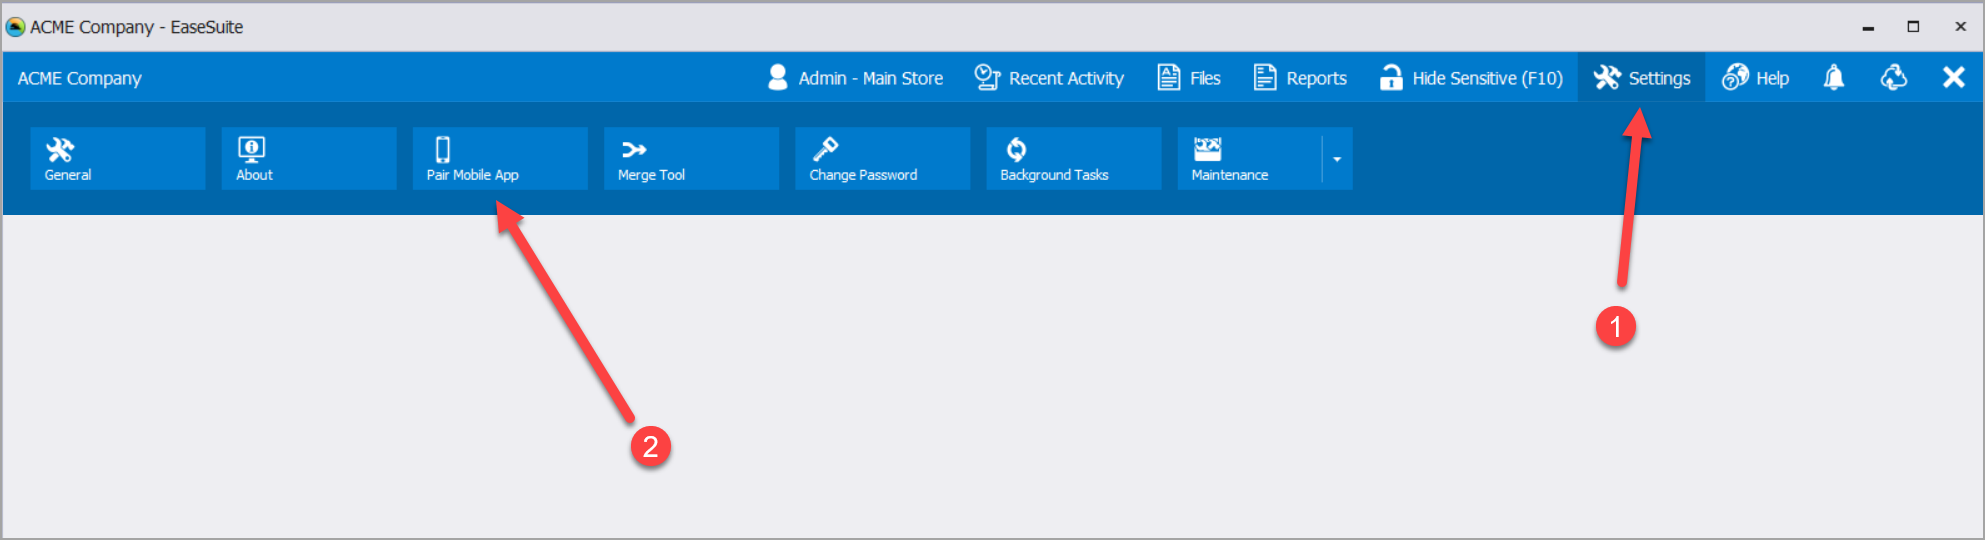
From the list, select the relevant member of staff to open their Staff Dialog at the Mobile Settings tab. Select Get App Download Link.
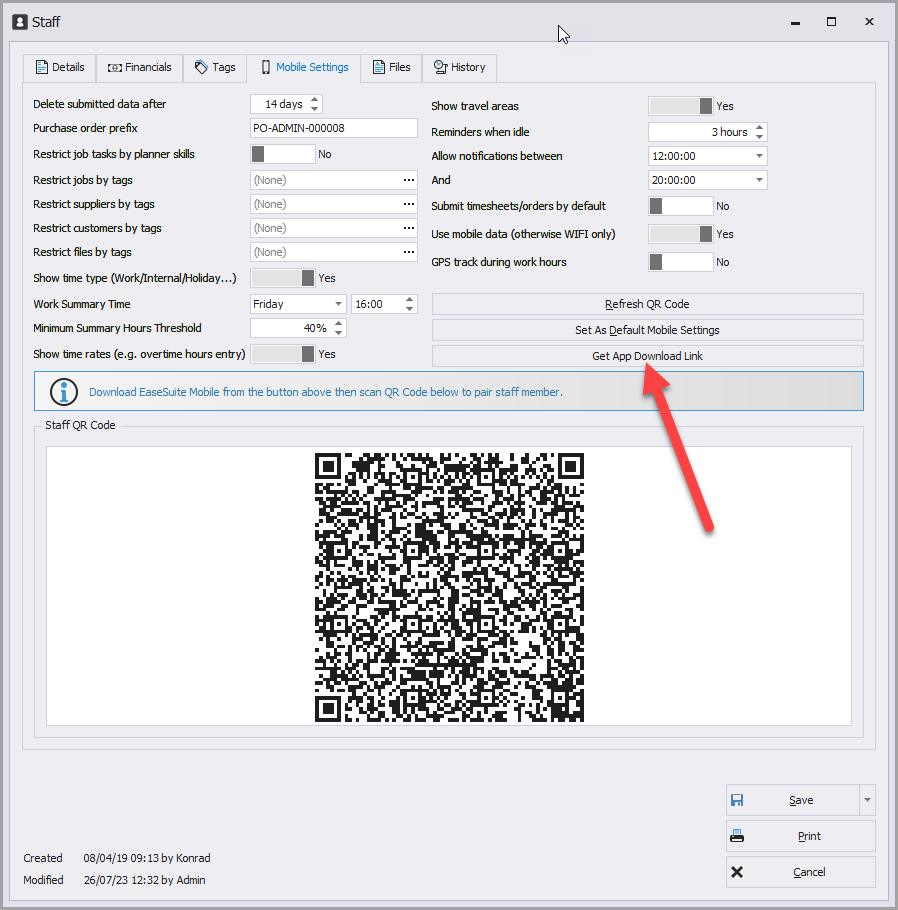
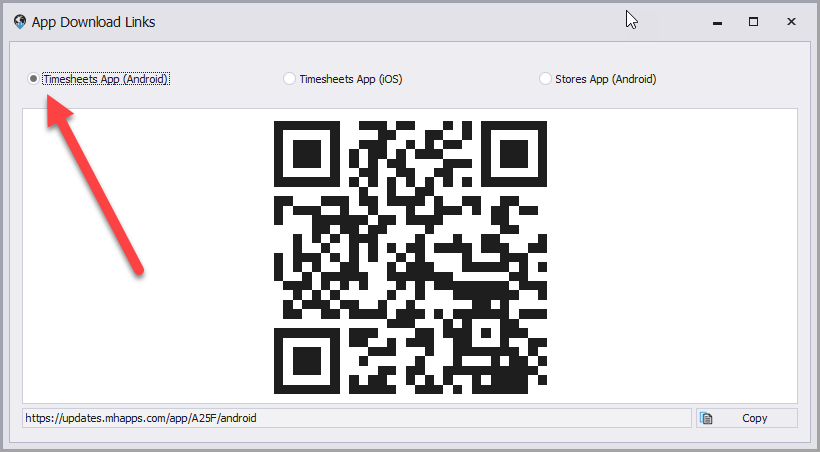
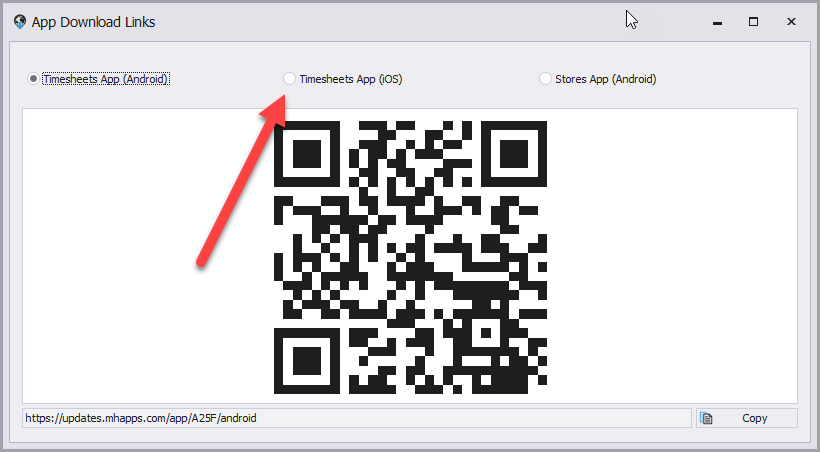
This will open a further dialog from which you can select the QR code to take you to the download page for the App and Device you require. In this case, select Timesheets App (Android).
Point the camera at the screen where the iPhone QR code is shown. The EaseSuite Timesheets App will automatically download and install.
- Your administrator may also provide you with a printed or emailed document with links and QR codes for the various mobile apps.
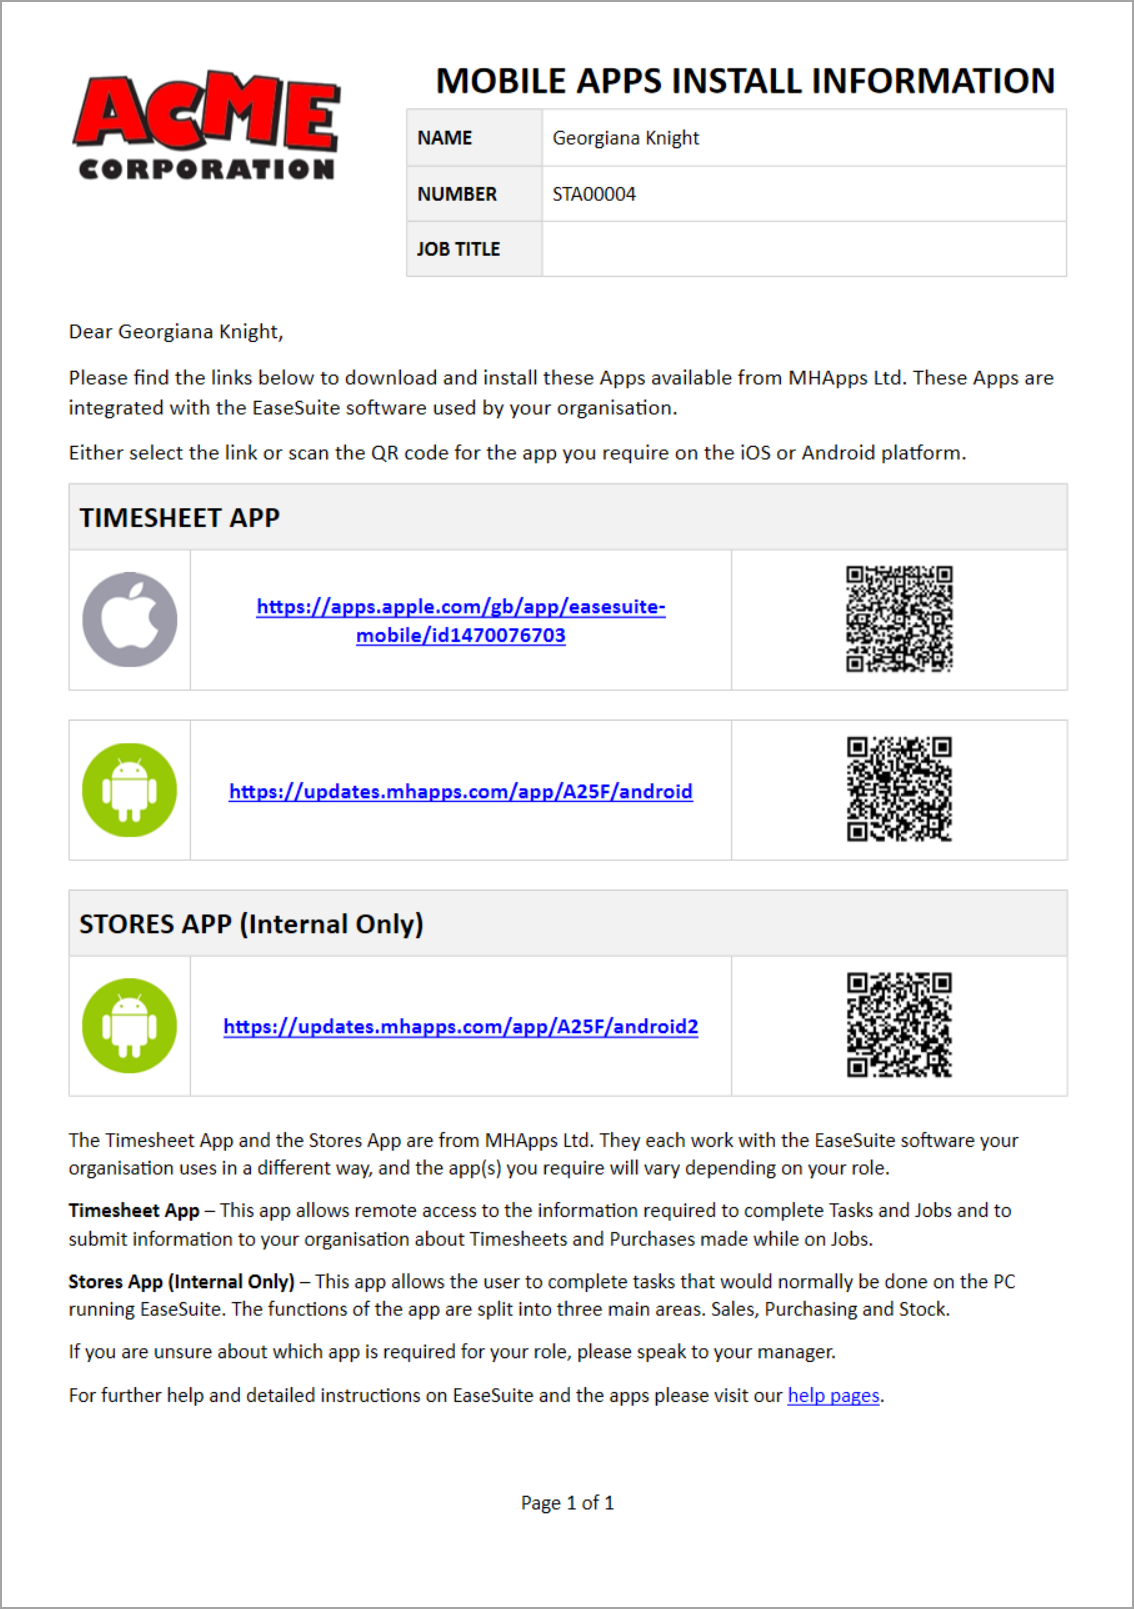
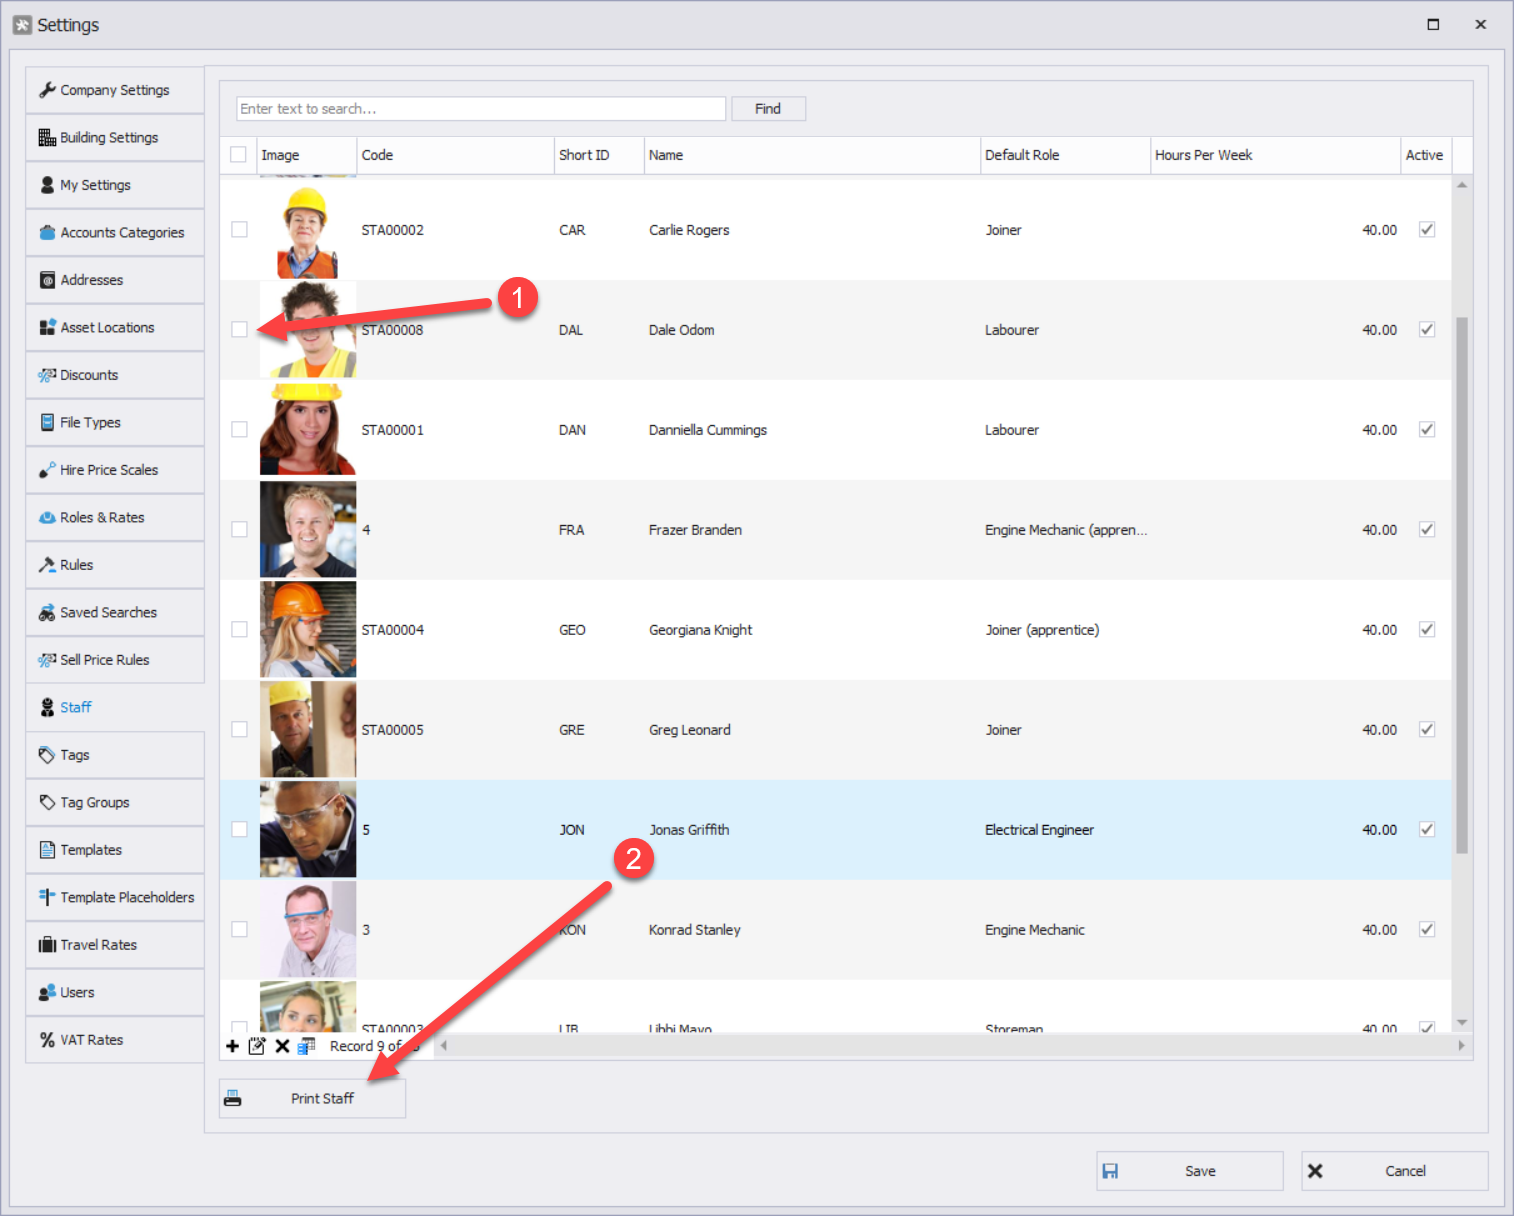
To produce this document for a staff member: Select Settings > General > Staff. Highlight the Staff Member or tick the boxes of multiple staff members if required (1). Select Print Staff (2).
In the Print Preview area that opens, select the Mobile App Instructions template and print if required or email as a pdf.
2.2 iOS/Apple Installation
The EaseSuite App for iOS is available on Apple's App Store. There are several ways staff may find the EaseSuite App to install on their iPhone.
- Search for EaseSuite.
- On the desktop EaseSuite software select Settings (1) > Pair Mobile App (2).
From the list, select the relevant member of staff to open their Staff Dialog at the Mobile Settings tab. Select Get App Download Link.
This will open a further dialog from which you can select the QR code to take you to the download page for the App and Device you require. In this case, select Timesheets App (iOS).
Point the iPhone camera at the screen where the iPhone QR code is shown.
Select the App Store link that appears on you phone's screen to take you directly to the EaseSuite App on the App Store
- Your administrator may also provide you with a printed or emailed document with links and QR codes for the various mobile apps.
To produce this document for a staff member: Select Settings > General > Staff. Highlight the Staff Member or tick the boxes of multiple staff members if required (1). Select Print Staff (2).
In the Print Preview area that opens, select the Mobile App Instructions template and print if required or email as a pdf.
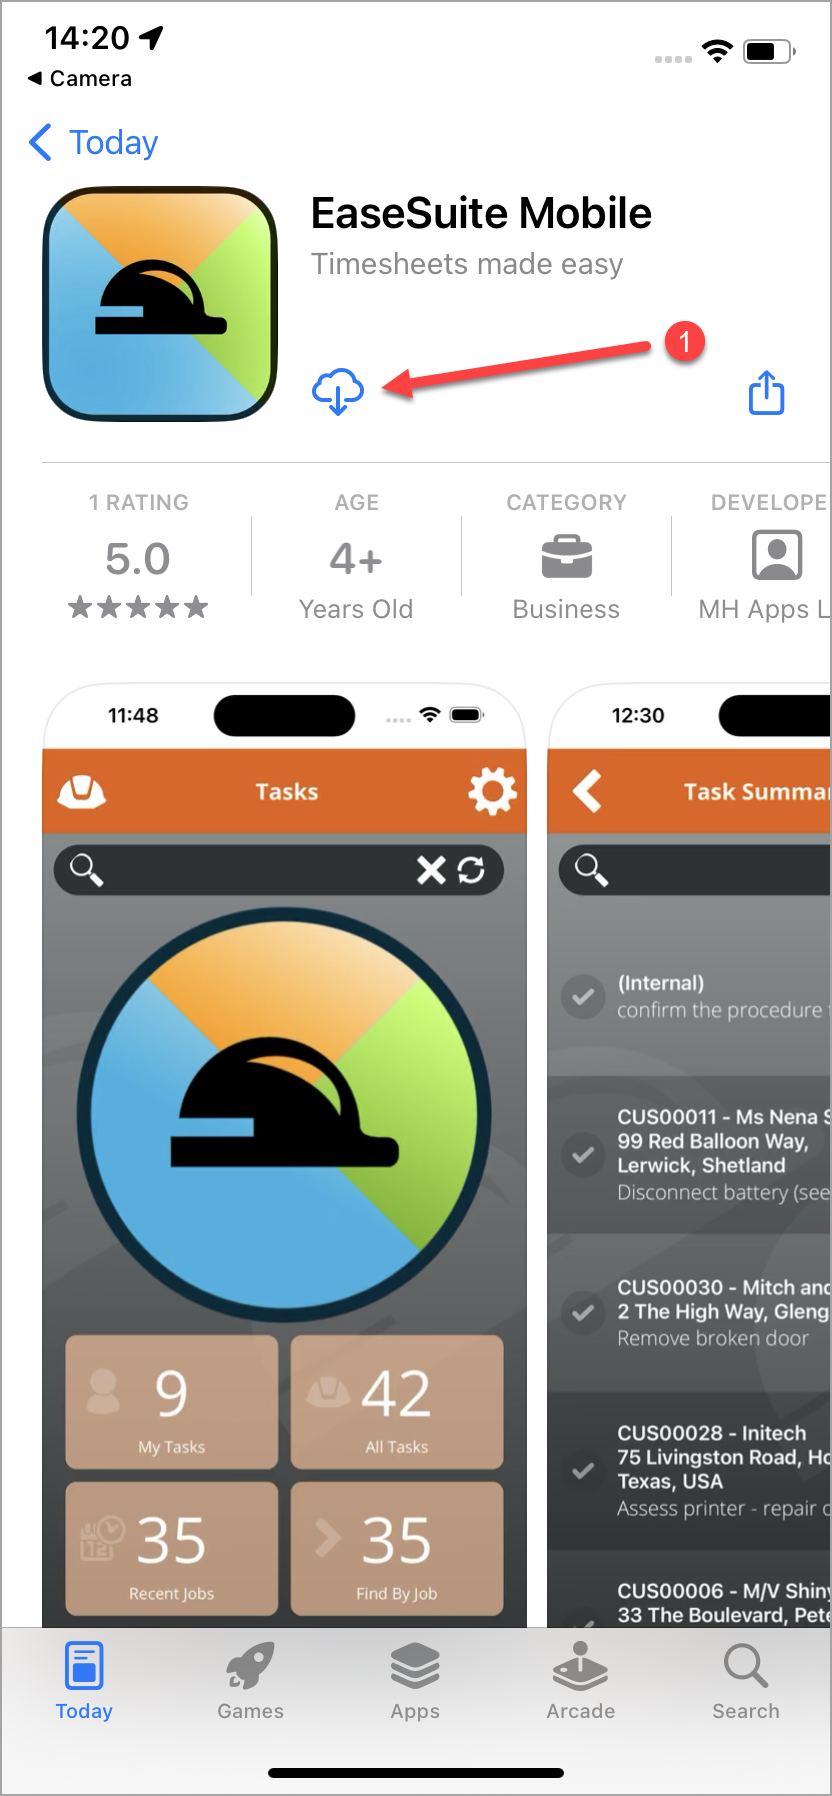
Once you have followed one of the methods above you will be taken to the EaseSuite Mobile page in Apple's App store.
- Select the download icon(1) to download and install the app.
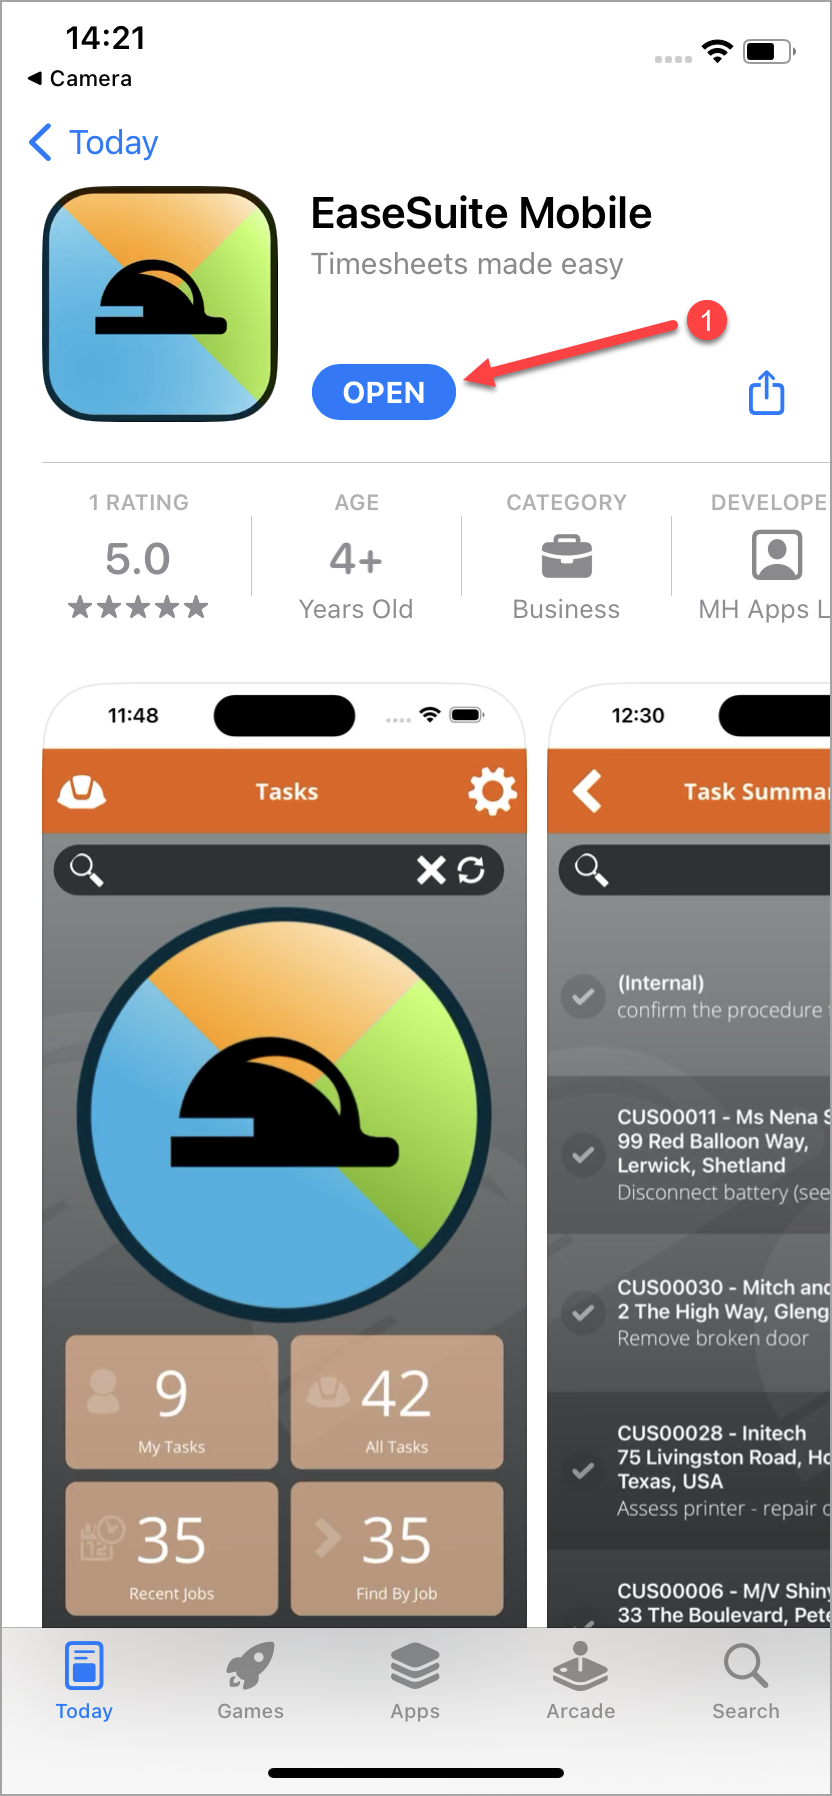
- When the app has installed select Open(1) to open EaseSuite Mobile.
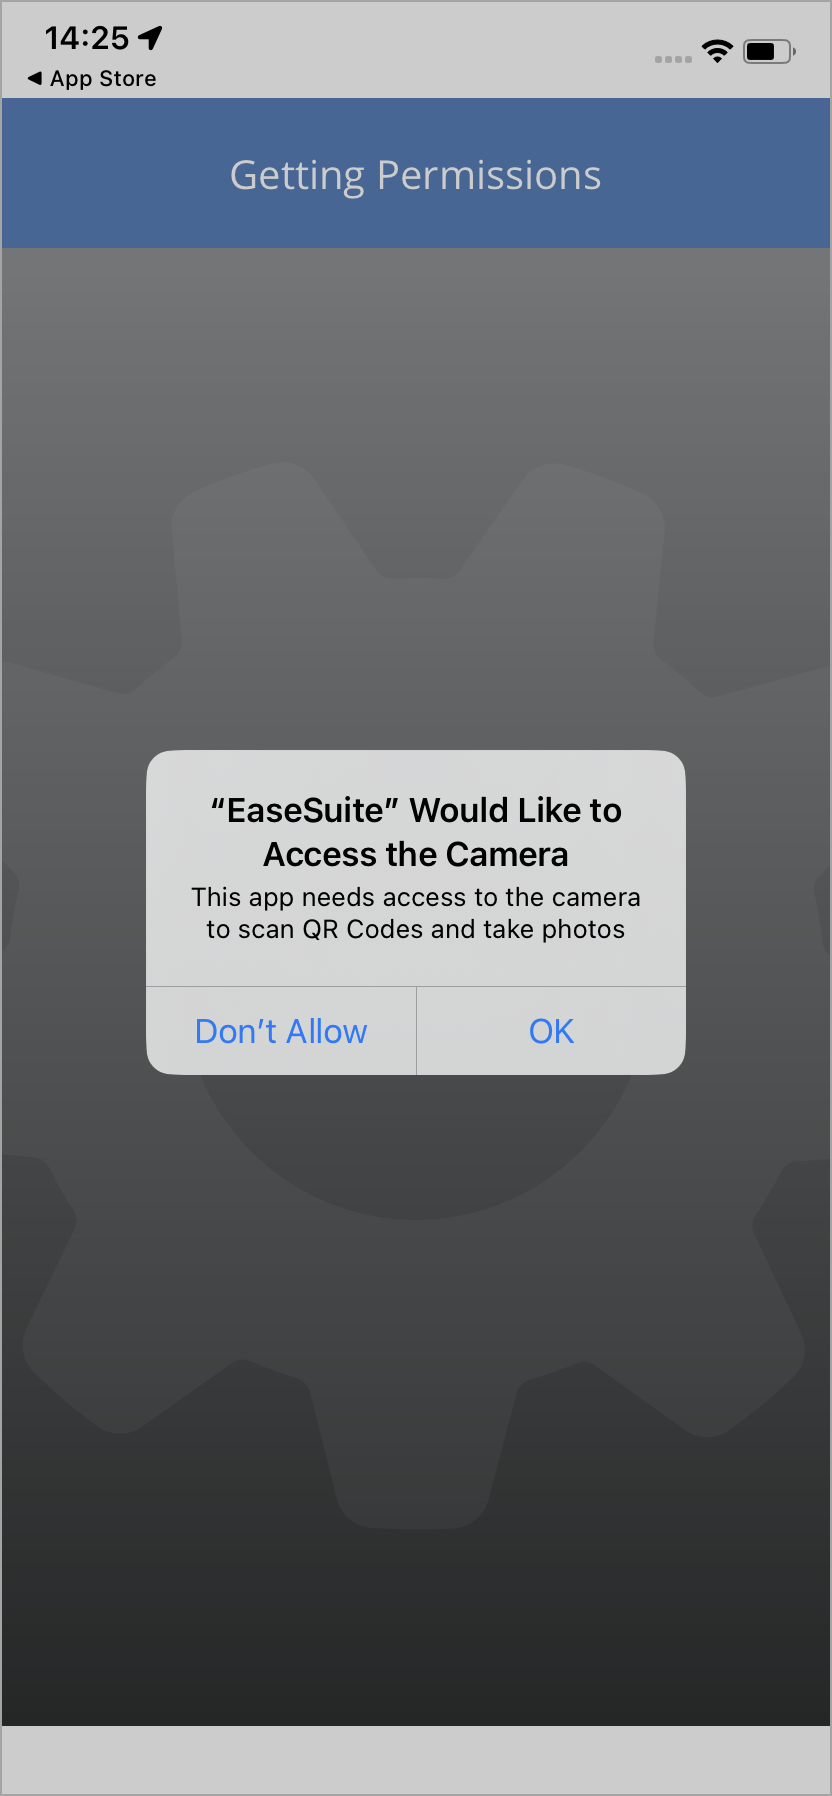
- When you open the app for the first time you will be asked for permission for EaseSuite to access the camera on your device. This is necessary to scan QR codes which are integral to setting up your device. Select OK to continue.
- With permission given, the Scan QR Code page will open with the camera active.
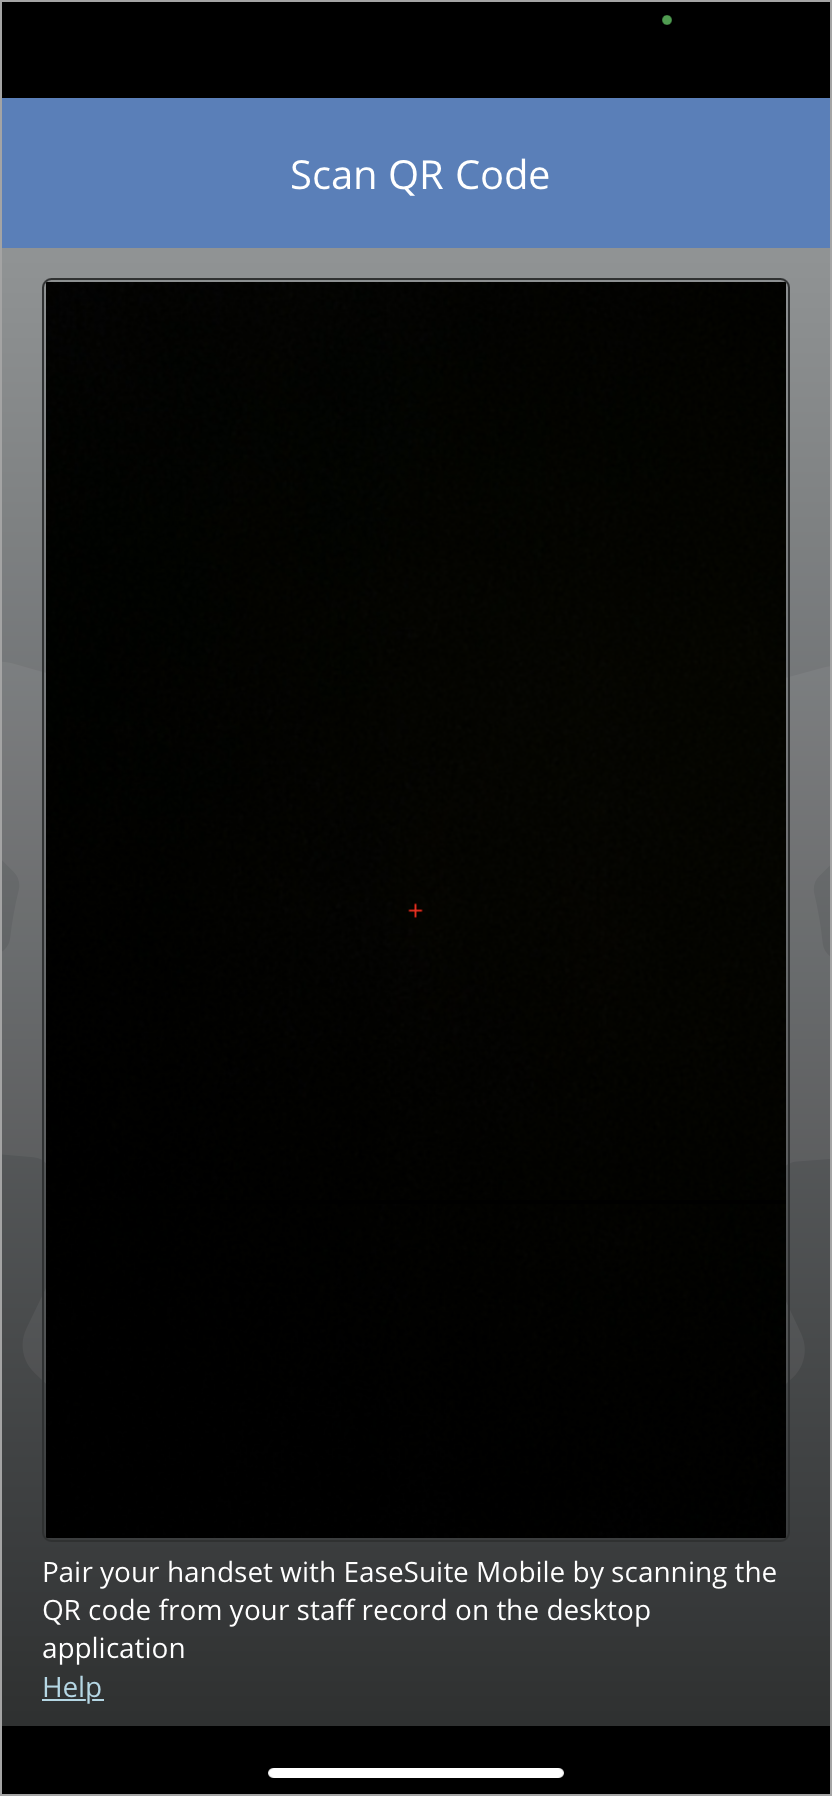
- Point your camera at the Staff QR Code found on the Staff Dialog > Mobile Settings. This will pair your mobile app to your staff ID.
.png)
- The next screen is titled Admin Sync Required. Do not tap either of the buttons until advised to by the admin helping you set up your device.
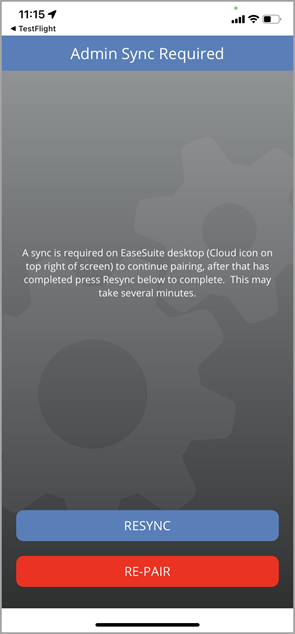
- The admin will now sync the EaseSuite Desktop application by clicking the cloud icon in the top right of their screen. This will upload to the server all the information that your phone app will need. This may take a few minutes to complete the first time.
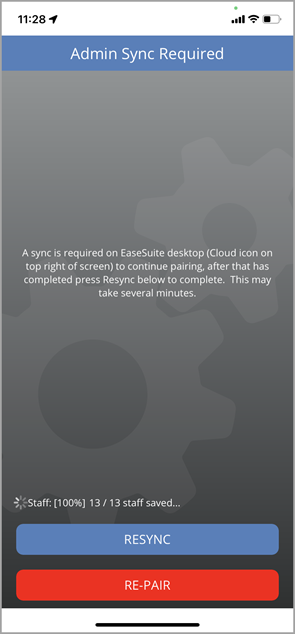
- Once your admin has confirmed the syncing of data from the desktop software has completed they will ask you to tap the blue RESYNC button on your mobile device.
- The data required will now be downloaded to your device. Again this may take a few minutes this first time.
- EaseSuite will then ask you to Allow notifications. If you wish to alter these notifications later they can be configured in Settings on you device.
- Your EaseSuite Mobile App is now installed and synced ready for use on your iOS/Apple device.
3. Opening the App
- Tap the EaseSuite icon on your mobile device to open the EaseSuite app.
- The app is separated into 3 main sections. Task, Timesheets and Purchasing.
- Navigation between sections is achieved either by pressing the names at the bottom of the screen or by swiping Left/Right on the screen.
- When the app first opens, the Task screen is selected.
4. Tasks
- The Tasks section is visible by default on opening the app.
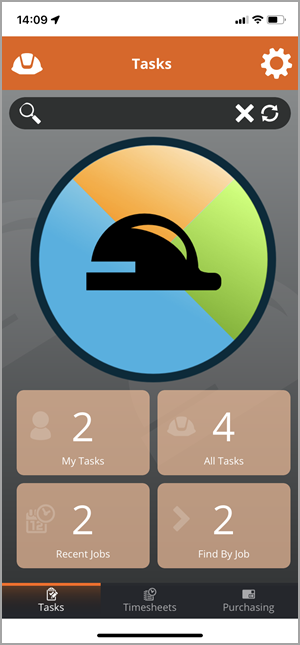
- From this screen four buttons provide access to further functions
- My Tasks - Access to all Tasks that have been assigned to you on Jobs that are In Progress.
- All Tasks - All Tasks on Jobs that are In Progress. These Tasks may be assigned to you, or to another staff member, or unassigned.
- Recent Jobs - Lists Jobs by those most recently worked on.
- Find My Job - Tasks listed by Job.
- All these options are different methods of finding your way to a specific Task. This is then viewed on the Task Page.
4.1 Task Page
- A Task page has detailed information about a specific Task.
- Customer/Client details such as Contact name and address
- Task Details
- Job Overview
- Last Synced and Submitted On information
- A button to Mark as Complete
- In addition to this information, this page has 2 buttons in the top right corner
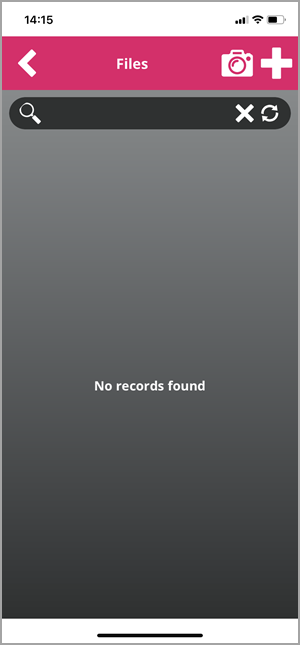
- Files
- This Files page gives access to any files such as photos or PDF documents that have been associated with this task.
- The Camera icon enables the taking and submitting of photos relevant to the Task.
- The plus (+) icon in the files page allows documents/files stored on your devise to be attached to the Task and uploaded.
- Plus (+)
- This button provides 3 options to the user-
- Add Time - This opens the Timesheet functions for this Task. For further details of the Timesheet functionality of the app please see the section on Timesheets below.
- Add Purchase - This opens the Purchasing functions for this Task. Further details of the Purchasing functionality of the app please see the section on Purchasing below.
- Mark as Complete - This Marks the Task as complete and provides the same function as the Mark as Complete button on the previous page.
- This button provides 3 options to the user-
- Files
5. Timesheets
- The Timesheets section is accessed by selecting Timesheets at the bottom of the Home Screen.
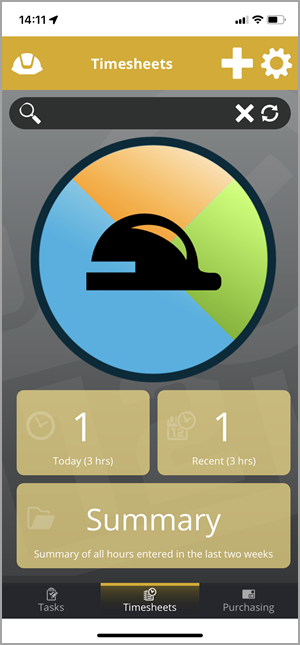
- From this screen three large buttons provide access to information and functions.
- Today - Displays the total hours worked on Tasks today. Pressing this will take you to individual Timesheet entries for today.
- Recent - Displays the total of hours worked for Timesheets that are stored on your device. Once your App has synced and uploaded any newly created Timesheets, these timesheets remain on your app for a period of time that is determined by the administrator of your mobile app. This may be different for your organisation, but the default period is 14 days. As above, pressing this will take you to a list of these Timesheet entries.
- Summary - Pressing this button takes you to a summary of all hour entered over the last 2 weeks.
- From the Timesheets screen the cogs icon in the top right accesses the Settings menu.
- In the top right is also a plus button for adding new timesheet data.
5.1 Filling in a Timesheet
- Tap the plus button (+) to enter timesheet information, a calendar page opens.
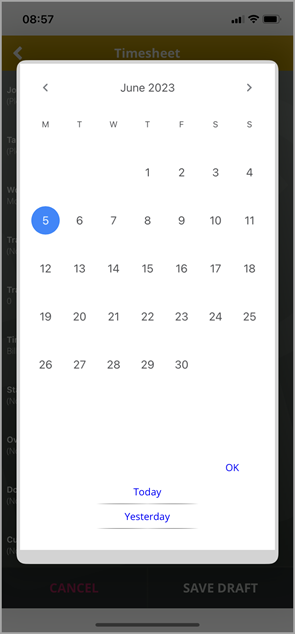
- Select the date for which the timesheet entry applies then tap OK to open a new timesheet form.

- Add the information to the timesheet sections as required. (Some fields may not be visible in your app. Your App Administrator will configure the app to show only the data fields necessary for your role/work pattern.)
- Job - Opens a list of Jobs available on your device. Each Timesheet entry must be associated with one Job. Select the Job for this entry.
- Task - Within a Job there may be a number of Tasks requiring to be done in order to complete the Job. From the list of Tasks associated with the selected Job, select the specific Task for this Timesheet entry.
- Work Date - This shows the date you selected from the calendar page when you first pressed the plus button to add a Timesheet entry. Tap this if you need to change the date information.
- Travel Rate - Select travel information for this job from the list of options made available by your organisation.
- Travel Trips - Document the number of Travel Trips required to complete the Task.
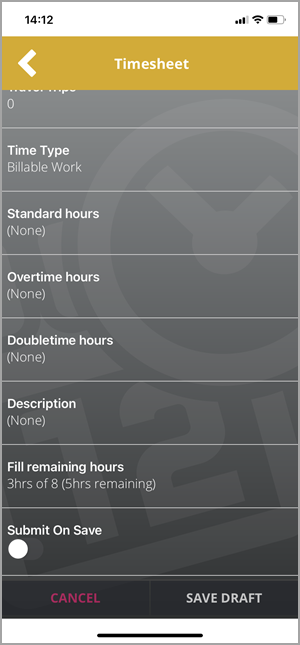
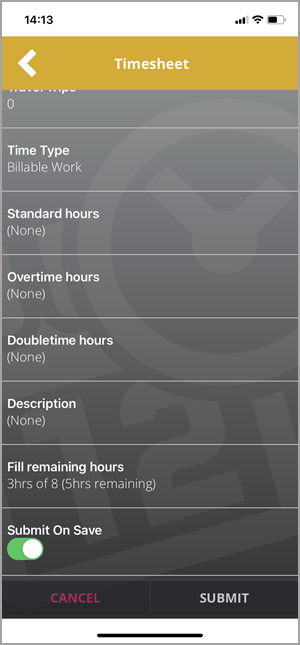
- Time Type - Select the Time Type from the list.
- Hours - The next entries are for Time worked at specific rates. Options visible will vary depending on your working practices.
- Standard Hours - Select how many hours and minutes are to be logged against the Task at Standard Rate.
- Overtime Hours - Select how many hours and minutes are to be logged against the Task at Overtime Rate.
- Doubletime Hours - Select how many hours and minutes are to be logged against the Task at Doubletime Rate.
- Custom Hours - Two more field can be customised to provide further rate options if required. Names will be different for your app if these are in use by your organisation.
- Description - Add additional information here as required.
- Fill Remaining Hours - This displays the hours that remain to be allocated to a Task. This amount will be set by your administrator based on you work/shift pattern.
- Submit On Save - This is set to No by default when a Timesheet form is first opened. As a result the option available at the bottom of the screen is to SAVE DRAFT. This saves a draft version of your entry that you can come back to and continue adding information. At this point your Timesheet will only be stored on your device and will not be submitted to your organisation. When your Timesheet has been completed tap to change this button to Yes. The button at the bottom of the screen now changes to Submit. Tap this to finalise the Timesheet entry and upload to the information to your employer when you device next syncs its data.
6. Purchasing
- The Purchasing section can be accessed by tapping Purchasing at the bottom of the main screen, or swiping right until Purchasing is highlighted.
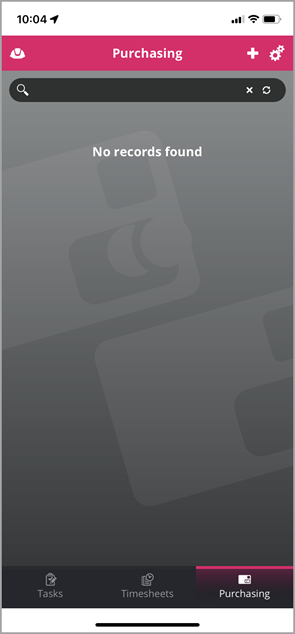
- Until an entry has been made, this section will show that No Purchasing Records are on you device.
- Purchasing entries can be started by tapping the Plus (+) icon in the top right.
- The Plus icon opens a Purchase Order form.
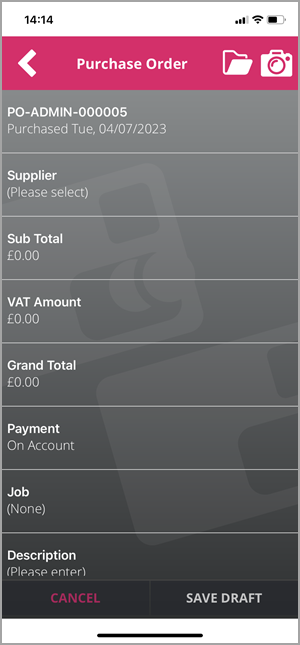
- This form allows entry of information in a number of fields.
- PO Number - The first field shows a PO number generated automatically based on your details. It defaults to today's date, but this date can be altered if needed by selecting this field to open the calendar view, and selecting an alternative date.
- Supplier - Select the Supplier from the list available. A Supplier must be selected for the form to be able to be submitted.
- Sub Total - Enter to the Sub Total (without VAT).
- VAT Amount - Enter the amount of VAT.
- Grand Total - The total amount of the Purchase Order.
- Payment - A list of option for the payment. Select the payment method used.
- Job - Select the Job this Purchase Order relates to from this list of available Jobs.
- Description - Further information can be added here if required.
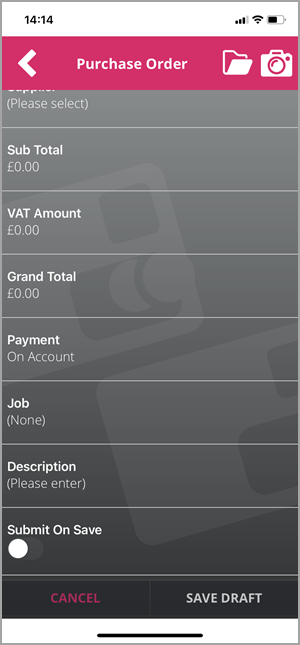
- Submit On Save - This is set to No by default when a Purchase Order is first opened. As a result the option available at the bottom of the screen is to SAVE DRAFT. This saves a draft version of your Purchase Order that you can come back to and update if needed. At this point your Purchase Order will only be stored on your device and will not be submitted to your organisation. When your Purchase Order has been completed tap to change this button to Yes. The button at the bottom of the screen now changes to Submit. Tap this to finalise the Purchase Order and upload the information to your employer when you device next syncs its data.
- Attaching Files - The folder icon in the top right opens a Files window.
- From here you can attach files or documents on your device to the Purchase Order by selecting the Plus Icon (+) in the top right.
- Tap the Camera icon to open you device's camera, take a photo and attach it to the Purchase Order.
- Photos, documents or other files attached to the Purchase Order will then appear listed on this page and will be submitted with the Purchase Order when your device syncs its information.
7. Settings
.png)
- The cogs icon in the top right of the screen opens the Settings page.
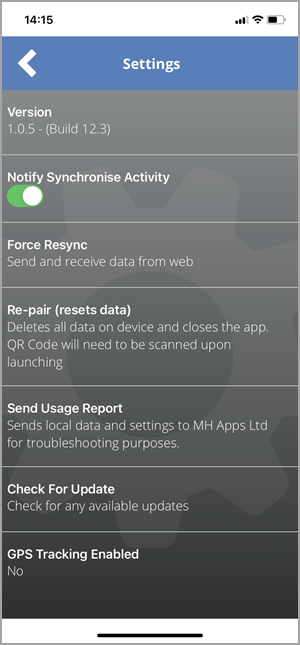
- Version - This shows the version number of the software.
- Notify Synchronise Activity - Select whether your device notifies you of synchronisation activity.
- Force Resync - Your device will attempt to sync data at an interval set by your app administrator. Select this option if you wish to sync data immediately rather than waiting for the next scheduled automatic sync.
- Re-Pair (resets data) - This removes all your data from the app including removing its association to you staff record. After doing this you will need to carry out the initial setup of your device again as you did before by scanning the QR code on your admin's PC. A confirm dialog opens asking you to confirm that this is what you wish to do.
- Send Usage Report - This sends local data and settings to MH Apps for troubleshooting purposes. Data stored in the EaseSuite App may be submitted along with details of the model/software version of your device. No personal or confidential information stored on your device out with the EaseSuite app will be submitted.
- Check for Updates - Your app will be routinely updated automatically as software version updates are made available. Tap to check if an update is available and update immediately.
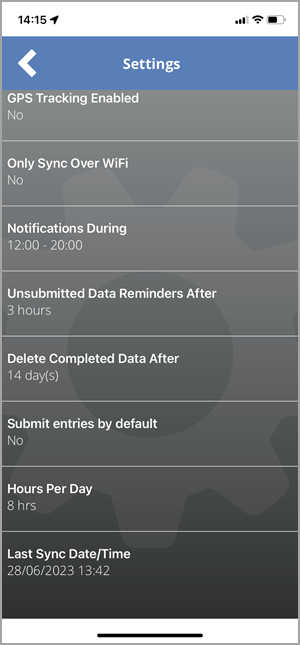
- GPS Tracking Enabled - The setting tells you if you administrator is using GPS data from your device to provide additional information on your location. The setting of this option is controlled by your app administrator.
- Only Sync Over Wi-Fi - If selected your device will only sync when it has a Wi-Fi connection and will not use cellular data. The setting of this option is controlled by your app administrator.