Help Topics
- EaseSuite
- Frequently Asked Questions / Troubleshooting
- General Application Features
- Stock Control and Replenishment
- Accounts Package Integration
- Quick Start Guides
- Mobile Guides
- Word Templates & Print Outs
- Concepts
- Hardware
- Workflow Case Studies
- Terminology
- Submitting Help Requests
- Feature Requests
- Web Shop Preparation Guide
Hire Quick Start Guide
- Introduction
- Prerequisites
- Workflows
- Setting up Pricing
- Creating an Asset
- Creating a Hire
- Creating a Customer Invoice for the Hire
1. Introduction
The Hire area allows you book equipment (Assets) out to Customers. A booking schedule is maintained for each Asset, and Hires are priced and Sales Orders are created for Customers.
2. Prerequisites
- Hires require Customers or Jobs to be present (Sales Order > Customers).
- Hires require Assets to be present (Hire > Assets).
- Assets require stock items to reference that have Hire prices set.
3. Workflows
- Setting up pricing
- Creating an Asset
- Creating a Hire
- Creating an invoice for the Hire
4. Setting up Pricing
4.1 Discount Scales
In Settings > General > Hire Price Scales you can set up your scaling discounts in the table. That is, the longer something is hired for, the better the discount to the customer, which is quite standard with equipment hire. If you don't offer scaling discounts, you can ignore this.
Below is an example of a possible discount scale.
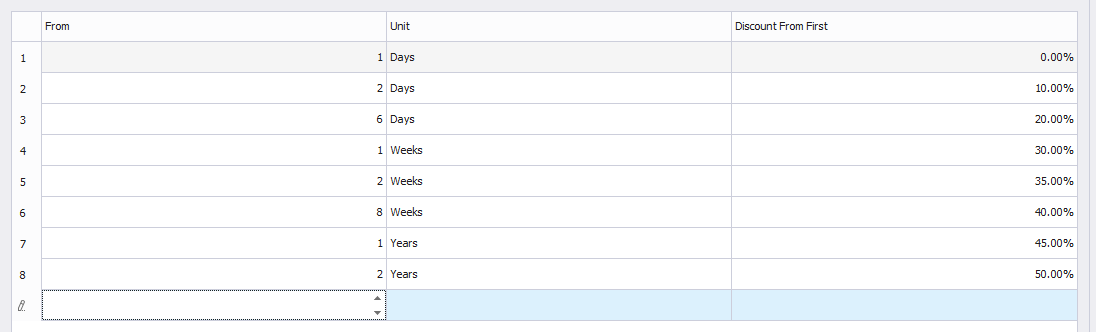
- The 1st row tells us that for a duration of 1 day and onwards (the minimum hire time), the charge will have no discount (0%) of the hire price from the product (see below). This row is the starting row and is read only and cannot be changed. If you don't want to discount scale, this would be the only row.
- The 2nd row tells us that on or beyond 2 days, the charge will have a 10% discount of the first (initial) price from the product (see below). Row #3 tells us the cut off point for this discount and when the next one will apply from (day 6 and onwards). So row #2 covers 2 days up to 6 days, then row#3 takes over etc.
- So the table cascades downward to define price points and when they start with next row ending the previous and starting a new duration price point. The final row covers anything hired for 2 years or more and in this example offers the maximum available discount (50%).
You can add a row using the "+" button at the bottom of the table or delete using the "x" as standard.
Different units can be selected, and From relates to that unit, e.g. 1 Day, 2 Weeks, 2 Years.
4.2 Product (Stock) Pricing
A Product must be present for the item you wish to hire out, this goes into the same Stock area as your regular stock items, and can be marked as not re-sellable. The Stock Product just needs to be added once for a line of items, so for example, say you had 10 Rotavators to be hired out and they were all the same make and model, you just add them once as a product below, but you'd add 10 assets that linked to this product (see next). If the make or model varied, you'd then add a new stock product for that line (and further assets) for example.
In the lower half of the Product form there is a Hire Rates tab. This breaks down our scaling table we set from above and lists out charge prices.
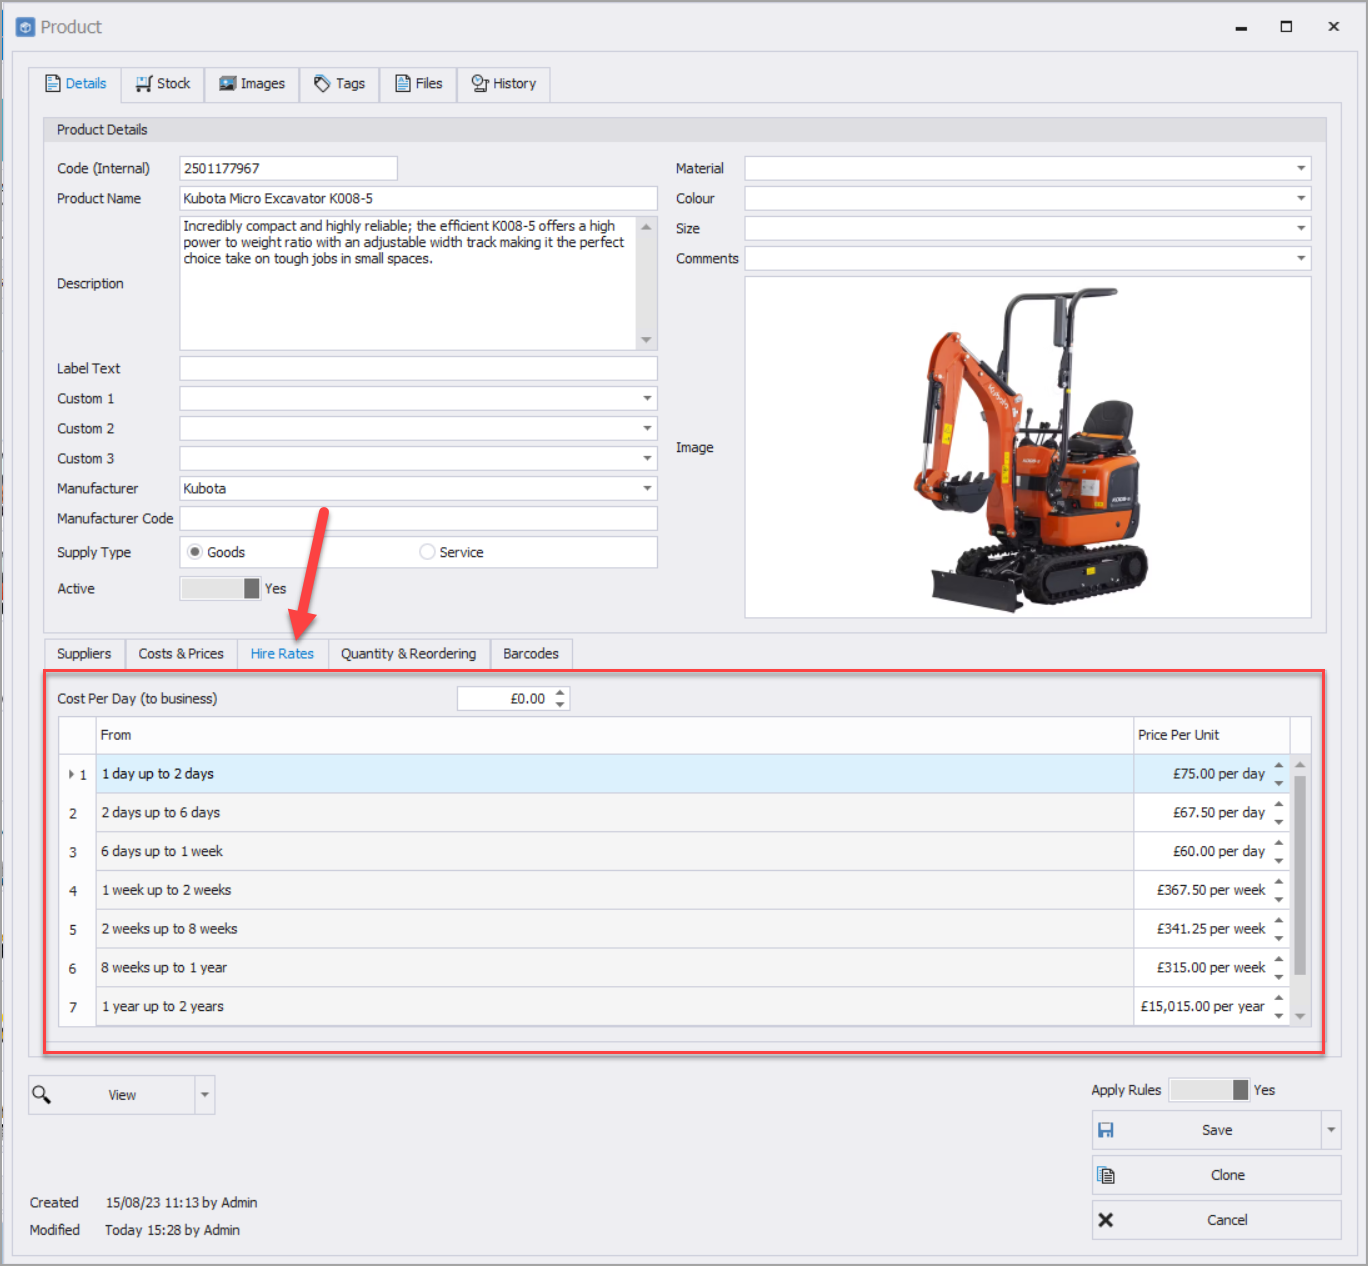
When you type in the first row's price, e.g. £60.00 per day for the first time or it is updated, it will ask you if you want to recalculate all other prices. If yes, the prices will then be calculated based on the percentages set in Discount Scales, factoring in the different units also, which speeds up the process of pricing if they tend to be consistent. But you also have the option to retype or adjust prices anywhere the table if you want to manually set some on an ad-hoc basis, e.g. increase/decrease anything or perhaps round figures. Note if you change the first price again and opt to recalculate the rest, it would overwrite any manual adjustments you made.
When the system prices a Hire, this table is basically traversed to find the duration point, e.g. 1 week up to 2 weeks, £294.00 per week (point #4). The numbers on the left (1 to X) correspond to the same scaling point numbers in settings.
5. Creating an Asset
You will need to create Assets to be hired out before you can create a Hire. See assets quick start guide for more details.
6. Creating a Hire
In the Hire area, add a new record the usual way (+ button in list or Add on left).
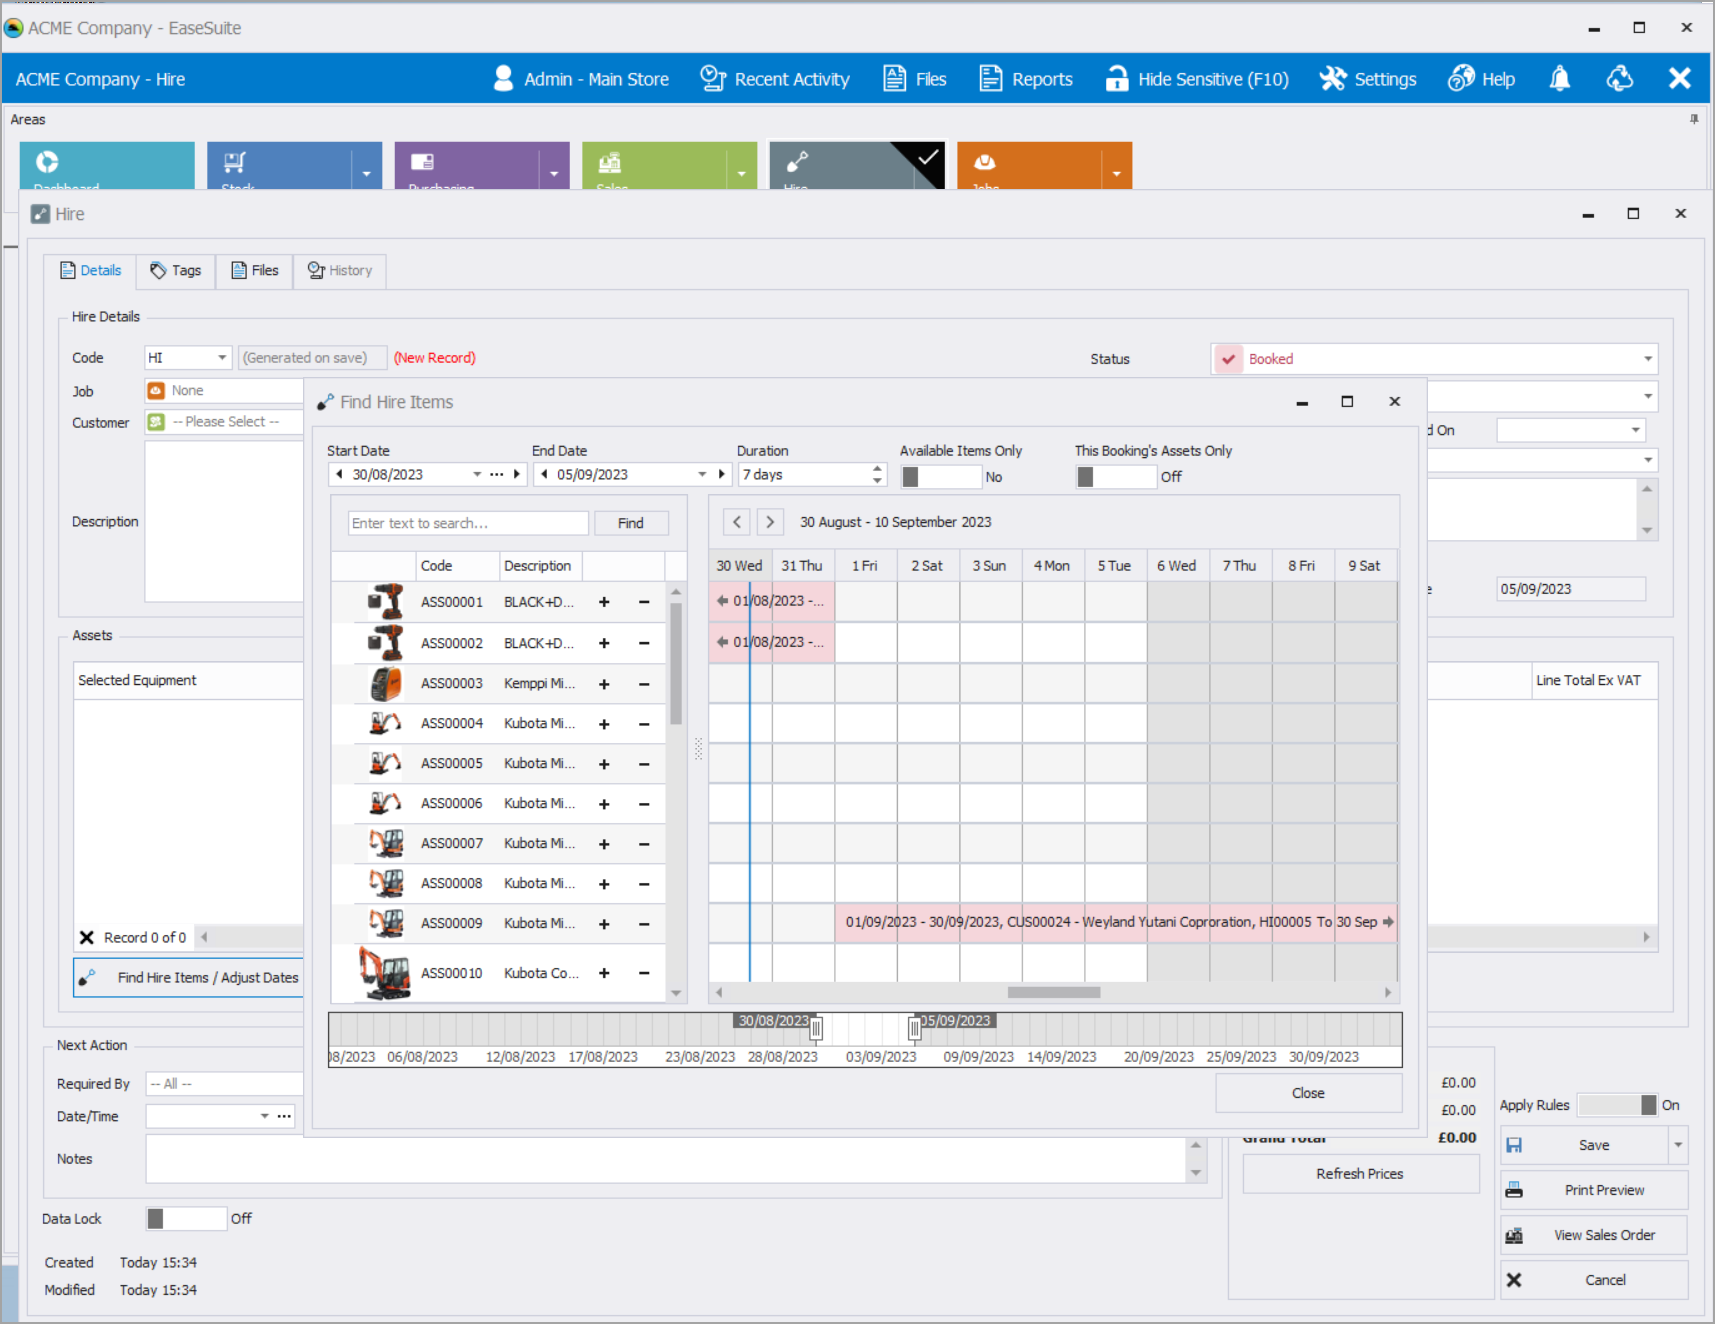
By default the Hire starts for a 7 day duration beginning from today (top right), but this can be changed as we Find hire Items / Adjust Dates. Note, a Hire covers the hire of one or more items between two fixed dates, it cannot have more than one date for different items and if that is required then more than one Hire needs to be created for different periods.
- Start off by selecting the Customer, Site (if applicable) and Job (if applicable). Note only Customer is required.
- Add any notes into Description.
- Next select Find Hire Items / Adjust Dates. You'll see a list of your Assets with their images on the left and their code per screenshot above, which you can filter using Find and the two switches Available Items Only and This Booking's Assets Only (this is on by default when returning back to the record after you've saved).
- Adjust dates by using the date range slider underneath, or type your Start Date and End Date at the top, or shift the dates using the left and right navigators. Also note "..." opens the quick range finder. If you just want to hire for one day, keep the Start and End Date the same. Duration will keep you right and can also be adjusted to adjust the End Date.
- In the calendar, we can see anything that's currently booked out in pinked and you're blocked from booking it. If you have more than one of an item you'll need to find a free one.
- Once you've located the Asset you want to Hire, select + and it will pop into the calendar on the right in green (it won't be booked until you've saved the record).
- You can add multiple items or click "-" to remove one if you made a mistake. Remember all items added are to be booked out for the same date range.
- Once done select Close.
- Back on the Hire form you'll notice top right the Status is Booked. You can come back here and progress it to Supplied or Complete if you want (along with date), or if you don't need to track that can leave at Booked. Note bulk actions can also apply this to searched records, so you might search out hire bookings for a day, then mark them as Supplied as passed to the customer, and Complete when you've received them back, though this is optional. Saved Searches can ringfence items to go out for a day (Start Date = Today, Status = Booked) in one search and another could be for those due back (End Date = Today, Status = Supplied) for potentially chasing up.
- Finally Save will save the booking. You can print/email/export the booking also for the customer or your own records (a print template may need to be set up).
7. Creating a Customer Invoice for the Hire
The good news is that as you've created the Hire, a Sales Order has also automatically been created for it (viewable in the sales search) or using View Sales Order from the Hire form shown above bottom right.
Once you've picked up the Sales Order you can add more items to it (e.g. stock items), it can form part of a Job (to add a labour element, e.g. hire with operator), and you can invoice it the same way you would a Sales Order or Job. See those quick start guides for more details.