Help Topics
- EaseSuite
- Frequently Asked Questions / Troubleshooting
- General Application Features
- Stock Control and Replenishment
- Accounts Package Integration
- Quick Start Guides
- Mobile Guides
- Word Templates & Print Outs
- Concepts
- Hardware
- Workflow Case Studies
- Terminology
- Submitting Help Requests
- Feature Requests
- Web Shop Preparation Guide
Products (Stock) Quick Start Guide
- Prerequisites
- Workflows
- Creating a product
- Associating Suppliers
- Setting costs & prices
- Maintaining quantities
- Hire rates
- Adhoc Items
1. Prerequisites
- Products require suppliers to be present (Purchasing > Suppliers).
- Products require one or more suppliers to be associated for purchasing.
2. Workflows
- Creating a product
- Associating suppliers
- Setting prices
- Maintaining quantities
- Hire rates (for equipment hire)
3. Creating a product
- In the Stock Area of the EaseSuite Desktop app, to add a new product select either Add or the + (plus) symbol (see image below)
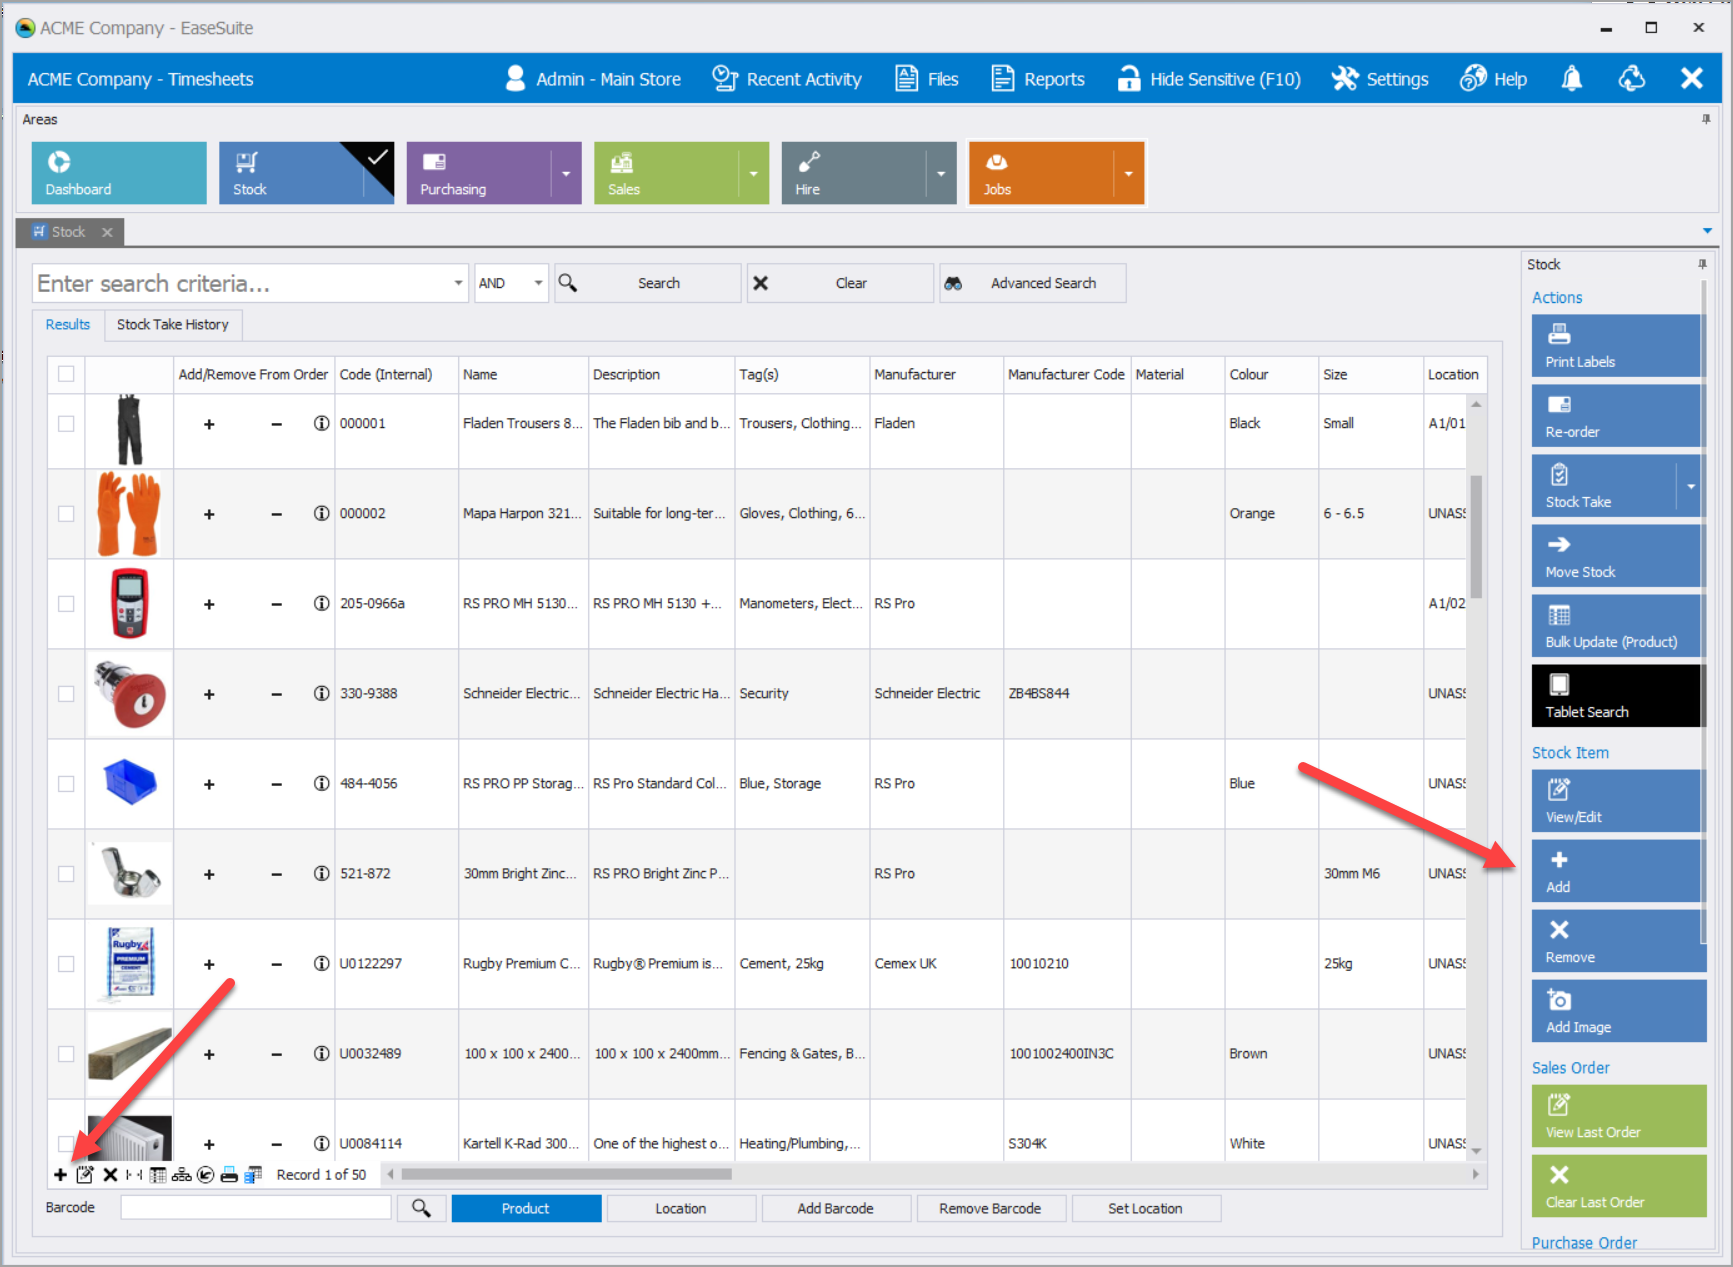
- This opens an empty Product form.
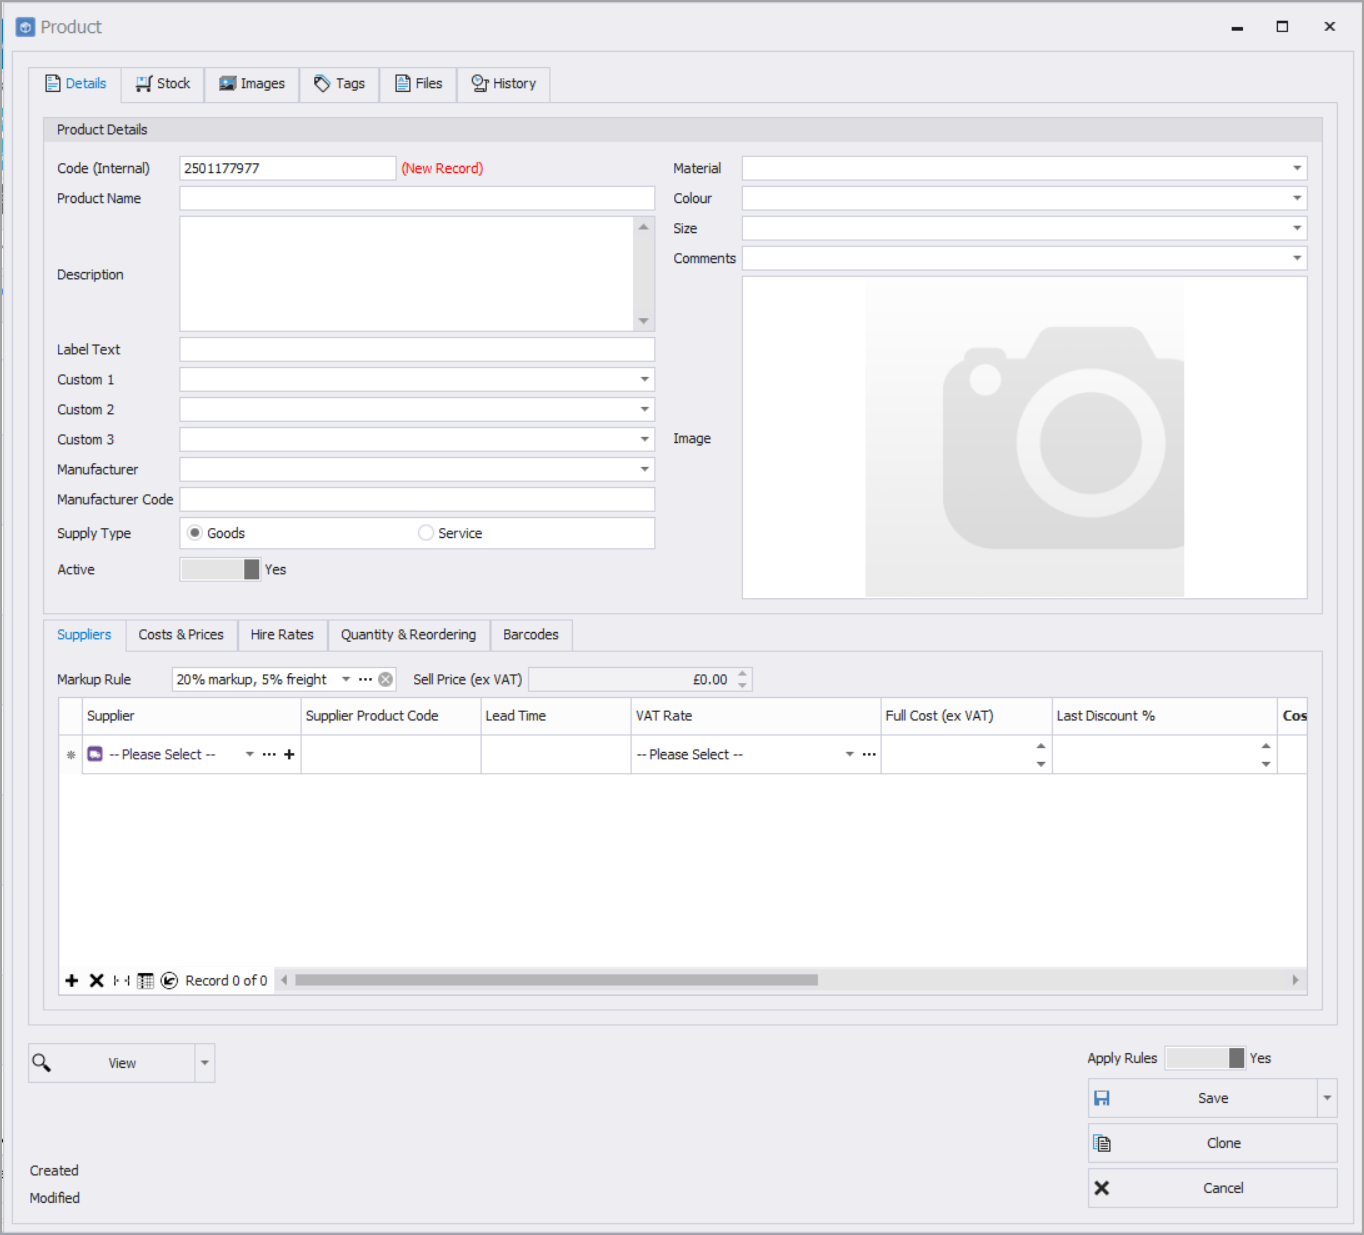
- The Details tab is visible and the Product Details fields can be completed as required.
- .The Supplier Type determines which further options are available
- Goods - Product gains Stock control and quantity adjustments
- Services - Product can be added to orders, but no stock control is available.
- An image of the product can be added in the Images tab.
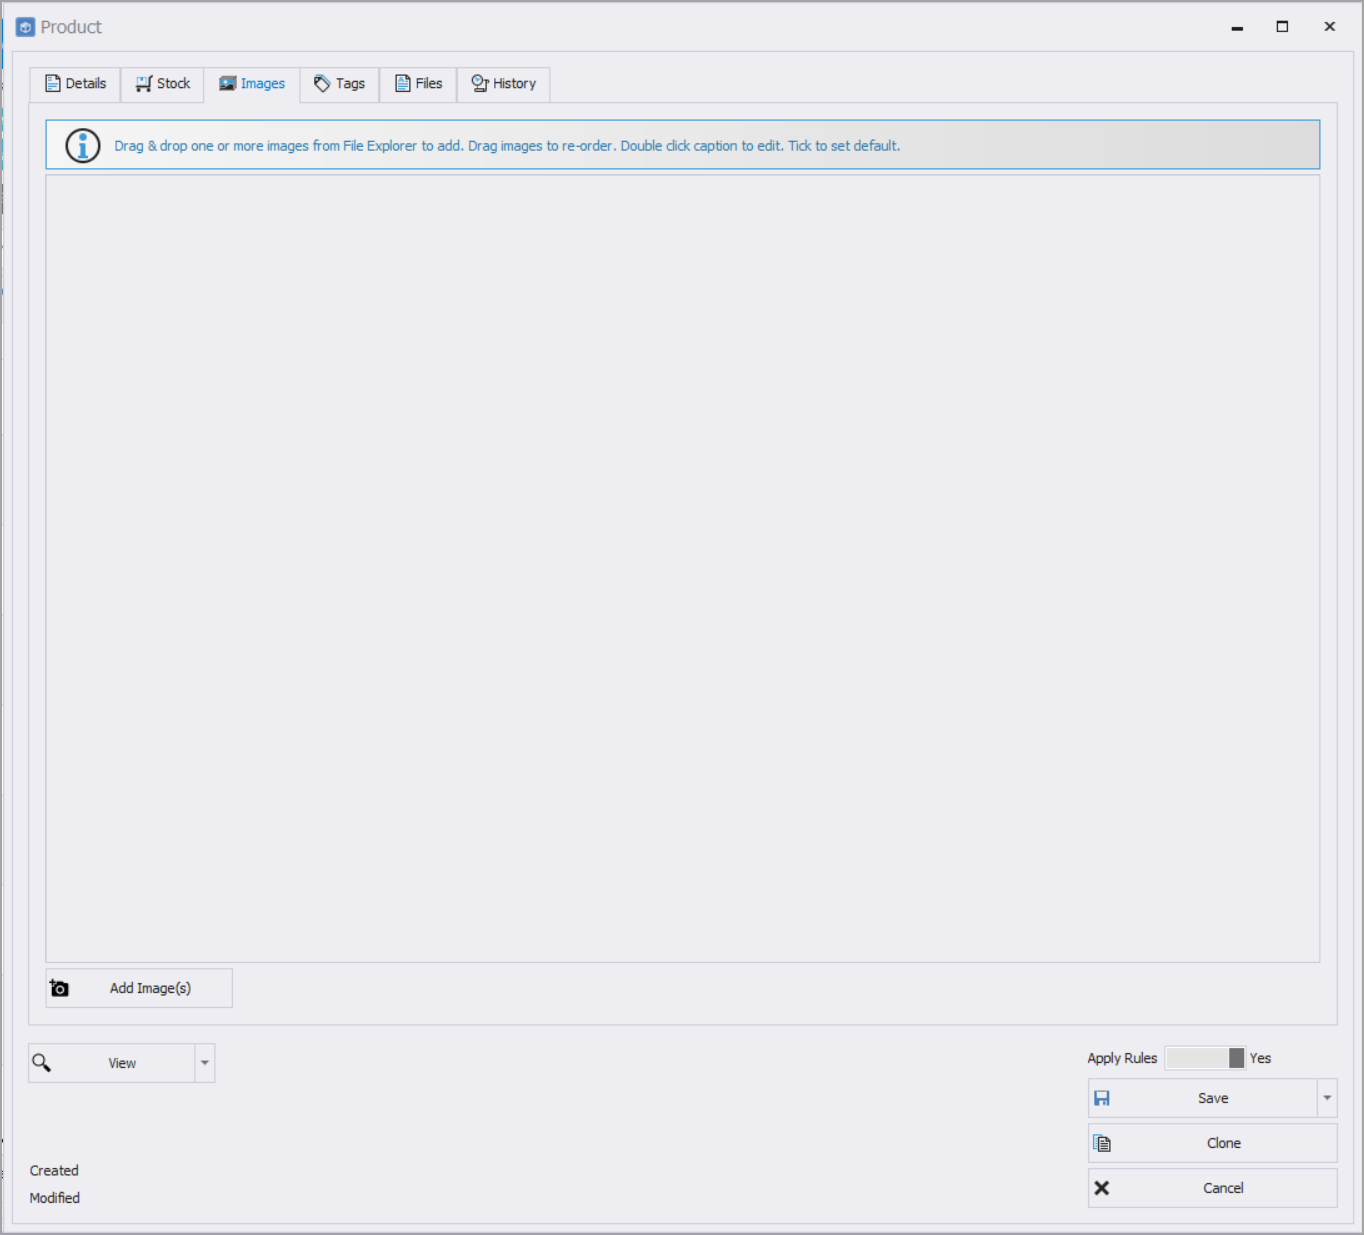
- Images stored on you PC can be dragged into this window to be associated with the product.
- More than one image can be added and drag as needed to reorder.
- Tick the image that is the default image. This image will be shown in the product list by default.
- Images can also be found and added by selecting Add Image(s). This opens the Add Image form.
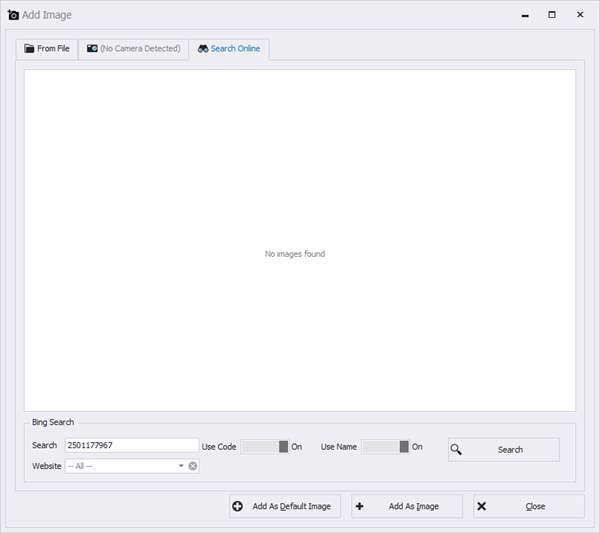
- An online search using the details from the Product Name field shows options for you to use. Alternative search terms can also be entered if required.
- From File - Select an image on your local storage.
- If a web cam is available, the middle tab will allow you to use the device to take a photo of the product.
- Images selected can be added to the product or added as the default image using the buttons at the bottom.
- Closing this window will take you back to the Images tab of the Product form.
- In addition, when the stock list is displayed, you can drag an image onto the image area of any product to add a new image. Confirm if you want to add this as the default image. The previous image will not be deleted but will remain as one of the additional images for the product. Return to the Product > Images tab if you wish to delete the old image.
4. Associating Suppliers
The first tab Suppliers at the bottom of a product contains the list of suppliers that supply it. The empty row at the bottom will let you add as many existing suppliers as required.

You can start off with adding suppliers and if the cost isn't known it can be sought the first time the item is ordered or when a supplier invoice comes in and the cost is updated on a purchase order line (Update Our Cost). Some details below:
| Supplier | Dropdown list of suppliers from the Suppliers Area. Quite often this is imported from the accounts package. |
| Supplier Product Code | The supplier may have a different product code from how we code it. This can be set here, and when the item is ordered it will use the supplier's correct code. |
| Lead Time | Optional, a note of how available the product generally is. |
| VAT Rate | VAT Rate from this supplier |
| Full Cost (ex VAT) | This is the full, non-discounted cost. If there is no discount, it would be the same as Cost (ex VAT). |
| Last Discount % | It is possible to document any discounts that have occurred and show workings. This will lower the Cost (ex VAT) price, and discounts can be tracked as items are ordered to pass on savings to customers. |
| Cost (ex VAT) | This is the main cost field which includes the discount. The green highlight above indicates this is the default cost, but depending on strategy that cost can vary (see pricing). |
| Last Purchase Order Date | Read only display indicating the last date purchased. If empty, the item hasn't been purchased yet. |
| Supplied Factor | Read only display indicating the % this item is ordered from a supplier. If 0% it has never been ordered, but you might get something like 80% on one line, 20% on another to make up 100%. This can factor into the average cost calculation (see pricing). |
| Cost Last Verified On | When a cost price is updated, either here, or from a purchase order, this cost is updated. Is helps convey how recent this being viewed is. |
| Notes | A general notes area for adding in notes/comments. |
5. Setting costs & prices
Costs & Prices can involve various calculations to average out costs and add markup in quite an automated way (or you can manually control all or certain aspects).
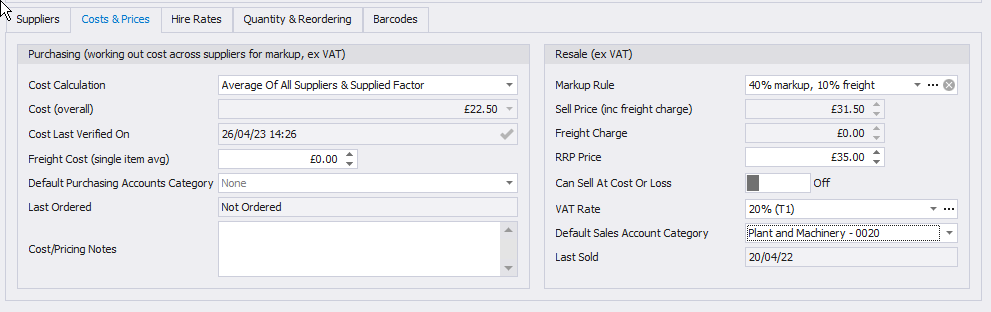
The left side refers to costs, and the the right sales.
5.1 Purchasing Costs
| Cost Calculation | There are 4 calculation modes possible to obtain a Cost (overall) from suppliers. They are:
|
| Cost (overall) | This is the main cost price, which can be derived in a variety of ways described above and even manually entered. |
| Freight Cost (single item avg) | You can add an average freight cost here. This is a workings field that can be used with the sale price (next). This can be factored into the markup price using a markup rule (or manually) and may be used for guidance when ordering. If this amount is set and the product is selected on a purchase order, it will force a freight line to be added. |
| Default Purchasing Accounts Category | An accounts system nominal code. If you utilise nominal codes at product level (rather than supplier level), it can be set here and it will be populated on a Purchase Order line when the item is selected. |
| Last Ordered | The last ordered date (irrespective of supplier, the supplier list shows last ordered for them). Note you can select View > Purchase Orders and get a list of sales orders containing it, then sort by Created On descending to see newest first. |
| Cost/Pricing Notes | Add in any notes or reminders here. |
5.2 Resale Costs
| Markup Rule | This is optional, but it's advantageous to set. It defines how a sell price is calculated from a cost price, and automatically calculates when cost prices move. In the example above, 40% is added to the cost price, and 10% to the freight, to make the resell price. So (£22.50 * 1.4) + (£5.00 * 1.1) = £37.00 for Sell Price (inc freight charge). Note the markup rule can be cleared using its x, and in that case the Sell Price below becomes manually editable (with the same caveats that it is not automatic from cost in this mode). |
| Sell Price (inc. freight charge) | The calculated or manually calculated sell price including the freight charge, see previous. |
| Freight Charge | Extracted from the price above for reference, effectively £5.00 * 1.1 in this example. |
| RRP Price | A field to document the Recommended Retail Price (RRP). It isn't used other than for a reference point. |
| Can Sell At Cost Or Loss | By default this is off, and is a preventative measure to ensure a stock item's sell price can't creep below its cost (warned on save if so and needs to be set here to override). |
| VAT Rate | The product's VAT rate to sell at. |
| Default Sales Accounts Category | An accounts system nominal code. If you utilise nominal codes at product level (rather than supplier level), it can be set here and it will be populated on a purchase order line when the item is selected. Sales may vary from purchase. |
| Last Sold | Date the item was last sold on. Note you can select View > Sales Orders and get a list of sales orders containing it, then sort by Created On descending to see newest first. |
Some additional notes:
- Cost prices and sell prices can be quickly pushed from a Purchase Order or Sales Order without opening the product to edit using the Update Our Product functionality.
- From a Purchase Order (Update Our Product), the cost price will be updated against the supplier's cost in the first Suppliers tab. Depending on Cost Calculation, this can then have a knock on effect onto the overall cost (Cost & Prices tab). And that overall cost can then also have a knock on effect updating the sell price (when a markup rule is set). In this example and mode, numerous prices can potentially update automatically based on just one supplier's cost changing and updated on the fly from a purchase order! This ensures profit with cost movement as things are ordered and can be very powerful, noting the cost average tracking. This can be turned of on a per item basis for more control.
- From a Sales Order (Update Our Product), the sell price can be manually set from that Sales Order if it is chosen to be updated on the fly. Note, this will turn off the markup rule and set a manual price, so you may not always want to do this from a sales order if you have markup rules in place.
6. Maintaining quantities
6.1 Stock Locations
- In the Product window, the Stock tab allows management and monitoring of the locations of stock.

- Multiple lines can be added for stock that is kept in multiple buildings.
- Location within a building can documented in a way to suit your setup. Eg. numbered zones. For large sites, numbered Aisles, Sections and Shelves can be shown. eg Aisle1/Section4/Shelf5.
6.2 Stock Reorder Levels
- Stock Reorder Levels are set in the Quantity & Reordering tab (see below image)
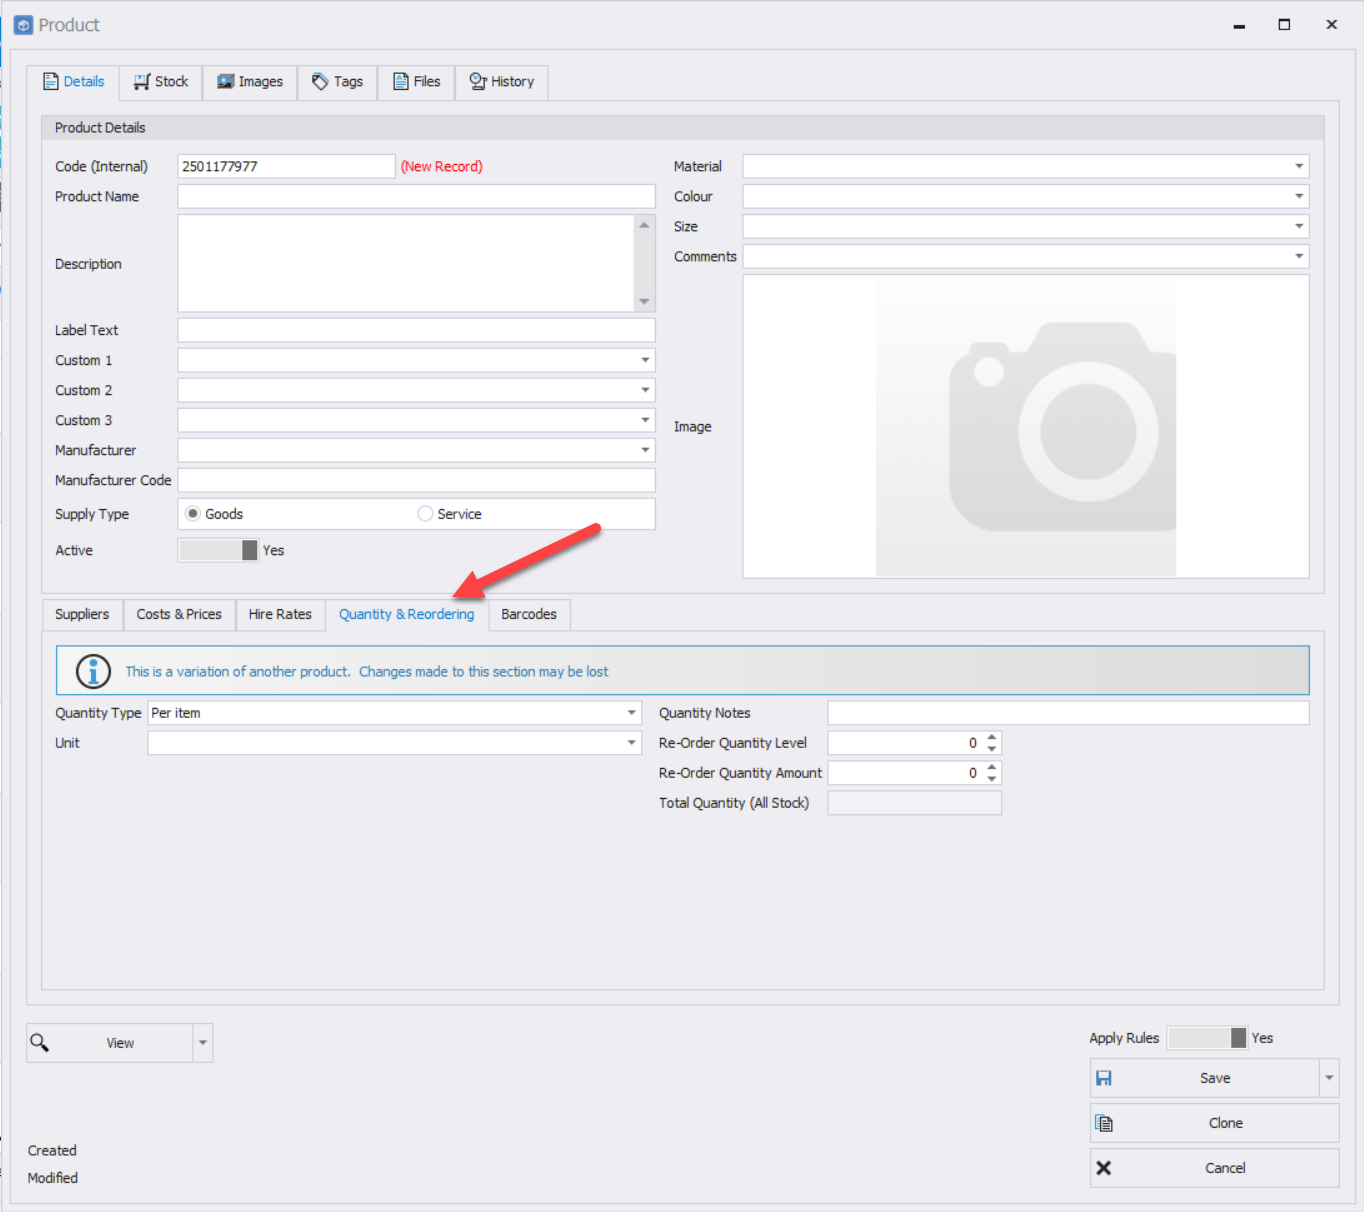
- Quantity Type - This determines in what quantity type the product is supplied. An item such as the electric socket above would be on a Per Item basis but options are selectable for items sold per length or per volume.
- Re-Order Quantity Level - Set this to the stock level at which a Re-Order should be placed.
- Re-Order Quantity Amount - Set the amount of stock to be re-ordered.
- Total Quantity (All Stock) - Shows current stock level.
7. Hire rates
For hire equipment price, see Hire Pricing.
8. Adhoc Items
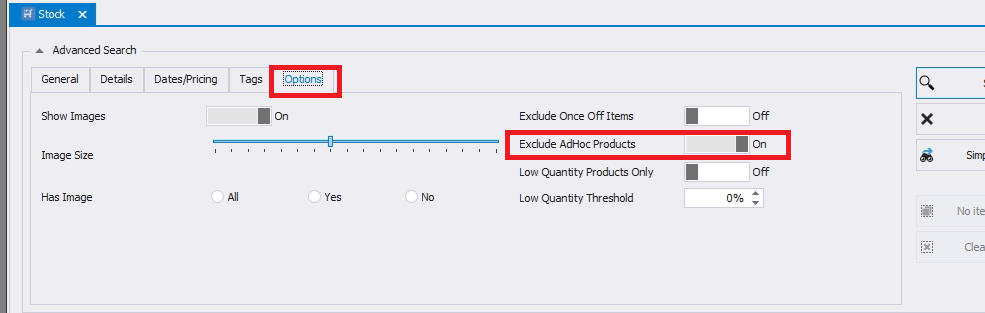
We have a concept of what we call "ad-hoc items" in the system. When you create a purchase order or sales order you'll notice you have the option to type straight onto the line instead of choosing an existing stock item. Once saved, these typed lines actually do become products in the system and by default they are hidden. But they are ready to be picked up and become regular stock items just in case they become more permanent, or for example, the first order of a new product line can quite often be ad-hoc (then fleshed out later).
In the search, going to Advanced Search > Options and Exclude AdHoc Product will show them in the list too (unhide them). You'll then see lots of items starting with the code Adhoc in the list and you can further filter using other search options.
Alternatively every purchase order or sales order has a "..." button at the start of the line and pressing this opens up the product straight from these areas and can be more convenient as a purchase arrival may say create the need for the ad-hoc item to then be turned into a regular stock item, and they can be easier to locate this way.
When you view an ad-hoc product, note the special code Adhoc:<number> that has been assigned by the system. It is this code that identifies the item as ad-hoc and by simply changing it to something else (that doesn't start with Adhoc:), it will turn it into a non-adhoc item (and so no longer hidden in search lists, it becomes a regular stock item). Don't worry about changing the code (or any code in the system), since any associations are still kept in the system.
When editing the ad-hoc item you'll notice a lot of the item has been pre-populated already from either the sale or purchase that created it and so you may just want to update a few other sections such as photo, give it a stock location, and set anything else procedural to filling out products to complete its addition into mainstream stock. Essentially be creating these stock items on the fly and hidden, we make it easier for them to become product lines if required.