Help Topics
- EaseSuite
- Frequently Asked Questions / Troubleshooting
- General Application Features
- Stock Control and Replenishment
- Accounts Package Integration
- Quick Start Guides
- Mobile Guides
- Word Templates & Print Outs
- Concepts
- Hardware
- Workflow Case Studies
- Terminology
- Submitting Help Requests
- Feature Requests
- Web Shop Preparation Guide
Sales Order Quick Start Guide
- Prerequisites
- Workflows
- Creating a Sales Order
- Sending a sales order
- Pushing Sales Orders to the accounts package
- Getting more advanced with Sales
1. Prerequisites
- Sales Orders require customers to be present (Sales > Customers).
2. Workflows
- Creating a Sales Order
- Sending a Sales Order
- Pushing Sales Orders to the accounts package
- Getting more advanced with Sales
3. Creating a Sales Order
Creating a Sales Order can be done in two ways:
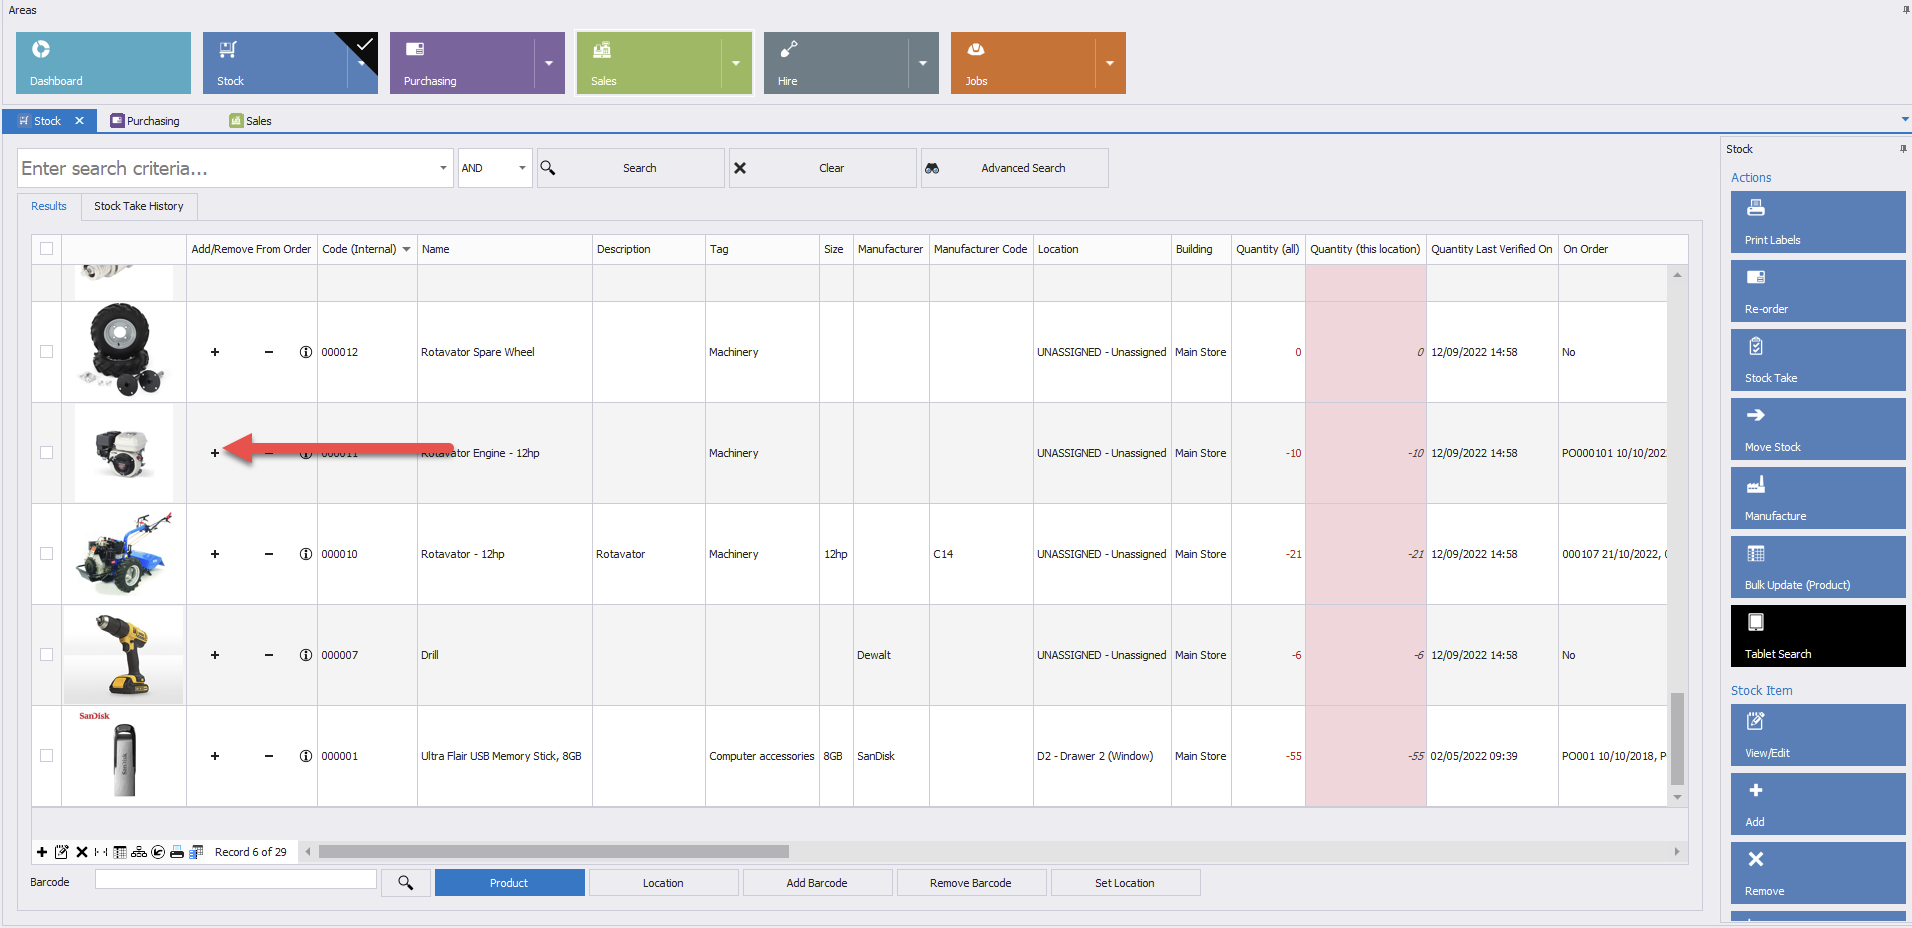
- From the Stock Area search (the most detailed search with imagery), you can search out products, often low stock items, and then Select the + symbol in the search listing to initiate a new Sales Order (or Purchase Order). It will start a new order. Selecting + subsequent times will up quantity with - reducing and eventually removing the last one from the lines.
This search is powerful and allows you to narrow down by supplier and then for example order by the lowest quantity items, or any combination you want (by shelf location, categories etc.).
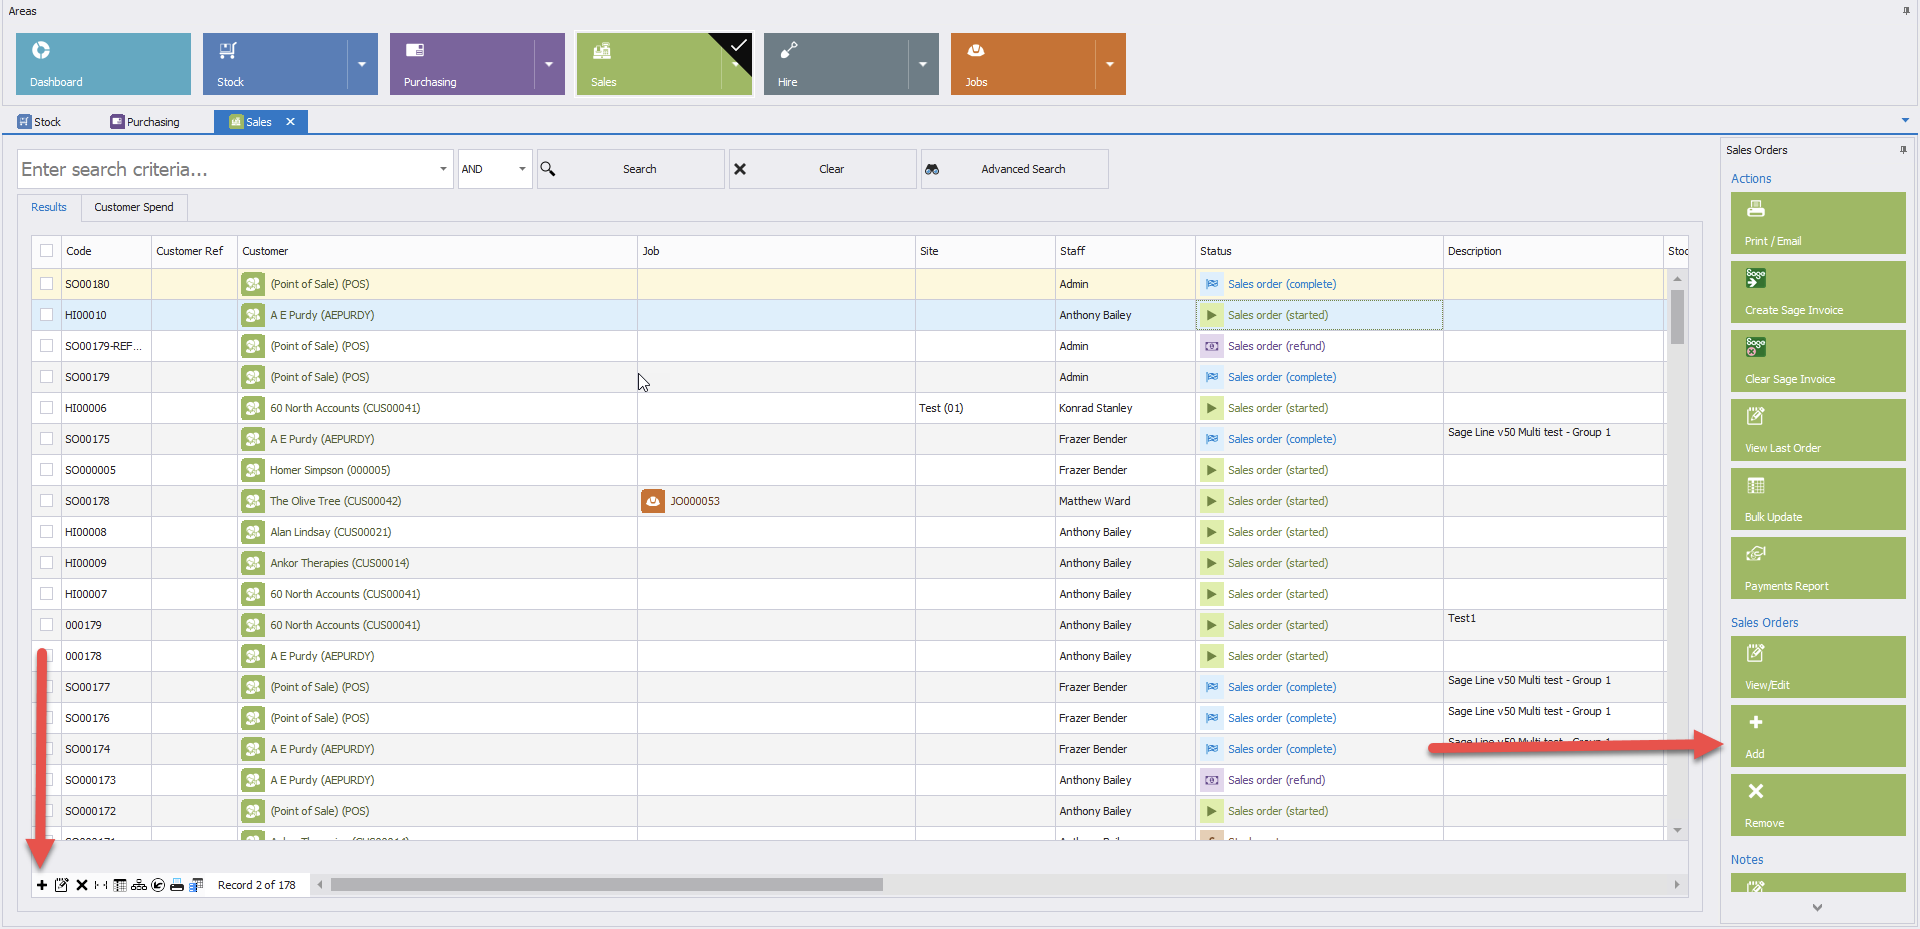
- From within the Sales area, select either of the + buttons (bottom of grid or on right menu).
When a new Sales Order opens select a Customer from the drop down list or add a new one (using the + option) (1). Now you can add stock items from the existing list to the order (or enter a new stock record) and adjust details as required. (2)
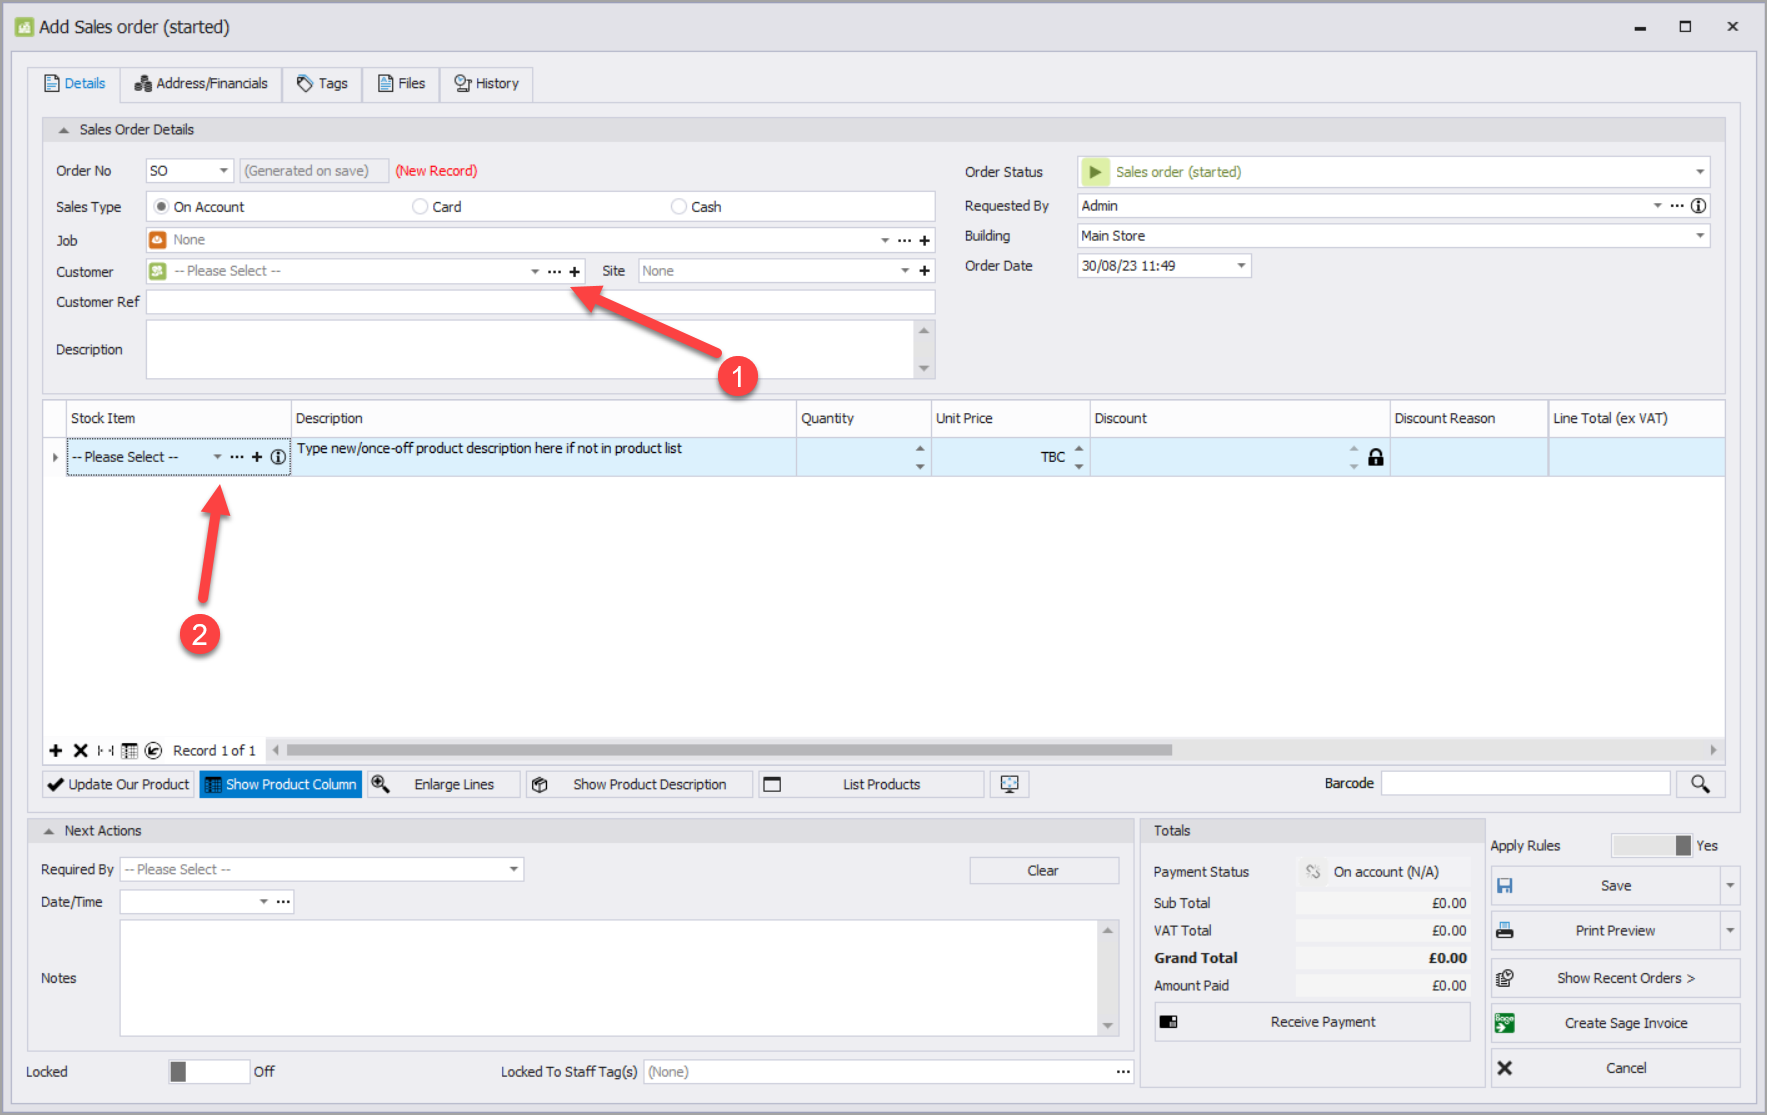
In the Sales Order form, the first two tabs (see selection at the top) mainly deal with initial entry, though you can add Tags (categories) or Files at this stage too.
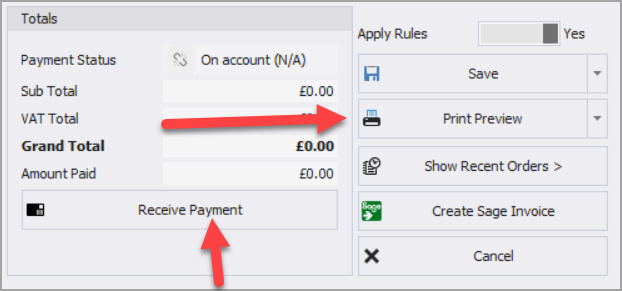
You can use the Receive Payment option to mark taking payments for the products. Receive Payment will open a new form listing available payments methods like Card, Cash, Cheque and Other. You can choose to Print/Reprint Receipt and Save Payment Process when done. Check if Order Status needs updating at this stage.
Receive Payment form also lets you view payments history for the order.
Once you are happy with the sales order you may save and print it.
4. Sending a sales order
Use the Save or Save and Print options to email the order directly to your customer. It is recommended to update the order status to Sales Order (sent) at this stage.
5. Pushing Sales Orders to the accounts package
This can be done in two ways:
- From a Sales Order form select Create Sage Invoice. This will prompt you for your Sage login, then show you the results and the invoice number. If the invoice is created successfully the Create Sage Invoice button becomes disabled and changed to Already Invoiced.
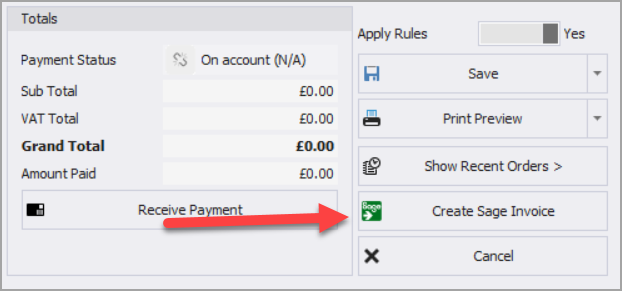
- From within the Sales area, select the relevant the document and select Create Sage Invoice from the right menu. A new message box will appear notifying the result.

To clear the Sage invoice, within the Sales area select the document to cancel and select Clear Sage Invoice from the right menu.
Note: It will not affect the Sage record which needs to be altered manually in the Sage system.
6. Getting more advanced with Sales
6.1 Updating products from a Sales Order
To update Cost Price, Unit Price or VAT Rate of the product select Update Our Product. This will show ticks next to the column values that can be modified. Ticking any of those will update a product's original value to the one from current Sales Order.
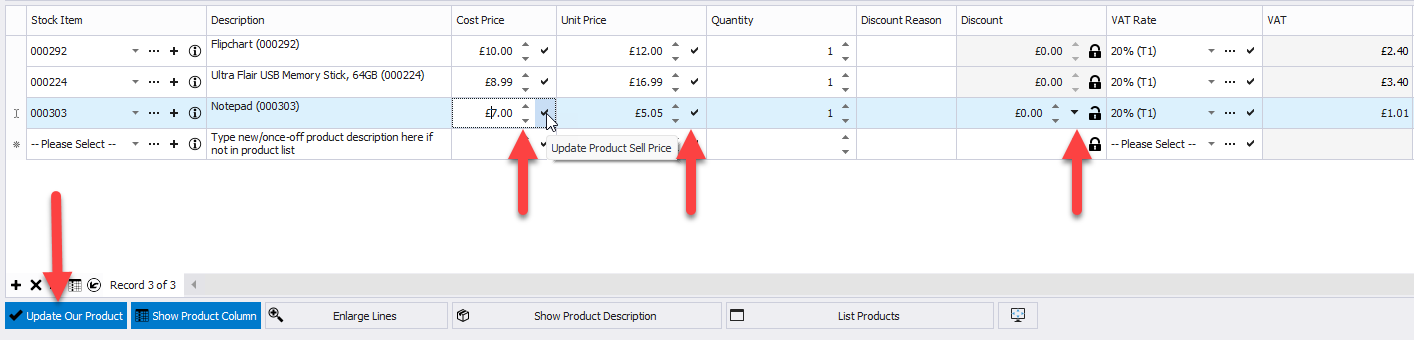
Note: You might need to select the Refresh Prices button before taking payment to reflect any price changes.
6.2 Bulk updates
See the General Application Features>Bulk Actions section
6.3 Refunding Sales Orders
In the system there are two ways of creating refunds. Both these ways create what looks like a sales order and this item appears in the list, but will have the status Refund and the totals negative.
1. From scratch. Create a new sales orders and choose the status Refund. Create the sales order in the same way but not prices are negated. From scratch is useful if you can't find the original sales order or it exists on a prior system and not this one.
2. From an existing sales order (below).
Locate and open the sales order to refund.
Only orders with status set to Sales Order (sent) or Sales Order (complete) can be refunded and will have the Refund button available.

You can choose to refund a whole order or just a parts of it per line. Also note one order can have multiple refunds associated with it with item refunded at a different times.
The refund option opens the Return Stock form (below) which lists the lines and quantity of each ordered item and allows you an option to choose quantity to return to stock and quantity to refund.
The buttons Refund All and Return All at the bottom offer quick ways of pushing all line quantities up.

Quantity To Refund - choose how many items from the order will be refunded. If set to zero - item is not refunded.
Quantity To Return To Stock - choose how many items from the order can be added back to stock. For example faulty items may not be returning the shelves.
Note refunds simply become credit notes when pushed to an accounts package such Sage, and you can push them along with sales orders (invoices). This keeps the accounts system squared up.