Help Topics
- EaseSuite
- General Application Features
- Stock Control and Replenishment
- Accounts Package Integration
- Quick Start Guides
- Mobile Guides
- Word Templates & Print Outs
- Concepts
- Workflow Case Studies
- Frequently Asked Questions / Troubleshooting
- Terminology
- Submitting Help Requests
- Feature Requests
- Recommended Hardware List
- ScanSnap (Fujitsu Sheetfed Scanner) Setup Guide
ScanSnap (Fujitsu Sheetfed Scanner) Guide
We recommend this high speed sheetfed document scanner for scanning in Supplier Invoices or any other type of multipage scan. Some set up details are below.
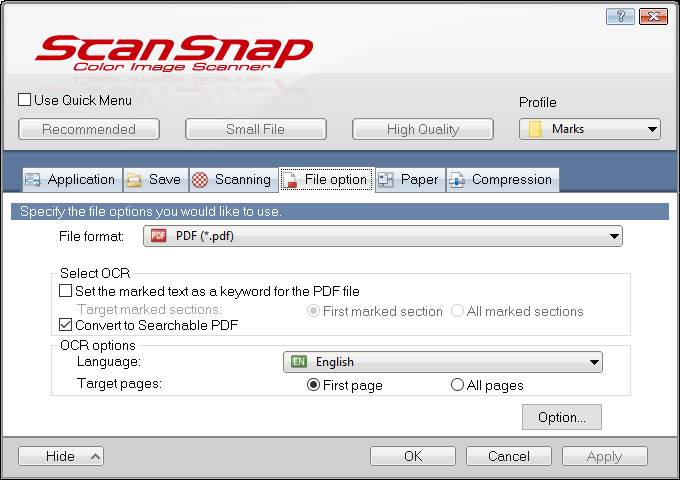
1. OCR
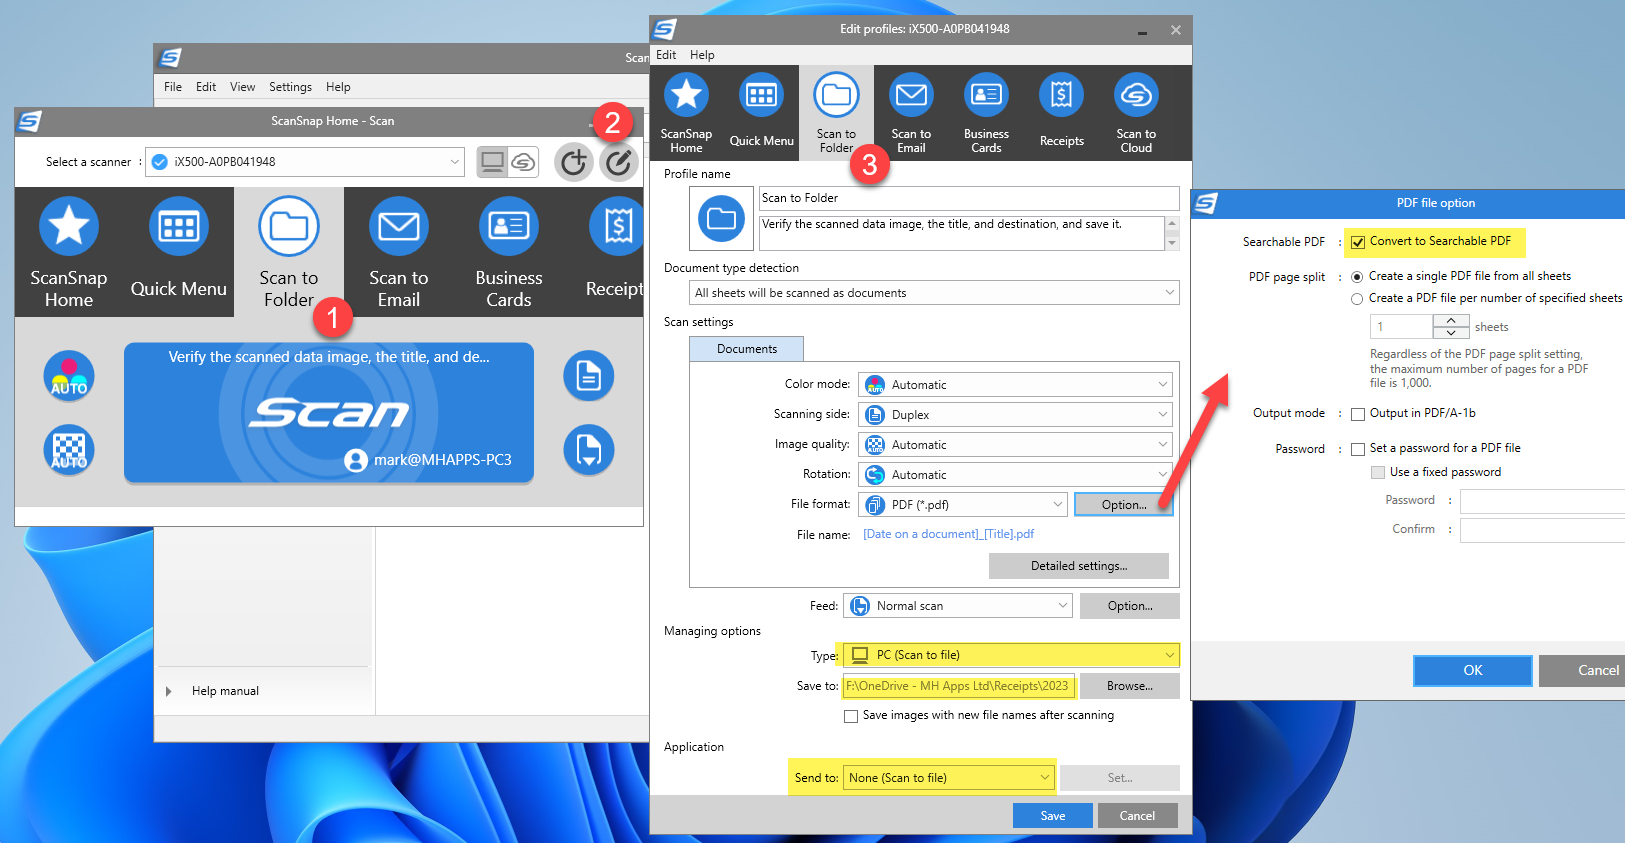
OCR stands for Optical Character Recognition and we recommend turning this on per the Convert to Searchable PDF option below. This will allow you to copy and paste from the PDF (e.g. transposing invoice numbers) and it also allows the scanned PDF to be fully searchable in the Files area.
2. Scan To Folder
After installed it is generally best to have the scanner scan to a folder, then from EaseSuite you can pick up the folder (EaseSuite will remember the last folder chosen in Choose File).
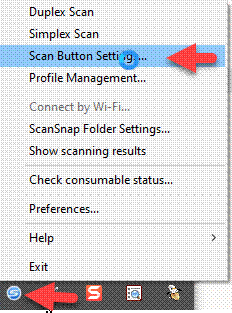
Below right click the ScanSnap icon bottom right on the the system tray. It may be present in the small menu with ^ icon then Scan Button Settings...
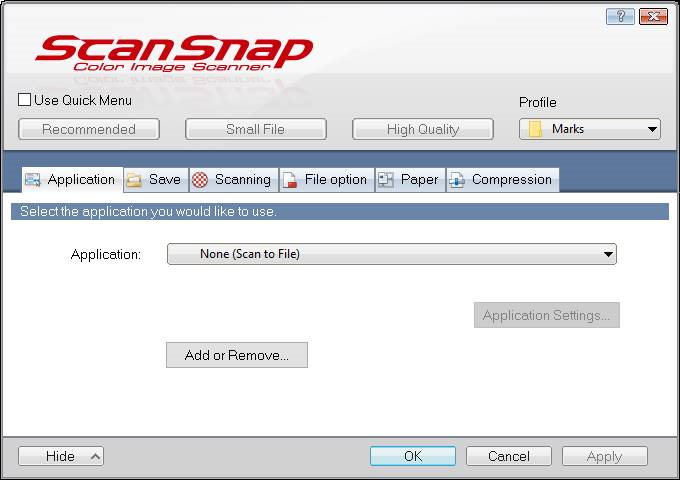
Below untick Use Quick Menu and I just added a new profile named “Marks” on the right, but think you could leave it as Standard.
Next to Application choose None (Scan to File). Even though there is a Scan To Folder option in there, select this instead, since the other one adds additional nags and you generally want this to be fire & forget when scanning in batches.
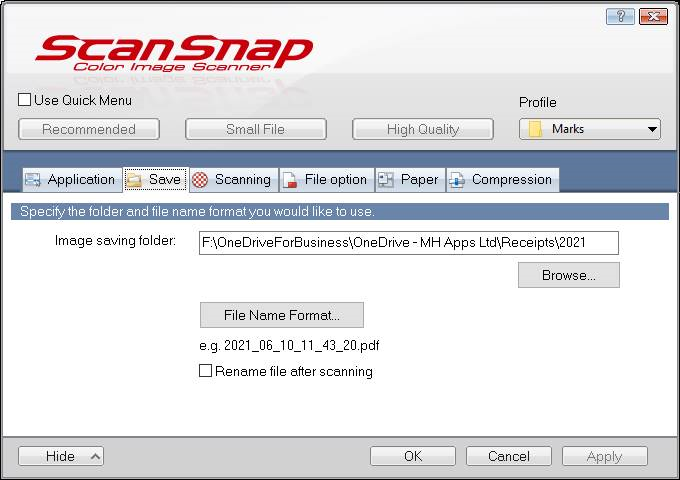
In Save, choose your folder to save to and you can set the filename format (date and time):
Below is optional, but in File option you can tick “Convert to Searchable PDF”, which can be handy if you need to find one using a keyword search in explorer later or Copy and Paste directly from the scan.
Also note the Target pages, no harm in selecting All pages but it may slow down the scanning process.
3. Latest Version Scan To Folder
The latest version looks quite different but has the same options as above.
Open ScanSnap Home (search in Start Menu).
Click 1 then 2 below to open setting. Highlighted are generally settings you want to customise / enable.